Sunday, March 30, 2014

Maple Water: Drink to Your Health!


We've been collecting maple sap for about three weeks now and with only three maple trees large enough for tapping, I had no idea we'd get as much as we've gotten.  We've collected 35 gallons of sap so far and it's still flowing. I'm pretty sure that all three trees that we tapped are silver maples, which is fourth in line for sugar content. The usual ratio of sap to syrup is about 40:1, but ours is running more like 25:1, meaning it takes about 25 gallons of sap to make one gallon of syrup.

The sugar content can vary year to year, depending on the weather, so maybe this was a "high sugar content" year.  I'm certainly no expert at this, because this is our first year for collecting sap and boiling it down for syrup. That fact kind of makes me mad at myself because we could have been doing this for a long time and didn't.  I didn't even think about it until last year and when I did, the season was over.

Boiling the sap down is a time-consuming process and it also produces a lot of steam. When I started boiling it down, it was just too nasty outside for me to boil it out there, plus I don't have a good setup to do that. So I've been boiling it in small batches on top of the stove.

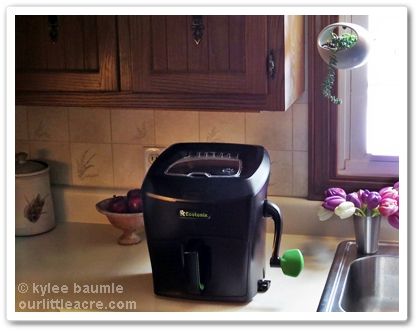
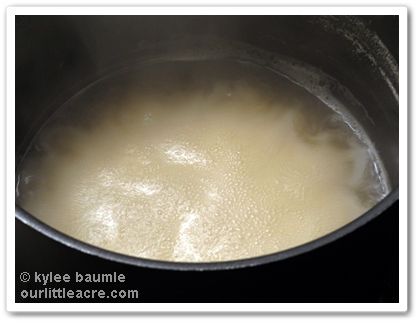
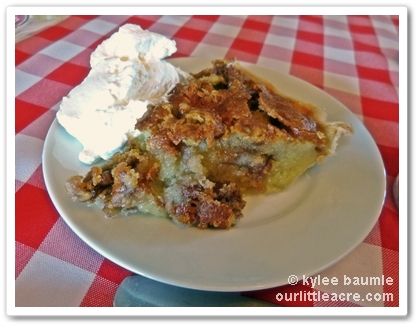
I don't recommend doing that unless you have a really good exhaust fan directly over the stove that vents outside (or at least into your attic). There's enough steam that it could peel the wallpaper right off the wall! The steam leaves a slightly sticky residue too.

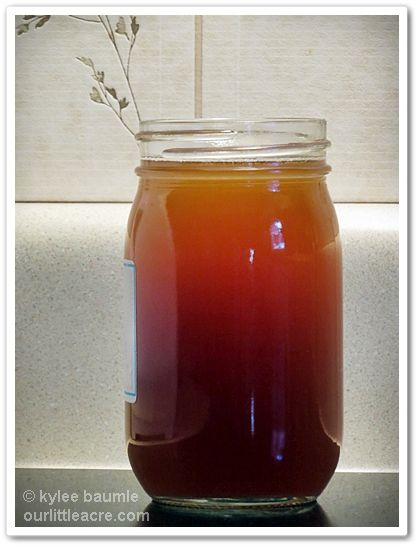
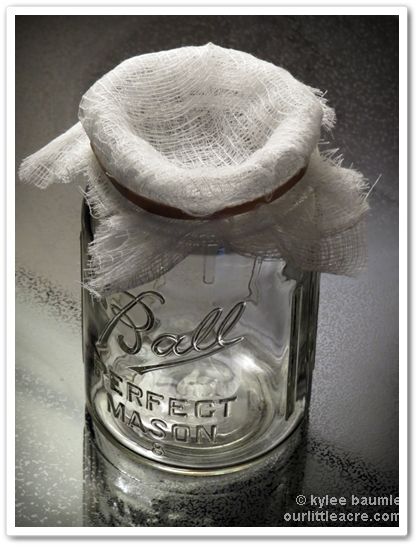
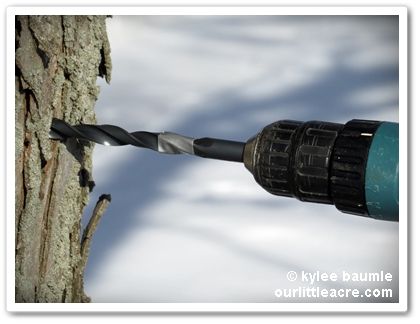
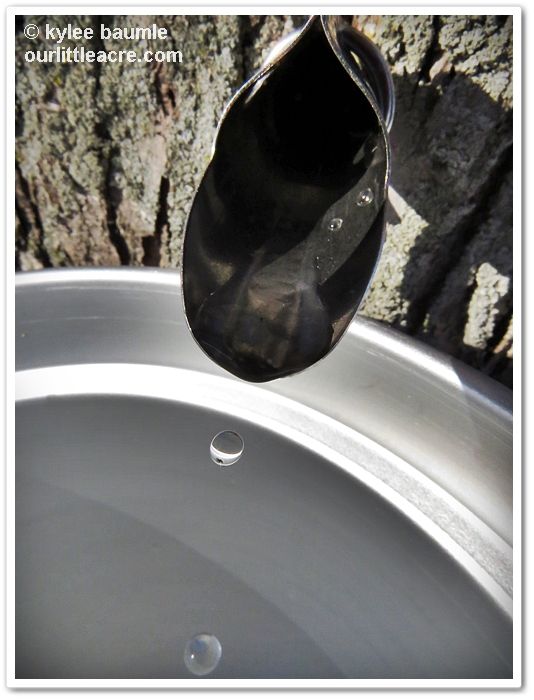
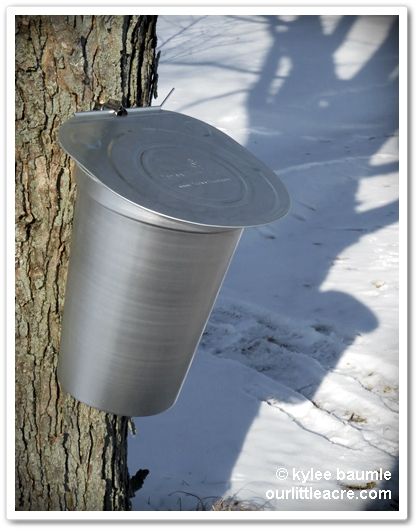
The sap that comes out of a maple tree isn't sticky like pine sap and it isn't yellow or amber like the syrup.  It's just like water.  That's what it is, really.  In the spring, the tree begins to draw up ground water through its roots and that's what we collect when we tap the tree.

Of course, the tree puts its spin on things, adding sugar from starch it stored from the previous year's growing season. Maple tree sap is typically anywhere from 1-4% sugar, so when you drink it, you can taste a hint of sweetness.  Maple syrup takes on its typical amber color as the sugar cooks. It gets thicker too, as the water is boiled out to the right consistency.

But how about drinking that maple sap? Native Americans and early settlers used to do that. They believed it contained nutrients and provided strength for the body. Koreans have drunk for years, calling it gorosoe.  Many Japanese and Northern Chinese also drink maple sap straight from the tree.

It's catching on around the world.  Last year, Tyler Steeves, from Ottawa, Canada, launched a Kickstarter campaign for his maple sap beverage idea.  TreeWell is a lightly carbonated maple sap beverage, bottled in bottles much like champagne. They reached their goal of funding in November, but TreeWell is only sold in Canada at this time, as is SEVA Maple Water, the only certified organic 100% maple sap drink also made in Canada.

Vertical Water™ is another maple sap beverage soon to be marketed in the U.S., in Sprouts stores in April.  This one is unchanged as it comes out of the maple tree - nothing added, nothing taken away. I have an order in for a couple of these to be brought back from Arizona to Ohio when a former resident comes back home for a visit, since there are no Sprouts stores near here.

Another Canadian company produces yet another maple sap beverage called KiKi Maple Sweet Water®, which only has natural flavorings added to maple sap.  Nutritional information from their website says:

Maple sap and thus, KiKi Maple Sweet Water® is a source of over 80+ micronutrients including electrolytes potassium (2-3%DV) and magnesium, plus calcium (2%DV), iron (2%DV), zinc, choline, selenium, riboflavin (B2), pantothenic acid (B5) and a very high content of manganese - all the nourishment to keep a maple tree vibrant and healthy can also be beneficial to us!

Of the 80+ micronutrients found in maple sap, 64 are antioxidizing in nature. Additionally, over 50 polyphenols are present in maple sap. Polyphenols have demonstrated the ability to decrease UV sensitivity, suppress growth hormones and increase deterrence of microbial infections. Maple sap is on par with foods such as broccoli, tomatoes, carrots and spinach for its antioxidant properties according to the scale of oxygen radical absorbency capacity (ORAC).

So, boil it or not - maple sap is good for you! 


Sources, for further reading:

"In South Korea, the Drinks Are on the Maple Tree", The New York Times (Hadong Journal Version), March 5, 2009.
Vertical Water™ (company website)
TreeWell, a Kickstarter campaign
KiKi Maple Sweet Water® (company website)
SEVA Maple Water (company website)
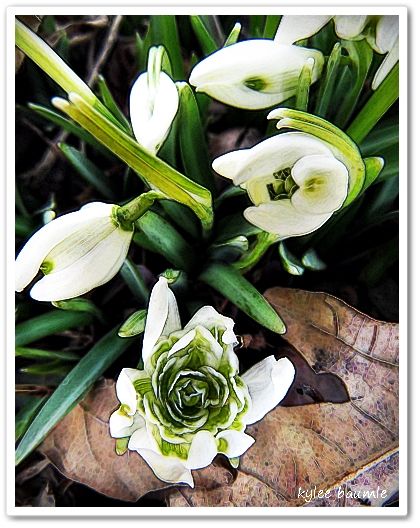
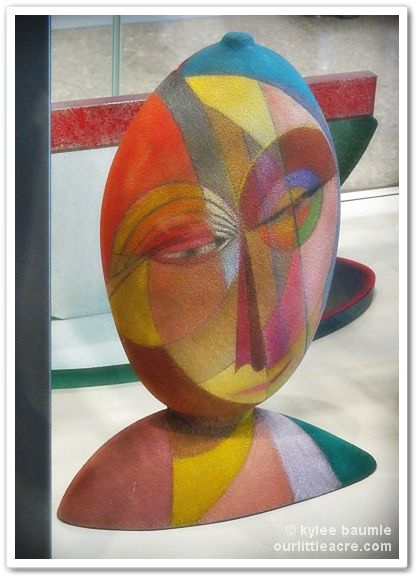
Wednesday, March 26, 2014

Wordless Wednesday: First Spring Bloom...Snowdrops


The only brave souls in a northwestern Ohio garden that feels like spring forgot...

Double Snowdrops
Galanthus nivalis 'Flore Pleno'

Zone: 3-9
Height: 4-6 inches
Light: Light Shade to Full Sun
Bloom:  Late Winter/Early Spring
Other: Flowers are fragrant. Ephemeral. Naturalizes.


Tuesday, March 25, 2014

What Was Your First Tweet on Twitter?


http://www.twitter.com
While I'm not as active on Twitter as I was, I still show up there on occasion as @OurLittleAcre.  I've had a sort of on again, off again kind of love affair with it, but for some it's the social media tool of choice.  I'm a big fan of Facebook because it's so much easier to follow, but yes, I know...they aren't the same and each has its place in the social media world.

It's kind of like cats and dogs.  One really isn't better than another, just different. Both make wonderful pets, but some people have a clear preference for one or the other.  Some like both equally and some couldn't care less about either one.  Like social media, we tend to gravitate towards that which is easier for us and fits with our lifestyle.  It's all good.

From shoeboxblog.com

Twitter is celebrating eight years this year and they've got a feature which allows you to see what your very first tweet was.  I certainly didn't remember how I utilized my 140 characters the first time, but Twitter tells me it was this:

http://www.twitter.com/OurLittleAcre

How appropriate.  :-)

Want to find out when you joined Twitter?  It might not be the same time as your first tweet.  Some people like to join and observe for a bit before jumping in.  In case you don't remember, find out when you joined here.  This will also show you some other fun stats about your Twitter account.  Here are mine:

http://www.twitter.com/OurLittleAcre


Twitter is the home of #gardenchat, #treechat, #herbchat, #rosechat, and other specialized chats where time is set aside each week for interested tweeters to come together to discuss topics relating to their passions.  But gardeners can get some pretty quick answers to questions they might have by tweeting them at any time of the day or night. Never before has information and discussion about everything under the sun been so easily accessible.

So...what is your favorite social media mode?  Facebook?  Twitter? Google+? LinkedIn? Pinterest?  Instagram? FourSquare? YouTube?  Do you use any of them to find information on gardening?


Friday, March 21, 2014

The Tuileries in Toledo - Ooh La La! (And a Giveaway)


Don't they say that we never take advantage of the opportunities that are in our own backyard? I've been guilty of this, over and over. We might know that something exists, but it will always be there and there's always a better time to go see it or do it than now.  Right?

No, not always.

The Toledo Museum of Art
Stegosaurus by Alexander Calder
1972-73

Tuesday, my mom and I traveled an hour and a half northeast to visit the Toledo Museum of Art. It was only my second visit to the museum, the first being just two years ago. At that time, I was impressed with what I found there and I wondered why it had taken me so long to see it.  It's a world class museum and if you live within a half-day's drive or less, there's really no excuse for not going.


Now, only through May 11th, the museum is hosting an exhibition of more than 100 paintings, photographs, drawings and sculptures exploring the art, design and evolution of Paris’ famed Tuileries Garden. (Pronounced 'tweel ree. The 's' is silent.)

Never before shown outside France, the Toledo Museum of Art is one of three U.S. museums that is hosting the exhibition. The other two are the Portland Art Museum, Oregon, and the High Museum of Art, Atlanta, Georgia. The exhibition is done in special collaboration with the Museé du Louvre.


The Tuileries Gardens were originally attached to the Tuileries Palace, built by Catherine de Medici after the death of her husband, Henri II in 1559. The gardens were designed by the architect André le Nôtre in 1664.

The exhibit includes a model of the grounds of the Louvre and the Tuileries Garden.


The Art of the Louvre’s Tuileries Garden showcases the gardens' impact on such artists as Édouard Manet and Camille Pissarro,  among many others.

Children of the Tuileries Garden
Édouard Manet
c. 1861-62

Water Lilies
Claude Monet
c. 1922-25

 Procession of Louis XIV in front of the Tuileries Palace: October, the Sign of the Scorpion
Tapestry: Gobelins Royal Manufactory, Paris
c. 1668-89

When we finished enjoying the special exhibition, we spent some time in other rooms of the museum, where a remarkable collection of art works by many of the world's great artists and sculptors are displayed.

Amphitrite
Michel Anguier
1654-58

The Rehearsal Room
Edgar Degas
c. 1905

Buddha
Central Tibet
c. 1450


Across the street is the Glass Pavilion, which houses an historical collection of early glass works, including many by Dale Chihuly.


Pinkerton
Jun Kaneko
2004

Wide Eyed Wink
Tom McGlauchlin
1994

City of Broad Shoulders
Ginny Ruffner
1989

Early works by Dale Chihuly
(1975, 1980, 1978)

For more information about the museum, as well as The Art of the Louvre’s Tuileries Garden, visit The Toledo Museum of Art website.

WIN!


The museum sent me a set of two tickets to share with one of my readers, so if you'd like to win them, just enter your information in the Rafflecopter form below.  You'll get an extra entry for leaving a comment to this blog post, telling me the name of one of your favorite artists. Entries will be accepted until midnight EDT, Friday, March 28, 2014.


a Rafflecopter giveaway


_________________________
I was given complimentary tickets to attend the special exhibition of The Art of the Louvre’s Tuileries Garden as well as a pair of tickets to give away. No other compensation was given. All opinions stated here are my own.

Thursday, March 20, 2014

The Green Cycler: A Review


We've been recycling at our house for many years now. It just seems second nature when disposing of things to go to the garage and put them in the proper bin: glass, paper, aluminum, plastic. We never forget and if I'm upstairs and happen to finish a Diet Mountain Dew, I have feelings of guilt if I'm tempted to toss the can into the trash up there, so I carry it down with me and put it in its proper place.

Composting food items hasn't been ingrained in me for that long, however. It's only been in recent years that I've actively done this. And I say "I" because Romie isn't as on board with it as I am yet, but he's doing better.  For the last two years, I've kept red wiggler worms in my office and they've been happily chowing down on leftovers I feed them, giving me worm castings to feed my plants.

http://www.thegreencycler.com/
Sometimes I have to chop things up so they'll fit better in the worm bin and so it won't take as long for the worms to do their thing. Last year, I received a product for review that makes that job easier and less messy.

The Green Cycler is a handy little pre-composter that I simply put my leftover food items in and with a few cranks of the handle, they're sliced and diced to the perfect size for either my red wigglers or the outdoor compost bin. Smaller pieces means quicker decomposition and the sooner I'll have compost for the garden.


The Green Cycler is designed to be kept on the kitchen counter so that it's always at the ready for your compostable kitchen scraps. My kitchen is rather small and counter space is premium real estate there, so I keep it just outside the door in the kitchen that leads to the garage. But Ecotonix made the Green Cycler with the kitchen in mind.

It was super easy to assemble out of the box, and comes in several contemporary designs. Because of the cranking action required to chop your food items, they put suction cups on the bottom to secure it to the counter top.  I found these to be helpful, but I still had to hold it down on the top while cranking because the suction wasn't strong enough by itself.


Inside, there are blades that rotate and chop. When I put the first items in, which were actually not food items, but stems and flowers of a tulip bouquet I'd received a week before, the stems were a tough assignment.  But the Green Cycler is designed to handle it, in spite of the stainless steel blades not being sharp.  I simply had to run the crank in reverse and by alternating forward and reverse, it got the job done in fine style.

The Green Cycler prepared a killer Tulip Salad for the worms!

The ZeoPack controls odor in the Green Cycler.
As with any composting product, odor can be a concern. The collecting bin is small and they recommend emptying it just as soon as it's full, but until it is, there is a replaceable filter called a ZeoPack that that absorbs any odors.  I have to say I was skeptical about that, but it works! Only if I put my nose very close to the opening of the top did I detect anything and that was when the lid was open.  With it closed, I didn't notice a thing.

The  ZeoPack contains zeolite - natural crystals that absorb moisture and odors. It's non-toxic and reusable.  To "recharge" the ZeoPack, you simply hang it outside in the sun, which causes the zeolite to release the trapped moisture and odors. It's reusable for years, and when it does need replacing, you can snip off the metal grommet (used for hanging while recharging) and toss it in your compost bin, because it's biodegradable. (Ecotonix thought of everything, didn't they?)

I found the Green Cycler to be very easy to use and to clean, and considering what it does, it has a small footprint. I think kids would enjoy getting in on the act too, because they can watch the chopping through the clear lid on top

Today, the Green Cycler is making its appearance in The Grommet's Product Pitch 2014 Finals in Boston at Fenway Park. The Grommet is instrumental in bringing great new problem-solving products to light and provides help to the makers of new products they believe in. The Green Cycler was voted into the finals by people like you and me and is competing against seven other new products for a spot in The Grommet's line-up of offered products for sale.

To learn more, visit the Green Cycler website.  You can follow the festivities at Fenway today from 11:30-12:30 EDT, as it's being live-streamed here.

UPDATE:  The Green Cycler won!  It will now be offered for purchase on The Grommet.  CONGRATULATIONS!

________________________________
I received the Green Cycler free of charge for the purposes of testing and review.  No further compensation was received. All opinions stated here are my own.


Monday, March 17, 2014

Sap 'n' Tap - What's Next?


I shared my first experience of tapping maple trees two weeks ago, but that was only half of the story.  We are still collecting sap from two different maples (the third just wouldn't give us any, for whatever reason), and because we only have five jugs for storing the sap, I had to start processing it into something.

My initial intention was to make maple syrup. Though it's recommended that you boil your sap outside because of all the steam it produces, I wanted to do it via stove top. I don't have a kettle for boiling outside and I didn't want to use one of my good pans, so I used the largest stock pot I own and did it on top of the stove. We have a good exhaust fan above the stove, so I wasn't really worried about all that steam.


I brought the sap to a boil...


I boiled it for about an hour and a half and stopped when the liquid started clinging to the spoon and didn't run off like water. I then poured it through some cheesecloth to filter out any debris and I let it cool in a mason jar that I had washed and rinsed in hot water.


It was a little tricky to figure out just when I should take the sap off the heat.  You can use a candy thermometer and I tried that, but it never did get up to the 220°F that was recommended and I boiled it too long. It can turn to sugar in an instant.

If your syrup turns sugary, make candy!
That's what happened with the first batch, so I poured a little bit of it into some candy molds that I hadn't used since my wedding in 1975 (#iamnotahoarder) and voila!  Maple sugar candies!

With the next batch, I took it off the stove when it ran off the spoon like water but I could see a very thin coating of the syrup on the spoon.  That was just right.

It didn't take as much sap as I thought it would to make the syrup - about 2½-3 gallons of sap made a pint of syrup.  I'm pretty sure the trees we tapped are silver maples,  and they're fourth on the list of those recommended for collecting sap, ranked by sugar content. (Sugar maples are best, then black, red, and finally, silver.)

We used some of the sugary first batch to flavor our Cream of Wheat on Sunday morning.  Mmmm!  The syrup will keep in the refrigerator indefinitely, but I have a feeling we won't ever find out just how long it would keep, because it's so good it will be gone before then!


Sept. 27, 2008
Photo by Diana Kuebler
Sometimes we think things just must be difficult because maybe we haven't done them before and don't know what's involved in doing them. Collecting sap and making syrup from it was one of those things that I just assumed had to be messy, must take too long, and you need highly specialized equipment to do it all. Right?  Wrong, wrong, wrong!

There have been some things that I've done just for the experience of doing them, with no intention at the onset of doing them ever again.  You know...you do them just so you can say you did it.  Like when I did the Fort4Fitness Half-Marathon in Fort Wayne, Ind., in 2008.

But I will collect maple sap and make syrup again. It's super easy and honestly, I'm not sure I want to eat pancake syrup ever again. I was never a big fan of it anyway, but now that I've tasted the amber goodness of The Real Thing...wellllll...Aunt Jemima will do in a pinch, I guess.

Photo from TapMyTrees.com
Do you need a maple syrup kit like we used for ours?

No.  You can google "how to tap maple trees" and find lots of ways to do it with things you may have on hand.

Do I love my Tap My Trees Starter Kit?  You bet I do.  It has quality components and everything I needed to collect sap, except for a hammer to help tap the spile in.  I've got an extra spile that we didn't use this year and I plan on buying another aluminum bucket for it for next year.

Is there anything I'd do differently next year?

Not really, but we did learn the hard way that it is a good idea to tie something around the bucket to secure it to the tree. On a particularly windy day, one of the buckets blew off the hook and we lost about a gallon of sap.  Because that happened, when emptying the 2½-gallon buckets, I leave about half a gallon of sap to help weigh them down if the day is windy.

Will you be tapping your trees next year, or do you already do this?

_________________
I received the Tap My Trees Starter Kit free of charge from TapMyTrees.com. No other compensation was given to me nor was I asked to write about the product.  I am merely sharing my experience and all opinions stated here are my own.

Friday, March 14, 2014

Happy Pi(e) Day! (And a Scrumptious Pecan Pie Recipe)


I loved math in high school.  I'm not kidding, I really did.  And I got As in Algebra, Geometry, and Algebra II, which shouldn't be surprising, because anyone who loves math is probably going to be good at it

So it probably doesn't surprise you that I can remember pi (Ï€) to five places after the decimal: 3.14159.  Or that the area of a circle is equal to Ï€r².  Why I remember those things is beyond me, because in the 40 years since I've graduated from high school, I've never once had the occasion to actually use pi in one single practical instance in my life.  It's just one of those quirky things that sticks in my head.

Why am I chatting about math and pi?  Because today is Pi Day!  Yes, people all over the world celebrate Pi Day on March 14th, because...well...you know...  3.14.  I really think it's just an excuse to eat pie.

http://www.amazon.com/gp/product/0307351084/ref=as_li_ss_tl?ie=UTF8&camp=1789&creative=390957&creativeASIN=0307351084&linkCode=as2&tag=theliteraryworld


My favorite pie in the world is pecan pie.  The best pecan pie I ever had was at Josephine's Tea Room in Godfrey, Ill., in 1989. I begged for the recipe and they left me sobbing on the floor without it.  But three years ago, P. Allen Smith came to my rescue.

I received a copy of his book,  P. Allen Smith's Seasonal Recipes from the Garden, and in that book was a recipe for pecan pie that rivaled Josephine's.  The book has other scrumptious recipes too, but trust me on the pie.  It's amazing.


I've got permission to share Allen's recipe, so here you go.  You're welcome.

The only thing better than Allen's pecan pie is getting to eat it at his farm in Arkansas.

Buttermilk Pecan Pie

  • 1 cup pecan halves
  • ¼ cup firmly packed light brown sugar
  • ¼ cup dark corn syrup
  • 8 tablespoons (1 stick) butter, melted
  • 1 ½ cups sugar
  • 3 eggs, beaten
  • ¼ cup all-purpose flour
  • ½ teaspoon salt
  • 1 teaspoon vanilla extract
  • 1 cup buttermilk
  • 1 pie crust

Preheat oven to 350°F.

Line a jelly-roll pan with aluminum foil, and lightly grease the foil.  Stir the pecan halves, light brown sugar, and dark corn syrup together in a small bowl. Spread the mixture out on the jelly-roll pan, and bake,stirring every 4 minutes, for 12 to 15 minutes, or until the glaze thickens.

Remove the pan from the oven and spread the pecans in a single layer on wax paper. Let the pecans cool completely, separating them with a spoon as soon as they cool.

Lower the oven to 325°F.

Combine all the remaining ingredients in a mixing bowl, and pour the mixture into the unbaked pie shell.  Scatter the chopped glazed pecans evenly on top of the pie filling.

Bake for 50 minutes to 1 hour, or until set. Let the pie cool on a wire rack before serving at room temperature. 


Mmmmmmm.....pie.  :-)


Tuesday, March 11, 2014

Join the "Farewell to Winter" Party on Facebook!


We're supposed to get hit with yet another big snowstorm tomorrow here in Northwest Ohio.  They're saying we could get 6-8 inches of new snow, which is on top of the snow we're trying to get rid of.  We've got drifts all over the yard that will be here for a while, simply because they were so high and it's been so cold for so long.

Yep.  This is what my garden looks like right now.

Today, we were well into the 50s and yesterday was pretty nice too.  The maple sap was running well and there was some snow melt, but with another storm poised to smack us in the face, it can be discouraging. So I decided to "turn my frown upside down."  I believe in the power of positive thinking and have always been an optimist, for the most part.

I decided today that I was going to throw a "Farewell to Winter" party on Facebook on Wednesday, right in the middle of the snowstorm.  Why not celebrate what might be the last big snow of the season?  Why...we might not get another one like this for MONTHS!

If you can't beat 'em, join 'em.  Right?

175 people have already said they're going. So why don't YOU join us for the party? Though it officially doesn't begin until Wednesday (that's about half an hour from now, according to my clock), unofficially it began several hours ago.  We're already having fun showing off blooms and flip-flop feet and yummy desserts.

WHAT:  Farewell to Winter Party
WHEN:  Wednesday, March 12, 2014
WHERE:  Facebook
WHY:  To give Mr. Snow and Old Man Winter a send-off party.  Buh-bye!

There will be some giveaways throughout the day tomorrow - seeds, a garden book or two, a Starbucks gift card, and whatever else I can find around here to share.

http://www.cabintiger.com/


While we were getting warmed up tonight for tomorrow's party, I got a message from Lauren Graves at Cabin Tiger Studio, saying she'd like to give away one of her awesome Perpetual Gardening Record Books to one of tomorrow's party-goers!  Wasn't that nice of her?


And then Angela Treadwell-Palmer from Plants Nouveau offered to give away one of their Aloe x humilis Spineless Hedgehog™ plants! Who wouldn't love a gorgeous, easy plant like that?  Thank you, Angie!


Aloe x humilis Spineless Hedgehog™
http://www.amazon.com/gp/product/1604693320/ref=as_li_ss_tl?ie=UTF8&camp=1789&creative=390957&creativeASIN=1604693320&linkCode=as2&tag=theliteraryworld
Evelyn's new book!

And then...Evelyn Hadden (garden author, who just joined Garden Rant) messaged me and said she'd like to offer one of the party peeps a signed copy of their choice of one of her titles:


Such a nice thing for each of these people to do, without even being asked.

I hope you'll join in on the fun, and that's what it's meant to be - a place to rejoice that spring is almost here.  So no grumbling about the weather, no matter HOW much snow you get.

I, for one, intend to make a snowman tomorrow.  There will be pictures posted during the party.  And it doesn't matter if you live where it's warm either.  We still want you to come and spread some sunshine at the party, please.  We like to hear about what we've got to look forward to.

Let's party!  Bring a friend!

Soon, my garden will look like this.  :-)


Thursday, March 6, 2014

My First Experience at Tapping Maple Trees


Last year about this time, we drove past a nearby home and I noticed several silver buckets hanging from one of their large trees in their front yard. I recognized that they were collecting sap from their maple trees, most likely to make maple syrup. "That looks like an interesting thing to try," I thought to myself, but I knew it was getting late in the season to start collecting sap of my own, so I filed the activity away for something to do the next year.

http://tapmytrees.com/
Months passed, and I never gave the maple syrup thing another thought until I attended the Independent Garden Center Show in Chicago in August. My co-writer, Jenny Peterson, and I walked past a vendor's booth and I said, "Wait...I want to see what this is." Tap My Trees was there, showing their supplies for all you need to tap your own trees for sap to make maple syrup.

I was pretty excited to find this, and owner Joe McHale talked to me at length about how simple the process is.  He was giving away free spiles, so I took one, intending to head home and get whatever else I needed at a little later time to collect sap from the maple trees on our property. But before I could go, Joe generously gifted me with a Starter Kit to take home with me. I was beside myself.

Well, now it's March and time to tap the trees! Today was the day, although we could have done it a few weeks ago, just to make sure we got all the sap possible from our trees. The ideal time to tap them is when the daytime temperatures are above freezing and the night temperatures are below freezing.  This creates a fluctuation of suction and pressure within the trees that causes the sap to flow. A detailed explanation (it's pretty cool!) can be found on Cornell University's website

http://tapmytrees.com/stkitwialbu.html
Photo and Starter Kit from TapMyTrees.com

I got the Starter Kit out, which contained all I needed to get started: 

  • 3 spiles (these are what you put into the tree for the sap to flow out of)
  • 3 hooks
  • 3 aluminum buckets
  • 3 lids
  • a 7/16" drill bit with a 3/8" shank
  • cheesecloth (for straining the sap later, when you make the syrup)
  • a book that tells you how to do everything, including making the syrup

The piece of duct tape on the drill bit marks 2½ inches, to make it easier
to know when your hole is deep enough.

We have several maple trees on our property, three of which are big enough around (12" in diameter or more) to tap. Using the drill bit provided in the kit, Romie drilled a hole at a slightly tilted angle (to aid in the sap flow) about two to two-and-a-half inches deep, about three feet off the ground. It's recommended to drill the hole on the south side of the tree, preferably below a large branch or above an obvious root flare.  Since we can't see the ground yet because of all the snow, we let a branch be our guide.

Even at the first bit of drilling, the sap was beginning to run!


I didn't really know what to expect when we drilled the first hole in one of the trees, but immediately the sap began running out.  Being first-timers, Romie and I both were pretty excited to see that.


Romie continued to drill, bringing the bit out every now and then to clear the hole of shavings.  Once it was at the proper depth, he inserted the spile through the hook provided for hanging the collecting bucket, and used a  hammer to gently tap it into the hole as far as he could.

The aluminum bucket provided in the kit has a hole for hanging on the hook and there's a lid that attaches to the spile via a pin, designed to allow for easy removal of the bucket when you need to empty it.


Here comes the sap!

We tapped two more trees and now we'll check them each day to see how much sap we're getting.  We'll empty the buckets as needed, keeping the collected sap in the refrigerator until it's time to stop collecting it.  That's when the temperatures are consistently above freezing and/or the sap begins to get cloudy or turn yellow. It'll be several weeks yet before that happens, about the same time that the trees break bud.

Our first tapped maple tree!

Wasn't that easy?  We thought so.  I'll be sure to let you know how the rest of it goes and if we get enough sap to make a little bit of maple syrup.  I think the three trees we tapped are silver maples, which doesn't have the highest sugar content of the recommended maples to tap, but it has enough. Sugar maples are highest in sugar content, with black maples, red maples, and silver maples next in line. It takes a lot of sap to make syrup, but I've got confidence that our trees are up to the task.

For more information about tapping maple trees and making syrup from the sap, as well as supplies needed to tap, check out Tap My Trees. I highly recommend the Starter Kit. It's also available in a less expensive version with plastic buckets, but I really like the vintage look and feel of the aluminum ones.

________________________
Thanks to Joe McHale for providing a Starter Kit to me free of charge. All opinions stated here are my own.

blogger templates | Make Money Online