Thursday, June 26, 2014

PBS Takes a Stroll Through Smiley Park Children's Garden in Van Wert, OH


Whenever something new and fun pops up in the neighborhood, there's a lot of hoopla and to-do about it.  Then time passes and locals settle in with whatever it is and it doesn't come to mind as often.  That's natural, of course, because there's everyday life and no shortage of other things that occupy our time and our minds.

But time does its thing in other ways too, including things that require effort in order to keep up appearances and remain that wonderful thing that stole our attention and even our hearts when it was shiny and new.  So it is with the Smiley Park Children's Garden in Van Wert, Ohio.

The garden was begun in 2005, as a project of the Master Gardener Volunteers of Van Wert County and if you've ever visited the one-acre corner of Smiley Park and spent any amount of time there, it's obvious just how much work is involved.  It took hours and hours of volunteer time and mammoth efforts (and money) that were donated by area residents and business owners to make the garden a reality.  And it still takes a lot of that to keep it looking good.

Kathleen Phipps, host of WBGU's Scenic Stops, interviews Mom about the Smiley Park
Children's Garden


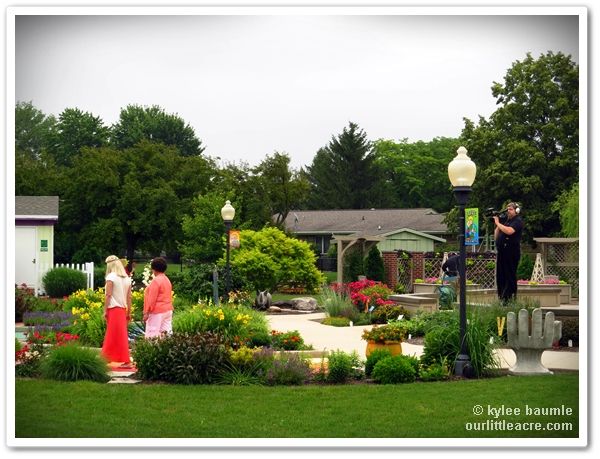
Today, the community of Van Wert and the Smiley Park Children's Garden was in the spotlight, being filmed by local PBS station, WBGU Bowling Green, for their regular feature, Scenic Stops.  The host, Kathleen Phipps, and her filming crew spent about three hours talking with my mom, Louise Hartwig, and fellow volunteers, Ruthann Covey and Sue Heppeard.  Sue is also the head of the Van Wert Parks Department and co-writer with Mom of Two Women With a Purpose blog.

The focal point of the gardens is the Butterfly House, and thanks to Hearth and Home Assisted Living, several monarch and Painted Lady butterflies live there, feeding and reproducing in a protected environment that has native host and nectar plants growing inside.

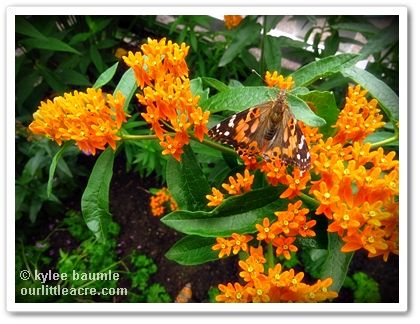
A Painted Lady butterfly rests on butterfly weed (Asclepias tuberosa) inside the Butterfly House.

Three monarchs and a Painted Lady line up.

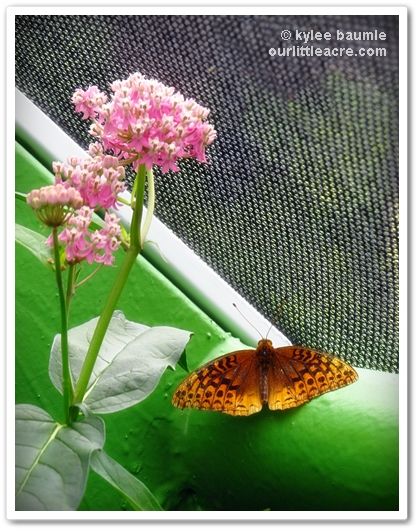
A Great Spangled Frittilary takes a rest near the swamp milkweed (Asclepias incarnata).

With all the rain we've had this month, the garden looks especially beautiful and lush, but that too means that there's more work to be done with weeding, trimming and mowing. Thank you to all those who selflessly give of their time and energy to make the garden something for the Van Wert community to be proud of.

The Rainbow Garden features plants from around the world.

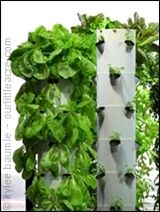
The Healthy Me Garden grows several edibles, which are harvested for the area food pantry.

The Enabling Garden features raised beds which are more easily accessible for the gardener.

Every garden needs a rhinoceros and a giant turtle, don't you think?

It was great to see Smiley Park Children's Garden get some recognition for being the Scenic Stop that it is and it will be fun to see it featured on TV.  The program is scheduled to air sometime in November.

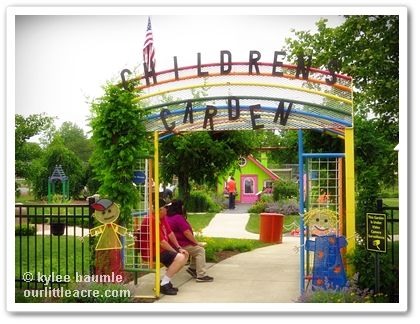
The Children's Garden is easy to find, being located directly across from the Van Wert Municipal Airport on West Leeson Avenue, in Smiley Park. If you haven't yet visited the garden, what are you waiting for? It's not just for kids...


For more on how the Smiley Park Children's Garden came to be, read "A Dream Becomes a Reality."


Wednesday, June 18, 2014

7 Reasons to Shop at an Independent Garden Center


Clichés are just so...cliché. When we see them, our eyes tend to move quickly past them, our brains barely registering the words we just read. Yet we somehow grasp the meaning in a split second, giving clichés inherent value even as we dismiss them as a tired communication tool. 

You hear it all the time - “Buy local!” We generally take it to mean that we should spend our dollars in locally-owned businesses. It can be a tough row to hoe (cliché alert!) for the smaller independent businesses, as they struggle to maintain their presence alongside the big stores. 

It can be a dilemma for the shopper too, because we all only have so many dollars to spend and we want to get the most for them. I will be the first to admit that if I can buy something considerably cheaper at a big box store, that’s where I’m going to buy it. Add to it that many times those stores are more convenient in terms of location as well as being a “one-stop shop,” and it’s hard not to shop there. 


But there are compelling reasons to buy your plants and garden materials locally. “Local” can be an ambiguous term, but generally it means a business that is both located in your community and owned by people who live there. 

Consider these things when you’re shopping for plants and other garden items: 

  • Your local garden center often carries the same plants you might find in a big box store, but if you want something out of the ordinary, you’re more likely to find it in a smaller, independent garden center (IGC). There’s a lot of thought given by the IGC owner when they make their buying decisions. They want to carry attractive plants that perform well, including those tried-and-true varieties that we’re familiar with, but they also want to cater to those who seek the unusual.

  • It’s always a gamble as to what will sell well. No business owner wants to get stuck with inventory that buyers passed over. But IGCs also don’t want their business to look like one you’d see in Every City, USA. And besides, those big box stores don’t have as much invested (relatively) as the independently owned ones do.

     
  • You know those plants that have a one-year guarantee at the chains? When you return a plant there, the store doesn’t lose money outside of the lost sale. They only pay for the plants that go out their doors and stay out. That loss is borne by the supplier and/or grower. Not so with the smaller independents. So when they offer plant guarantees, appreciate what that means to their business.

     
  • IGC owners also care a lot about whether their customers have success with what they buy, and they often choose to carry plants that have a high rate of success for their particular geographic and climatic area. That means happy customers, which in turn means repeat business. Happy customers often share their experiences with others and word of mouth can be the best PR a business can have.

     
  • Local garden centers are known to take better care of their plants too, and healthy plants already have a better start in your garden before they even go out the door. As a rule, IGCs are more knowledgeable about plants in general and the ones they carry in particular. They can help you make decisions about what would work best in your individual situation.

     
  • Many times, the local garden centers purchase plants as liners and grow them larger themselves. That may mean that the plants you buy locally have acclimated themselves to local conditions, thereby increasing their chances of success in your garden.

     
  • Want a certain plant or a large quantity of something? Sometimes local businesses will special order things for you. Good luck trying to get a big box store to order you a couple of flats of something specific. 

It’s no secret that some of the smaller garden centers have been struggling. In March, I spoke with the owner of one of them at the Fort Wayne Home & Garden Show and during the hard part of this past winter (which was pretty much all of it), he shared with me that just keeping his greenhouses going cost him $200 a day in propane. It takes a lot of sales to support costs like that and it’s representative of the things that all businesses have to face, whether large or small. But these things have a bigger impact on the smaller businesses. 

Sometimes I think we take our local small businesses for granted. We assume they’re doing okay and that they’ll always be around, but they won’t be if we don’t support them. There’s another cliché that I’m sure you’re familiar with: “It takes a village to raise a child.” It also takes a village to make a village.


Previously published as "Buy Local! - The Garden Version" by Kylee Baumle in the Paulding Progress newspaper in April 2014.  Reprinted and modified here with permission.

Friday, June 13, 2014

Planting Seeds Is Easier With Garden Row Markers


As a garden writer, I receive a number of garden products to try in my own garden each year, some new, some not.  I enjoy doing this because in some cases, it allows me to try something I'd never heard of before and might never, had it not been brought to my attention.  When I'm approached with something to review or try, I don't always say yes.  If it's not something that I think I would actually use in my garden or that I feel that is not well-designed or well-made, I'll pass.

When I was in Seattle for the Northwest Flower and Garden Show in February, Karen Chapman, co-author of Fine Foliage (with Christina Salwitz), showed me the Garden Row Markers  and Dibber that her husband makes.  She asked me if I wanted to try them in my garden this spring, and I enthusiastically said, "YES!"

First of all, the design is simple, and I knew instantly that they would work well to help plant seeds in a straight row.  But secondly, they were so beautifully made and I was instantly in love with their vintage look.  To top it off, I loved that these finely finished wooden markers are made with tools her husband's grandfather passed down to him.  Andy also uses tools that he's custom made himself.

The row markers are made of local wood (maple, cherry, or apple) that they either harvest from their own property near Duvall, Wash., or purchase from local arborists.  They feature a slot for securing the twine so that they stay together when storing.  The set of two, with twine, are $25 and can be purchased from Karen's website, Le Jardinet.

A companion piece, a dibber, comes in handy too, during seed planting time. I used it to make the trench for the seeds and also when planting larger seeds by just poking it into the soil to make the hole and dropping the seed in.  It's marked off in one-inch increments, which helps with determining the depth of planting.  The dibber sells for $10.

Garden dibber


Of course, I cherish these because they were a gift from a friend, but I can't imagine any gardener that wouldn't love to have these in their garden tool basket.
  
For more information about the garden markers and dibber, visit Le Jardinet.

Friday, June 6, 2014

'Tis the Season for Peony Jelly!


Collected petals from various peonies at Our Little Acre.
I know.  I hadn't heard of it before either. Then a few people called it to my attention on Facebook and wondered if I'd ever made it.  No, but it looked like something that should go on my to-do list, so I did it.  Wednesday's rain did a number on the peonies, so I decided to go out and pluck some petals and make that jelly.

I love peonies and also love that we live near the once Peony Capital of the World - Van Wert, Ohio.  Large peony farms once existed throughout the county and several hybrids came out of this area. This weekend the city celebrates the annual Peony Festival, which had its beginning back in 1932.

This has been a good year for peonies in my garden, with a couple exceptions.  The Itoh hybrid, 'Bartzella', didn't have a single bloom this year, but it's only the second year in my garden and peonies have been known to pout for a few years after planting or transplanting. I expect to see blooms on it next year.

Another Itoh, 'Lollipop', bloomed for the first time this year since planting it three years ago, although neither of its two blooms were particular pretty. (I have confidence they'll be better next year.) The tree peony that had to be moved when the greenhouse was built started blooming again.

The biggest success story was the purple tree peony, 'Kamatanishiki', which bloomed for the very first time in my garden and boy, did it.  I'm not sure I'd call it purple, but it was gorgeous.

Paeonia suffruticosa 'Kamatanishiki'


When it was brought to my attention by several friends on Facebook that you could make jelly from peony petals, I was fascinated and wanted to try it.  It could not have been easier.  I generally followed the recipe posted by Joe and Janna at Imperfect Urban Farm in 2011, only changing the kind of pectin I used - powder versus liquid.

Peony Jelly

1 quart of peony petals (sort out green bits and bugs, and don't use any with brown edges)
5 cups of boiling water
3 Tbsp. lemon juice (juice of one lemon)
3 cups granulated sugar
1 package of liquid pectin or 2 Tbsp. powdered pectin

I picked an assortment of peony petals, choosing those that were most fragrant and only those that smelled good.  While I love the fragrance of most peonies, some of them don't smell as good as others. I gathered about a quart of them, although that is an arbitrary amount because it depends on how tightly you pack them.  The more, the better, I think, but I didn't smoosh them down much.


Then I poured about five cups of boiling water over the petals, which immediately caused them to wilt and get mushy. The fragrance changed to less of a perfumey smell to just smelling like green plants. I let them steep overnight, but it's recommended to let them sit for a minimum of six hours.

This is what the liquid from the steeped peony petals looked like after I strained it through cheesecloth.

The next morning, I poured the water off the petals, straining it through some cheesecloth. In the original post at IUF, they mention the color as being ugly, but mine was actually very pretty.  I think it may have been because of the dark red petals in my mix.

I used the juice of a Meyer lemon from my
own tree!
I ended up with about 3½ cups of liquid, which is what you want. Then I walked out my front door and picked a Meyer lemon from my pathetic-looking Meyer lemon tree that is growing four lemons and currently has about as many leaves. It conveniently had a ripe one when I needed it, and I squeezed as much juice out of it as I could.  The standard measurement for the juice of one lemon is three tablespoons and that's exactly what I got from mine, even though it was rather small.

When I added the lemon juice, the color of the liquid intensified quite a bit to a deeper pink.

It just LOOKS like it would taste good, doesn't it?

I brought the liquid to a boil, then added the sugar and powdered pectin.  The original recipe called for one package of liquid pectin, but I only had the powdered kind on hand and I found that two tablespoons of powdered equals one package of liquid. Note though that it's recommended you mix the powdered pectin in with the sugar before adding it to the liquid.  I whisked it all in and brought the liquid to a boil again, and boiled it for about three minutes.

The original recipe said to only boil it for a minute, but that just didn't seem long enough to me. After three minutes, the liquid coated a spoon so I knew it would thicken as it cooled.

This recipe yielded three pints of jelly for me.  Though it looks a little more orange in this photo, it's
actually a nice shade of pink.

I poured it into the jars and let it cool.  Later in the day, it was thicker, but wasn't thick enough to spread just yet, so I took a Club cracker and dipped it into the jelly to taste it. I don't even know how to describe it, but it's good.  Romie said he thought it was "kind of peachy, kind of like strawberry, something a little different, but it's good!" If you're expecting a berry type of jelly, it's not that. It would probably be in the same class as rose or lavender jelly.

If you try it or have made peony jelly in the past, I'd love to have some feedback here about your experience!

Paeonia lactiflora 'Charles Burgess', which is actually a deep red, rather than dark pink as it appears here.

An unknown single white, which grew from root stock of a tree peony that died above the graft.


blogger templates | Make Money Online