We got our first real snow of the season Sunday night. There was that day a couple of weeks ago where you could see some snowflakes if you looked real hard, but this was a snow that accumulated. We got not quite two inches before it tapered off.
I was sitting on the couch, working on reviewing some of the edits on my new book that will be out in April, THE MONARCH: Saving Our Most-Loved Butterfly, and I had a light bulb moment.
I CAN MAKE SNOW CREAM!
This is something that has taken me over 59 years to experience. That's just crazy. I hadn't even heard of it until a couple of years ago and I just kept forgetting about doing it until tonight. So I jumped up and quickly mixed up the first part, then went outside to gather up some fresh snow.
This was the perfect snow for making Snow Cream!
It couldn't have taken more than five minutes, start to finish. Now I'm not a vanilla ice cream lover, nor do I particularly like homemade ice cream, so this is isn't something I'd crave, but it was sure fun to do and we'll be doing it the next time we have the grandkids here and we've got fresh snow on the ground.
Here's what you do:
SNOW CREAM
1 cup milk
⅓ cup white granulated sugar
1 teaspoon vanilla extract
Pinch of salt
Mix up the ingredients in a mixing bowl using an electric hand mixer. Mix until well blended. Put the bowl with the mixture into the freezer while you go get the ice cream. Gather up about 8 cups of fresh snow.
From this point on, you have to work fast, because it will melt fairly quickly. Add the snow to the mixture in the bowl and whip it. It should be thick enough that you can use an ice cream scoop to form a ball.
Scoop into bowls and add sprinkles, chocolate syrup, or whatever your favorite topping is. Eat and enjoy!
My chocoholic husband added Hershey's Syrup on top.
~~~~~~~~~~~~~~~~~~~~~~~~~~~~~~~~~
*I would give credit to whomever came up with this recipe if I only knew. I looked up several recipes online and they were all the same, with no credit given, so this is undoubtedly older than I am and may be in the "public domain" by now.
This year, we had our first cherry harvest from the two 'Carmine Jewel' dwarf cherry shrubs we have. I'd gotten two seedlings from Gurney's at a regional GWA (Garden Writers Association) meeting in 2011, and after being gnawed to the ground one winter by rabbits, they came back like gangbusters.
I had my first experience at pitting cherries and I can tell you it was more fun than shelling peas. I don't enjoy shelling peas, which is why I no longer grow them, but pitting the cherries was another one of those tasks that you can do without thinking. Or you can think about the pie or cobbler or liqueur that those cherries will become.
There are several ways to pit cherries if you don't have a proper cherry pitter. I opted to use a straw - a stainless steel straw, which I knew would hold up well. I simply put the end of the straw at the stem end and pushed the pit out the other end. Don't wear a white shirt while doing this, although it doesn't seem to cause a permanent stain if you wash it right away.
The harvest yielded 207 cherries, which was about a pint of cherries, weighing ¾ of a pound after pitting. That wasn't quite as many as the recipe I used them in called for, but it was enough. And it was good.
I pretty much followed this recipe found on The Kitchn:
Tart Cherry Crumble
For the cherries:
1 pound tart cherries
2 tablespoons sugar
2 tablespoons flour
2 tablespoons finely chopped crystallized ginger, optional (I didn't use this)
1/4 teaspoon cinnamon
Pinch of salt
For the crumble:
6 tablespoons butter
1 cup flour
⅔ cup sugar
1 teaspoon baking powder
¼ teaspoon salt
1 large egg, beaten well
Position a rack in the center of the oven, and preheat the oven to 375°F.
Spread the cherries in an ungreased 9x9-inch baking dish, deep pie pan, or similar-sized dish. Toss the cherries with the sugar, flour, ginger, cinnamon, and salt.
Cut the butter into several pieces and melt over low heat in a small saucepan. Raise the heat slightly after it has melted, and cook, swirling frequently, until the butter has turned nutty brown. Remove from the heat.
In a medium bowl, combine the flour, sugar, baking powder, and salt. Add the beaten egg and use your hands to combine the dry ingredients and egg. As you work the egg into the flour, it will form small moist crumbs. Sprinkle these over the cherries, then drizzle the browned butter over the topping.
Bake for 30 to 35 minutes, or until the top is browned and the cherries are bubbling. Cool for at least 30 minutes before serving. Serve warm or at room temperature with vanilla ice cream or unsweetened whipped cream.
I'd make it again.
Dwarf Sour Cherry
(Prunus cerasus 'Carmine Jewel')
This is a dwarf shrub-type of tart or sour cherry. It is suitable for growing in Zones 3a to 8b, in sun to part-shade. It prefers neutral to alkaline soil, but is adaptable to most soil types, including heavy clay.
Developed at The University of Saskatchewan (Canada) and introduced in 1999, this black cherry is consistently highly productive, with a high fruit-to-pit ratio.
________________________________
*I received these cherry plants as seedlings from Gurney's in 2011, free of charge. I have not received any other compensation for writing about them.
I recently wrote about chestnuts for my weekly gardening column in our local newspaper, the Paulding Progress. Chestnuts are a timely topic, what with Christmas and the song, not to mention chestnut season is generally October through December.
The president of the New York chapter of the American Chestnut Foundation, Allen Nichols, somehow saw my column and contacted me, offering to send both American chestnuts for eating and some for planting in the spring. Yes, genuine American chestnuts, not the Chinese ones most people eat these days.
The natural range of the
American chestnut
The American Chestnut Foundation is dedicated to bringing back the American chestnut tree (Castanea dentata), all but wiped out by blight in the early part of the 20th century. A fungal disease was inadvertently introduced to the U.S. from Asia and it proved to be fatal to the American chestnut, which has no natural defense against it.
Efforts to bring back the American chestnut include the creation of a transgenic American chestnut tree at the State University of New York College of Environmental Science and Forestry (SUNY-ESF). By inserting a naturally-occurring gene from wheat (also found in strawberries, barley, oats and bananas), the chestnut tree is resistant to the fungus. (See video at the end of this blog post.) If researchers are successful in gaining permission, it could be the first transgenic tree to be released in the wild.
My eating chestnuts arrived just before Christmas and yesterday, I set
about roasting them. I'd never even seen a chestnut in my life, let
alone roasted any, so I consulted Google and found several good guides
for the process. I melded several of the guides into one and here's how I
did it:
1. Since chestnuts contain a fair amount of moisture, you need
to cut a slit in the outer covering to prevent them from exploding as
you heat them up in the oven. Make sure your knife is very sharp,
because they're very tough, and make a cut about ⅛-inch deep, through
the outer layer, the thin papery layer and just nicking the meat a bit.
All you need to do is to provide a vent, but traditional cuts are in the shape of an X:
2. After cutting, I soaked the chestnuts in warm water for about half an hour. This helps loosen the outer covering which will later be peeled away.
3. After soaking, I placed them in baking pan in a 350°F oven for 30 minutes. (Some sources recommend 400°F for 15 minutes.)
4. When they're ready to take out of the oven, the skins will have peeled back on their own and the meats will be a golden color, glistening slightly.
5. When I took them out, I put the hot chestnuts in a piece of foil and closed it up. This allows them to steam a bit, which helps with removal of the skins. After a few minutes, they were cool enough to handle.
6. While many comments were found complaining of the difficulty in shelling the roasted chestnuts, I didn't find it to be difficult at all. Several of them popped right out of the shells on their own. Others came out when I cracked the shells further. The thin papery layer stuck to the shells, so even those weren't a problem. Beginner's luck, maybe?
What did they taste like?
I'm a pretty picky eater. Certain textures, temperatures, and aftertastes have a way of making something unpalatable to me, in addition to the flavor itself. But I often discipline myself to try new things and to eat things that I
know are good for me even if I don't particularly like them.
I didn't expect to like roasted chestnuts. The only nuts I really like are pecans and almonds, but I'm even selective about the kind of almonds I'll eat. I like peanut butter (creamy only) but don't like peanuts. Walnuts make my mouth hurt. Cashews are just nasty.
But these chestnuts... YUM! I'm not really sure how to describe the taste to someone who's never had them before, but my first reaction was that their flavor hinted of something I'd eaten before. It took me a bit to identify it, and don't laugh, but to me they tasted like chicken. Not exactly, of course, but that's the taste that came to mind and Romie concurred.
Others have said they remind them of sweet potatoes and I can see that, too. Whatever... they were good. Romie liked them as well, but he'll eat just about anything.
Planting chestnut trees in spring
Photo from United States
Forest Service
When grown from seed, American chestnut trees take about 7-8 years before they produce seed. So why would I want to plant chestnut trees, when I'm not even sure if we'll be living here in 2023?
As Allen Nichols told me, "We are encouraging people to plant pure wild type American chestnuts
so they have a tree to cross with our blight resistant transgenic tree,
when it is available, which we hope will be in just 3-5 years."
I will plant them because I like being a part of something that is for the greater good and because, like my beloved monarchs, they can use all the help we can give them.
Several years ago, I was having a conversation with Mimi San Pedro, COO of Hortus, Ltd., P. Allen Smith's company. It was a few weeks prior to one of my Garden2Blog visits to Allen's Moss Mountain Farm, and the conversation veered in the direction of pecan pie, as most conversations do. I mean, who doesn't love pecan pie? It's always in the forefront of our thoughts and eventually we're going to talk about it. We can't help it.
Now I am not a pie eater in general, but if you put a Dutch apple or pecan pie in front of me, I'm a happy girl.
Mimi described Allen's pecan pie to me and I was already drooling, and I secretly hoped he would serve it when I was there. Okay, maybe it wasn't so secretly and I might have just said, "Can we please have Allen's pecan pie when I'm there?"
"M-m-m-m... pie!" Photo via Hortus, Ltd.
Well, how about that - a few weeks later when we had one of our meals at the farm, THERE WAS THE PIE. Of course, I just KNEW we were having that pie specifically for ME, right? (The truth is, all visitors get it for lunch when they take the farm tour.)
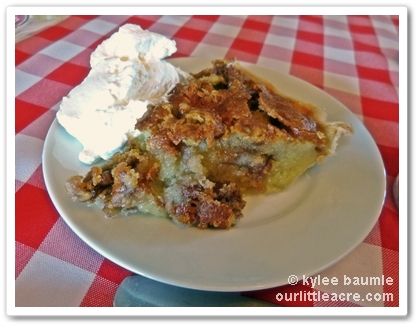
This is The Pie.
Take my word for it - make this and you will throw out all your other pecan pie recipes. Even if you don't particularly like pecan pie, you might just like this one. So. Good.
Allen's Pecan Buttermilk Pie is featured in his wonderful cookbook, Seasonal Recipes From the Garden. This is my go-to cookbook if I want to make something new and be assured that it will taste good.
Enjoy! *Recipe reprinted here with permission. Link for Allen's book is my Amazon affiliate link.
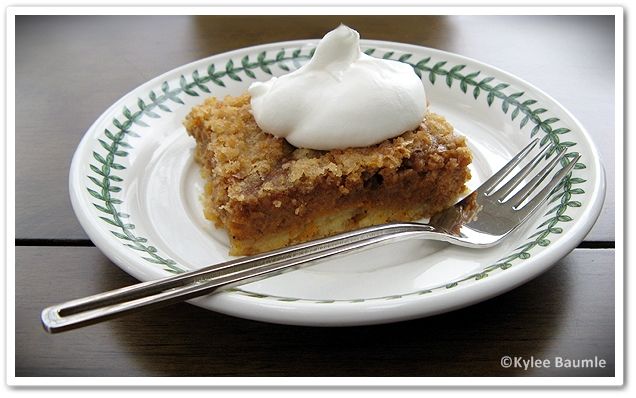
It's been two years since I posted my pumpkin torte
recipe, but since there are always new readers to this blog, and I get
asked for this recipe every year around this time, I'm posting it again.
This is seriously good stuff and it's my personal favorite dessert of
all time. Enjoy, and happy Thanksgiving to all!
With Thanksgiving looming on the horizon, thoughts turn to food and
those special dishes we enjoy as we dine with family. I'll be doing the
turkey again this year as well as the pumpkin torte that I'm known for.
With the exception of my husband, our family likes this dessert better
than pumpkin pie. It's not that he doesn't like the torte - he does. He
just likes pie better.
To each his own, I say.
I've
posted my recipe for the pumpkin torte a few times before, but I always
get asked again for it when Thanksgiving rolls around, so here you go:
Kylee's Pumpkin Torte
1 yellow cake mix (take out 1 cup) 3 eggs
1¼ cup white sugar
¾ cup butter
¾ cup evaporated milk
1 teaspoon cinnamon
1 large can pumpkin pie mix(30 oz.)
Crust:
Mix the cake mix (less 1 cup) with one egg and ½ cup butter. Press into
the bottom of a greased jelly roll pan (10½ x 15½ x 1). Filling: Mix until smooth - pumpkin pie mix, 2 eggs, and evaporated milk. Pour on top of the crust.
Topping: Mix 1 cup cake mix, sugar, cinnamon and ¼ cup butter. Sprinkle on top of the pumpkin mixture.Bake at 350° for 45-50 minutes. Serve with whipped cream.
Enjoy the torte, enjoy the day, and don't forget to give thanks!
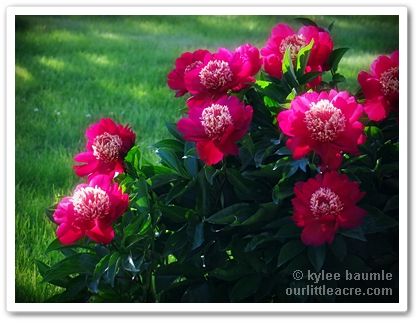
Collected petals from various peonies at Our Little Acre.
I know. I hadn't heard of it before either. Then a few people called it to my attention on Facebook and wondered if I'd ever made it. No, but it looked like something that should go on my to-do list, so I did it. Wednesday's rain did a number on the peonies, so I decided to go out and pluck some petals and make that jelly.
I love peonies and also love that we live near the once Peony Capital of the World - Van Wert, Ohio. Large peony farms once existed throughout the county and several hybrids came out of this area. This weekend the city celebrates the annual Peony Festival, which had its beginning back in 1932.
This has been a good year for peonies in my garden, with a couple exceptions. The Itoh hybrid, 'Bartzella', didn't have a single bloom this year, but it's only the second year in my garden and peonies have been known to pout for a few years after planting or transplanting. I expect to see blooms on it next year.
Another Itoh, 'Lollipop', bloomed for the first time this year since planting it three years ago, although neither of its two blooms were particular pretty. (I have confidence they'll be better next year.) The tree peony that had to be moved when the greenhouse was built started blooming again.
The biggest success story was the purple tree peony, 'Kamatanishiki', which bloomed for the very first time in my garden and boy, did it. I'm not sure I'd call it purple, but it was gorgeous.
Paeonia suffruticosa 'Kamatanishiki'
When it was brought to my attention by several friends on Facebook that you could make jelly from peony petals, I was fascinated and wanted to try it. It could not have been easier. I generally followed the recipe posted by Joe and Janna at Imperfect Urban Farm in 2011, only changing the kind of pectin I used - powder versus liquid.
Peony Jelly
1 quart of peony petals (sort out green bits and bugs, and don't use any with brown edges) 5 cups of boiling water 3 Tbsp. lemon juice (juice of one lemon) 3 cups granulated sugar 1 package of liquid pectin or 2 Tbsp. powdered pectin
I picked an assortment of peony petals, choosing those that were most fragrant and only those that smelled good. While I love the fragrance of most peonies, some of them don't smell as good as others. I gathered about a quart of them, although that is an arbitrary amount because it depends on how tightly you pack them. The more, the better, I think, but I didn't smoosh them down much.
Then I poured about five cups of boiling water over the petals, which immediately caused them to wilt and get mushy. The fragrance changed to less of a perfumey smell to just smelling like green plants. I let them steep overnight, but it's recommended to let them sit for a minimum of six hours.
This is what the liquid from the steeped peony petals looked like after I strained it through cheesecloth.
The next morning, I poured the water off the petals, straining it through some cheesecloth. In the original post at IUF, they mention the color as being ugly, but mine was actually very pretty. I think it may have been because of the dark red petals in my mix.
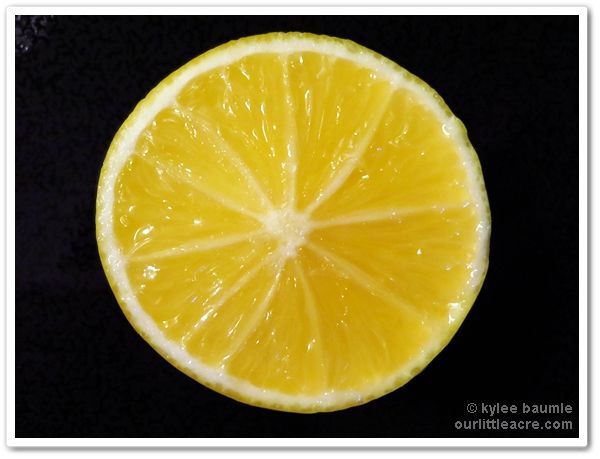
I used the juice of a Meyer lemon from my
own tree!
I ended up with about 3½ cups of liquid, which is what you want. Then I walked out my front door and picked a Meyer lemon from my pathetic-looking Meyer lemon tree that is growing four lemons and currently has about as many leaves. It conveniently had a ripe one when I needed it, and I squeezed as much juice out of it as I could. The standard measurement for the juice of one lemon is three tablespoons and that's exactly what I got from mine, even though it was rather small.
When I added the lemon juice, the color of the liquid intensified quite a bit to a deeper pink.
It just LOOKS like it would taste good, doesn't it?
I brought the liquid to a boil, then added the sugar and powdered pectin. The original recipe called for one package of liquid pectin, but I only had the powdered kind on hand and I found that two tablespoons of powdered equals one package of liquid. Note though that it's recommended you mix the powdered pectin in with the sugar before adding it to the liquid. I whisked it all in and brought the liquid to a boil again, and boiled it for about three minutes.
The original recipe said to only boil it for a minute, but that just didn't seem long enough to me. After three minutes, the liquid coated a spoon so I knew it would thicken as it cooled.
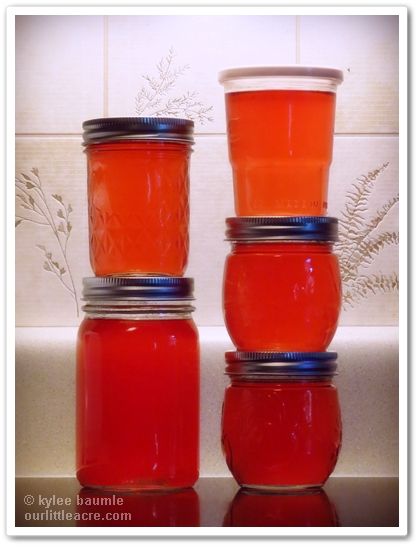
This recipe yielded three pints of jelly for me. Though it looks a little more orange in this photo, it's actually a nice shade of pink.
I poured it into the jars and let it cool. Later in the day, it was thicker, but wasn't thick enough to spread just yet, so I took a Club cracker and dipped it into the jelly to taste it. I don't even know how to describe it, but it's good. Romie said he thought it was "kind of peachy, kind of like strawberry, something a little different, but it's good!" If you're expecting a berry type of jelly, it's not that. It would probably be in the same class as rose or lavender jelly.
If you try it or have made peony jelly in the past, I'd love to have some feedback here about your experience!
Paeonia lactiflora 'Charles Burgess', which is actually a deep red, rather than dark pink as it appears here.
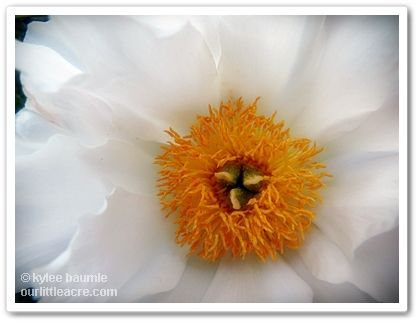
An unknown single white, which grew from root stock of a tree peony that died above the graft.
I loved math in high school. I'm not kidding, I really did. And I got As in Algebra, Geometry, and Algebra II, which shouldn't be surprising, because anyone who loves math is probably going to be good at it
So it probably doesn't surprise you that I can remember pi (π) to five places after the decimal: 3.14159. Or that the area of a circle is equal to πr². Why I remember those things is beyond me, because in the 40 years since I've graduated from high school, I've never once had the occasion to actually use pi in one single practical instance in my life. It's just one of those quirky things that sticks in my head.
Why am I chatting about math and pi? Because today is Pi Day!
Yes, people all over the world celebrate Pi Day on March 14th,
because...well...you know... 3.14. I really think it's just an excuse
to eat pie.
My favorite pie in the world is pecan pie. The best pecan pie I ever had was at Josephine's Tea Room in Godfrey, Ill., in 1989. I begged for the recipe and they left me sobbing on the floor without it. But three years ago, P. Allen Smith came to my rescue.
I received a copy of his book, P. Allen Smith's Seasonal Recipes from the Garden, and in that book was a recipe for pecan pie that rivaled Josephine's. The book has other scrumptious recipes too, but trust me on the pie. It's amazing.
I've got permission to share Allen's recipe, so here you go. You're welcome.
The only thing better than Allen's pecan pie is getting to eat it at his farm in Arkansas.
Buttermilk Pecan Pie
1 cup pecan halves
¼ cup firmly packed light brown sugar
¼ cup dark corn syrup
8 tablespoons (1 stick) butter, melted
1 ½ cups sugar
3 eggs, beaten
¼ cup all-purpose flour
½ teaspoon salt
1 teaspoon vanilla extract
1 cup buttermilk
1 pie crust
Preheat oven to 350°F.
Line a jelly-roll pan with aluminum foil, and lightly grease the foil. Stir the pecan halves, light brown sugar, and dark corn syrup together in a small bowl. Spread the mixture out on the jelly-roll pan, and bake,stirring every 4 minutes, for 12 to 15 minutes, or until the glaze thickens.
Remove the pan from the oven and spread the pecans in a
single layer on wax paper. Let the pecans cool completely, separating
them with a spoon as soon as they cool.
Lower the oven to 325°F.
Combine
all the remaining ingredients in a mixing bowl, and pour the mixture
into the unbaked pie shell. Scatter the chopped glazed pecans evenly on
top of the pie filling.
Bake for 50 minutes to 1 hour, or until set. Let the pie cool on a wire rack before serving at room temperature.
I can cook. I'm fairly good at it. But I usually just don't want to, because it's not high on my list of things that I think are fun to do. I'd much rather weed a garden. However, when photos of delicious food start showing up in my Facebook stream, sometimes I get motivated to get barefoot and get in the kitchen.
It happened Monday. My friend (and cousin) Algene posted a photo and recipe for Crock-Pot® Chicken Teriyaki that caught my eye. I started salivating. Anything teriyaki has that effect on me. So I looked down through the list of ingredients and noted that I had all of them, including garlic from last summer's garden.
Then I looked at the directions. It's a Crock-Pot® recipe, so how hard can it be? It's not. The most difficult thing was cutting up the chicken into bite-size pieces and that was a piece of cake. (More about cake later...)
That settled it. We were having this for supper. I'm sharing it here, just in case it looks good to you, too. It originally came from the Facebook page of Heavenly Recipes and if I spend too much time on that page, I may just be forced to cook more often. This particular recipe appealed to quite a number of people, because as of this evening, it's been shared 144,667 times.
Here we go:
Crock-Pot® Chicken Teriyaki
1 lbs chicken, cubed
1 cup chicken broth ½ cup teriyaki sauce ⅓ cup brown sugar 3 garlic cloves, minced 1. Combine chicken broth, teriyaki sauce, brown sugar and garlic cloves in large bowl.
2. Add chicken to sauce, and mix.
3. Pour chicken mixture into Crock-Pot®.
4. Cook on low 4-6 hours, or until chicken is cooked through.
5. Serve over hot cooked rice and spoon on extra sauce if desired.
It should be noted, if you saw the recipe on my or on any other Facebook page, that the photo posted was NOT a photo of this recipe. The photo showed sesame seeds in the sauce and a thicker sauce. Most of us that tried the recipe agreed that the sauce was more watery than we'd have liked. The remedy for that is to cut back the broth drastically or as one my friends suggested, cut it out entirely. I would do that next time.
But it was delicious, and I will make it again. Now, about that cake...
My cousin also posted a photo of white cake with caramel frosting, which reminded me of a recipe my mom had when I was a kid. My dad loved it and I loved it, and I dug it out and made it. So we topped off our teriyaki meal with caramel cake. Yummmmm...
When I attended the Garden2Blog event last spring at P. Allen Smith's Moss Mountain Farm outside Little Rock, Arkansas, one of the sponsors was Le Creuset. Each attendee was allowed to choose one item from their catalog to try out after we returned home. Prior to this, I'd not owned a single piece of Le Creuset cookware, but I'd kind of drooled over the wok.
I love Asian food, so the wok seemed like the best choice to me. I've used it quite a few times since I got it and yes, it's ridiculously heavy, but I have to say that I actually like that about it. With the bottom being small in relation to the rest of the pan, the weight is a stabilizing factor as I stir-fry in it. Not only that, because it's enameled cast iron, you can use a lower setting on your stove to maintain a specific level of heat. I chose red, because that's my favorite color.
Ooh, pretty!
Last night, I decided to get ambitious and make some lettuce wraps, P.F. Chang's style. I looked up recipes online and what I came up with for mine was a combination of several versions I found, improvising when I didn't have exactly what the recipe called for. No matter - the result was something that we both LOVED, in fact, Romie loved it so much, he ate three of them.
Here's the recipe - my version of a conglomeration of several:
Lettuce Wraps
3 tablespoons oil
2 boneless skinless chicken breasts
1 cup water chestnuts
1 small can mushroom pieces
1 small chopped onion
2 teaspoons fresh minced garlic
4 -5 leaves iceberg or Romaine lettuce
Dipping Sauce
1/4 cup sugar
1/2 cup water
2 tablespoons soy sauce
2 tablespoons apple cider vinegar
2 tablespoons ketchup
1 tablespoon lime juice concentrate
1/8 teaspoon olive oil
1 tablespoon prepared mustard
2 teaspoons water
1 teaspoon garlic powder
Stir Fry Sauce
2 tablespoons soy sauce
2 tablespoons brown sugar
1/2 teaspoon apple cider vinegar
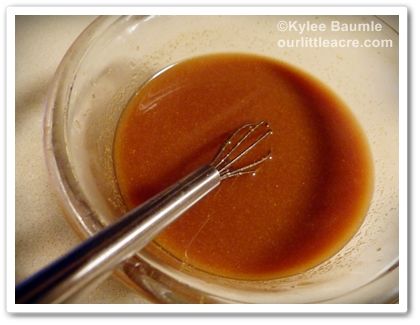
Mix all the ingredients for the dipping sauce together and whisk well. Set aside.
Cut the chicken breasts into small cubes about the size of game dice. Prepare the mushrooms and water chestnuts by dicing those, and mince the fresh garlic.
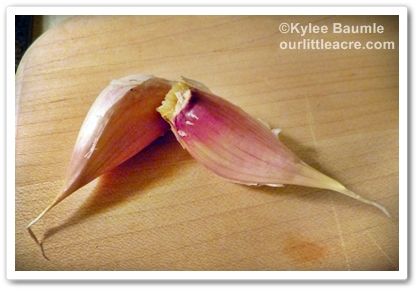
Hard neck garlic 'Music' is from last summer's garden
Mix the stir fry sauce in a small bowl so it's ready when you need it.
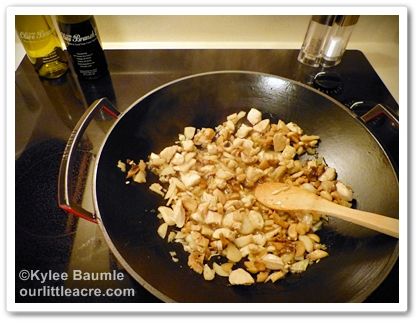
Put 3 Tablespoons oil in the wok and turn heat on high. Add the chicken and sauté it. If there's any liquid from the chicken, drain it off. Add the onions, garlic, water chestnuts, and mushrooms, stir, then add the stir fry sauce and sauté for several minutes.
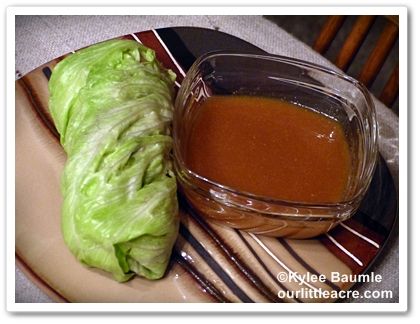
Take each leaf of lettuce and put several tablespoons of chicken mixture in the middle, fold each end in, then roll it up lengthwise.
You can dip the lettuce wraps in the dipping sauce, or you can just pour it over the wraps on a plate and eat with a fork.
_____________________________ Thank you to P. Allen Smith and Hortus, Ltd. for the opportunity to attend Garden2Blog, where all expenses were paid, as well as to Le Creuset for the free wok.











 "Bejeweled"


