Monday, September 8, 2014

Projects X 2: The Berry Barn & The Weeping Circle


It seems as if life around here is operating on a delay much of the time. Too busy? We're getting older? Maybe a little of both, but it feels good to have two of our planned projects completed now. One, The Berry Barn, should have been done last fall and The Weeping Circle was something I've wanted to do for a couple of years now. Neither really took all that long, but you know how that goes.

Thornless blackberries beginning to ripen earlier this season.
We've got six thornless blackberry plants, or at least that's what we started out with a few years ago - three each of 'Chester' and 'Triple Crown'. They've done well and we've gotten some great tasting berries from them, but the birds like them as much as we do. We've netted them in the past, but nets are a pain.

There are also three Raspberry Shortcake™ thornless raspberry plants I received as test plants from Fall Creek Farm & Nursery a few years ago in close proximity to the blackberries. We've never gotten any berries on those, but it could be because just when they were getting big enough to possibly give us some, the rabbits decided they would do us the favor of chewing them off at the ground. We forgot to cage them last winter. Our bad.

Last year's 'Jelly Bean' blueberries

For the past couple of years, we've grown blueberries in containers, mostly because we've got alkaline soil here and blueberries like it acidic. It's easier to control the pH when you grow things in containers.  We've got some great compact varieties, also test plants from Fall Creek Farm & Nursery ('Jelly Bean' and 'Peach Sorbet'), as well as 'Pink Lemonade'. But I wanted to try them in the ground, amend the soil around them, and see how they did.

2012 Blueberries

So how did they do?  Ask the rabbits.  By the end of last summer, I really thought they were large enough to withstand a little rabbit pressure, but nooooooo... The rabbits sheared them all off right at the ground too. It was a rough winter for everyone. But guess what? None of them died, even though I was certain they were goners. We didn't get any blueberries this year, but they did recover nicely and I expect to get some next year.

To better address these bird and rabbit problems, I came up with an idea. My husband dislikes it when I do this, because he knows my ideas mean work for him. He's not opposed to working in the yard or work in general, but he likes it better when it's his idea. No matter how hard I tried, I couldn't finagle this into being his idea in any way. But he agreed to build The Berry Barn. (I have other ways of persuasion.)

My idea was to build a wooden frame and put chicken wire all around it to keep the birds and bunnies out, but still allow pollinators in. Since the raspberries and blueberries would remain relatively small due to the varieties they are, and with all of those planted about 4-5 feet south of the row of blackberries, I wanted the roof line of the enclosure to be asymmetrical, being longer on that side. Hubby says, "Can't you just ever do something the simple way?"


To make a long story short, The Berry Barn got built (my dad even came out and helped one day), and I was so happy with the way it turned out, I literally was jumping up and down.  Hubby smiled. I suspect the rabbits and birds will not be pleased. Too bad, so sad.


In the same week, a paved circle was placed around one of our weeping trees, the Weeping Extraordinaire™ Double Flowering Cherry (Prunus x 'Extrazam'), from Lake County Nursery/UpShoot!. This project didn't take nearly as long and was made easier by special ordering the patio kit from Menard's. No cutting of pavers!


Hubby didn't understand the need for this project at all, but he agreed that it looked nice when it was done. There were a couple of other little projects on my list - a cinder block wall by the pool house and a short trellis near the newly-planted Eco-Lawn area in the middle of the garden. More on those later!
Friday, July 4, 2014

The Gutter Planter Redux - Succulent Style!


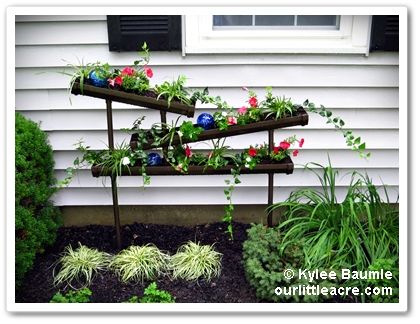
Last year, I enlisted the help of my husband and friend Julie to create a gutter planter for my monthly project as a Lowe's Creative Ideas Garden Team member.  Once it was constructed, I planted it up with an assortment of annuals and perennials and just for fun, threw in a few glass watering balls that had gotten their bottoms broken off.

Angled gutter planter - Summer 2013


As the summer wore on, the planter, which was located on the hot south side of our house, demanded that I pay pretty close attention to keeping it watered.  Because there's not a whole lot of room for potting soil, there isn't a lot of leeway or forgiveness on the watering issue.

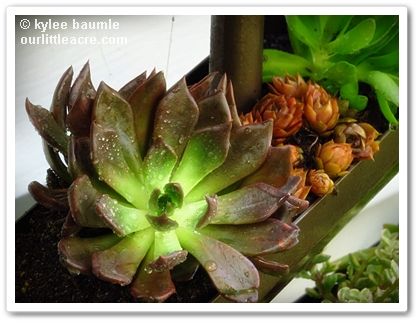
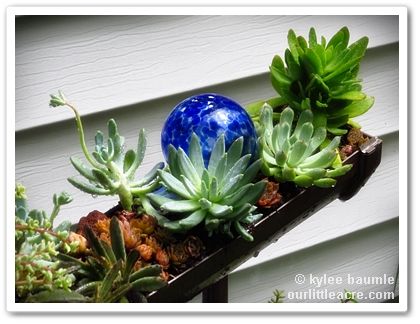
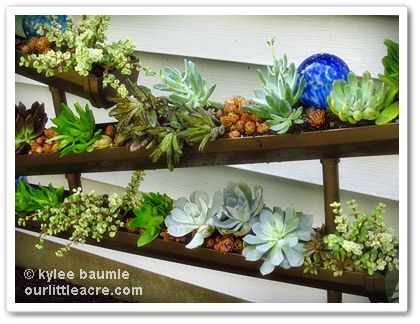
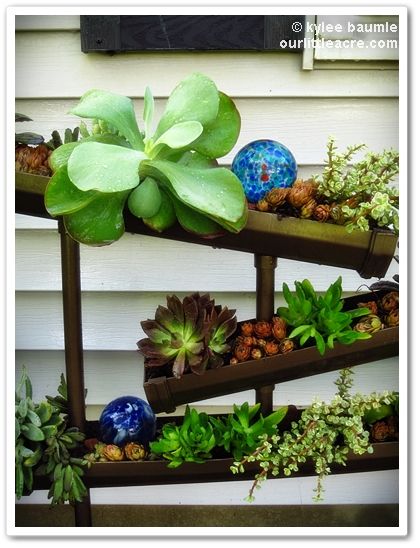
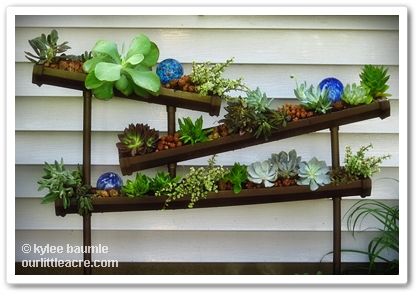
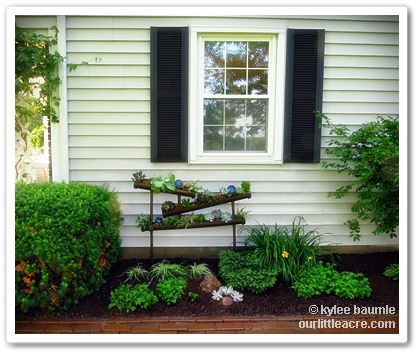
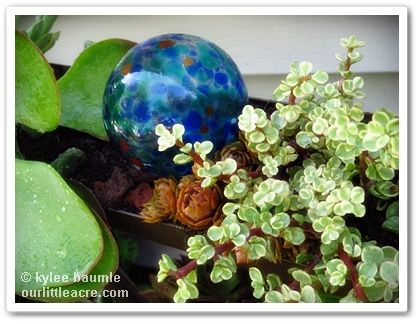
So this year, I decided to try something else. What kind of plants do well in hot, sunny locations that take a laissez-faire attitude when it comes to watering? SUCCULENTS!  So, with the help of Costa Farms, North America's largest houseplant grower and wholesaler, who sent an assortment to me, I planted that baby up with a bunch of cool succulents.


I added in some hens and chicks (Sempervivum spp.) that I already had in my garden, that I'd received from Forever and Ever Plants two years ago. One is 'Red Heart' (seen on the lower right in the photo above) and I've lost the tag for the orangey one.


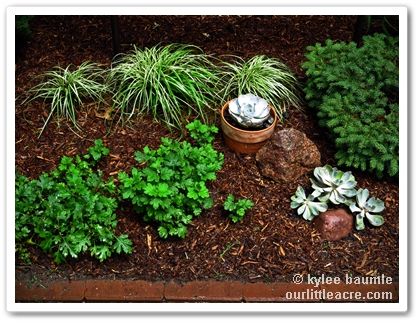
I also used some of the succulents from Costa Farms in the ground, below the planter, as a tie-in.  Since there are some hardy mums growing here too, I've made sure that the soil drains well, because mums won't survive our cold, wet winters here if I don't amend the native clay soil.  Succulents should do just fine.


It's been a couple of weeks now and we've had a few heavy rains, but the drainage holes in the bottom of the planters allow for excess water to drain away and everything looks just as good or better than it did the day I planted it.  I think this planter will be filled with succulents every year now.  When the danger of frost arrives later this year, I'll pot up the tender succulents and put them in the greenhouse for the winter.

 I just love how this looks!


You can find out how we constructed the planter in my original post, "A Different Angle on Vertical Gardening."

_________________________________
Thank you to Garden Media Group for arranging to have the succulents sent from Costa Farms.  Thank you, Costa Farms, for your generosity and help with this project!

Thursday, May 8, 2014

Garden2Blog 2014: Return to Little Rock!


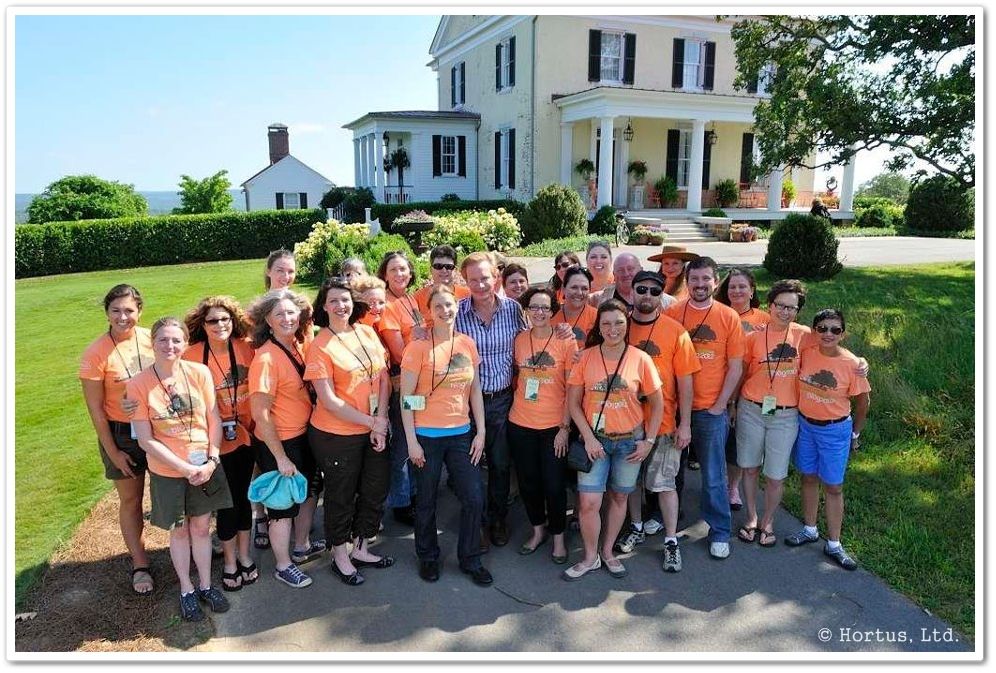
Boy, do I feel blessed.  Or lucky.  Or both.  In 2011, I got to visit someone who became one of my favorite people, who lives in a house on a property that most of us just dream about.  It was the very first Garden2Blog, held at P. Allen Smith's Moss Mountain Farm just outside Little Rock, Arkansas.

Garden2Blog 2011
Twenty (give or take) garden bloggers from around the country spent two days touring private gardens and whooping it up at Allen's farm, all the while learning great stuff about plants and gardening and garden products.  We garden bloggers enjoyed each others' company too, because you know when that many people who enjoy the same thing get together, all kinds of shenanigans are sure to happen.  Some people call it networking.  Whatevs.

Then the next year came along and lo and behold, I got to go again!  About half the bloggers in 2012 had been there the year before and half of them were first-time attendees.  Just when I thought it couldn't be as fun as it was the first time, it was even more so.  And this time we didn't have a tornado breathing down our necks.  We had the best time.  Again.

Garden2Blog 2012   

I was pretty sure I'd had all the fun I was going to get to have at Moss Mountain Farm those two years, but guess what?  I got invited back this year!  In about ten days, I'll be heading to Little Rock again and you can bet I'll be cherishing every moment I spend there, because for SURE this will be the last time, I just know it.  And boy am I grateful for what I know will be a third charming time.

The festivities have actually already begun.  Two weeks ago, we were sent a package from one of the event's sponsors - Jobe's Organics - and we were instructed to use the materials to plant a container and video the process.  We got a plastic container, some Jobe's Organic potting soil, some Jobe's Organic fertilizer, and a $10 gift card to either Lowe's or Home Depot to help buy plants for the container.  Mine was from Lowe's, since that's the closer store to me.

Now videos and I are not the best of friends.  You don't really see me in too many videos on this blog or elsewhere, do you?  Some people are good at them and actually love doing them (*waves at Shawna*), but I'm sort of uncomfortable with them.  This one was actually kind of fun though, because I got this idea of showing, not telling.  So without further ado, here's my 1:23 video:


I did it in one take, which is a good thing, because I would have hated to have to put those plants back in their pots and the potting soil back in the bag and do it all again.


Some potting tips:

  • Make sure your pot has a hole for drainage in the bottom.  I had Romie drill one in the bottom of this pot because it didn't already have one.  You can use a container with no drainage hole, but you have to be really careful about overwatering if you do that.
  • This potting soil didn't already have fertilizer added to it, so I put the proper amount in it (according to package directions) before adding the plants.
  • The old formula of Thriller + Filler + Spiller still works well.  I used Juncus grass as my thriller (something tall), Dahlia 'Pooh' as my filler (medium height), and Nemesia Sunsatia® Lemon as my spiller (something to spill out over the side).  All three plants like pretty much the same light and moisture, so watering will be easy to manage.
  • Because containers dry out faster than in-ground plantings, keep an eye on them, especially during hot and dry weather.  Don't forget that wind can dry out plantings faster, too.  And when you water, do it thoroughly, until the water runs out the bottom.  Let the top inch or so dry out before watering again. Most plants don't like to be sopping wet all the time.
  • Since you're watering the containers often and water runs out, the fertilizer may need to be replaced every so often, depending on what kind you use.  Some potting soils have extended release fertilizers but the Jobe's I used is organic, unlike those other ones that last for three months or so.  Organic is good.
  • If any of your plants start looking sad as the season draws to an end, take those out and replace them with something new that goes with your theme. By that time, the garden centers may have some good deals on some suitable replacement plants, and you'll have a whole new look to your container!

I mentioned a theme, didn't I?  My theme for my container in the video was to plant something for the hummingbirds.  They're drawn to red, which the dahlia provides and I added a hummingbird feeder in red and yellow colors that echo the flowers.  We'll see if the hummers find it!

https://www.facebook.com/Garden2Blog

__________________________
As I said, the planter, soil, fertilizer, and a $10 Lowe's gift card were provided by Jobe's Organics and the container video project was part of the P. Allen Smith Garden2Blog 2014 experience.  I paid the amount over $10 needed to buy the plants and the hummingbird feeder.


Monday, July 8, 2013

A Different Angle on Vertical Gardening


On my recent trip to San Francisco for the Garden Bloggers Fling, I saw a piece of vertical gardening artwork for sale in the Ruth Bancroft Garden.  It was a whole lot out of my price range at $4000, but it gave me an idea for something I could do in my own garden at a fraction of the cost.

Using gutters for gardening isn't new and I've often thought about doing one here.  I didn't know exactly where I'd put one, nor how I would construct it, but as we all do, I stored ideas away in the back of my mind and finally, it all came together.

The theme for this month's Lowe's Creative Ideas project was vertical gardening and here's my take on it - using gutters!


Vertical Trough Garden

Materials


The first thing we did was to have the pipes and the gutter cut in half while we were still at Lowe's, and special thanks to Chris, the plumbing department manager at the Findlay Lowe's store, for so cheerfully doing this!  That made it easier for us to get things home in our vehicle.

Construction

Figuring out the logistics of this was a little difficult, because I had a vision in my head, and knew what needed to happen to get things to come out the way I was seeing it, but executing it was another matter.  Friend Julie Kroske spent the day with us and provided valuable input on the project, as well as being a calming influence when frustrations ran high. And three heads are better than two!

Existing plantings and a window determined the length of the trough garden.  The longest piece of gutter was cut to a length of 42" and this was the bottom one of the three pieces.  The next higher gutter piece measured  36" long and the third and topmost piece was 24" long. After cutting these to the proper length, we put the end caps on.


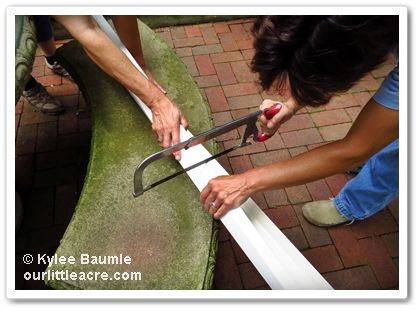
We cut the PVC pipes into lengths of  56", 49" and 15".  A PVC cutter makes short work of that task and luckily Romie had purchased one a few years ago when he had to do some plumbing. Two ¾-inch holes were then drilled into the bottom of the bottom gutter piece, four inches from each end, for the PVC pipe "legs." 


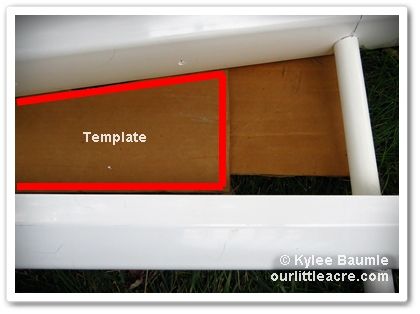
The tricky part came in when it was time to drill the holes in the top two gutters.  These are angled and we wanted the angle to be the same degree off parallel on both of them, so I cut a template out of cardboard that matched the angle of the middle gutter.

I'm sure there's an easier way to do this part, but this worked for me.

I then placed the bottom straight edge of the template an equal distance from the top edge of the bottom gutter and matched up the angle for placement of the top gutter.  This then dictated where the holes would be drilled for the top and middle gutters.  It worked out to be 7" from each end of the middle piece, and the top gutter had holes drilled at 7½" from the left end and 6" from the right end.

Smaller holes were then drilled in the bottom for drainage.


Now it was time to put it all together.  To keep the gutters from sliding up and down on the PVC pipe and securely where they needed to be, we cut the seven ¾-inch couplings in two across the middle so that we ended up with 14 of equal size. These were then placed on the PVC pipe above and below where they went through the gutters.


These were not made to slide all the way down a pipe - only on the end - so they were super tight.  This was a good thing when it came to anchoring the gutters for this project, but it made it difficult to get them to the spot on the pipe where we needed them to be.  So Romie used an adjustable wrench, holding tightly onto the coupling and he hammered the wrench until the coupling was in the proper place.  Julie and I secured the pipe so that it stayed in place while he hammered.

I forgot to take a photo of the placement of the "T".  This was used at the bottom of the short piece of pipe, inside the bottom gutter.  It was orientated so that the bottom of the T was perpendicular to the sides of the gutter.  Romie then secured it in two places with deck screws that we already had here from another project.  This helped minimize torquing of the gutters.

Now it was time to paint!

Photo by Julie Kroske

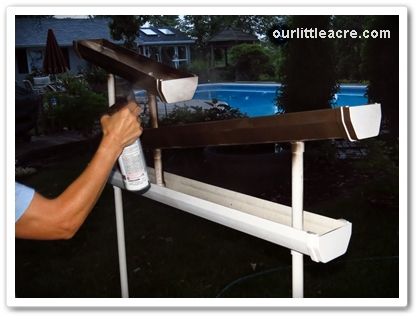
I used Rust-oleum Universal spray paint in Hammered Brown.  This can be used on plastic and it gives whatever you paint the appearance of being made of metal (if you don't inspect it too closely).  I'd wanted to make this project out of metal to begin with, but we couldn't find appropriate metal pipe or gutters at Lowe's for the three planter parts. The vinyl worked well though.


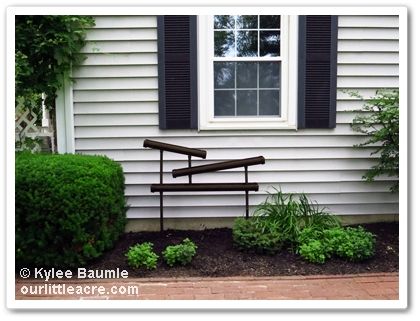
Once the paint was dry, I used our post hole digger to dig holes for the legs, which ended up being in the ground about 15 inches, give or take.  We used some scrap steel rods from Romie's work and drove those into the ground first, then slipped the legs of the planter over them.  You wouldn't need to do that - you could just put the pipe directly into the ground - but I like the idea of being able to lift the planter off and storing it inside for winter.

In the ground, ready to plant!

Time for planting!  I used some plants grown by the Berry Family of Nurseries - Variegated Lilyturf (Liriope muscari 'Variegata') and English Ivy (Hedera helix 'Natasha') - as well as Proven Winners Supertunia® Red petunias.  I also used some white vinca (Catharanthus roseus).  Then, since it's July and we just celebrated our nation's birthday, I added some blue glass balls that are supposed to be watering aids, but I use them as accents in the garden and in containers.

Voila!


For more Lowe's Creative Ideas for your home and garden, visit their website.  And here's the bloggers' page, where you can see what other Lowe's Creative Ideas team members are up to:

The Lowe’s Creative Ideas Creator and Influencers Blogger Network

Very happy to see my May project, "Dress Up a Dry Bed," as one of the current featured projects!


___________________________
Lowe's Home Improvement provided me with gift cards for the purpose of purchasing the materials needed to complete this project.The total cost, including plants, was approximately $85.00.


Friday, June 28, 2013

Lowe's Creative Ideas: Making Watering Easier


Our Little Acre is...well...an acre, but the configuration of that acre is such that our property is somewhat narrow and deep.  The lion's share of our gardens are located at the back of the yard and the spigots for hoses are at the house and at the pool house.  That means we have to drag hoses to and from the back gardens and that is, plain and simple, a pain in the behind.

The theme for this month's Lowe's Creative Ideas project is irrigation, so we took this opportunity to remedy our watering issues.  After the last three summers of being hot and dry, we took on this project with great enthusiasm.  Last summer's drought just about did us (and the gardens) in.

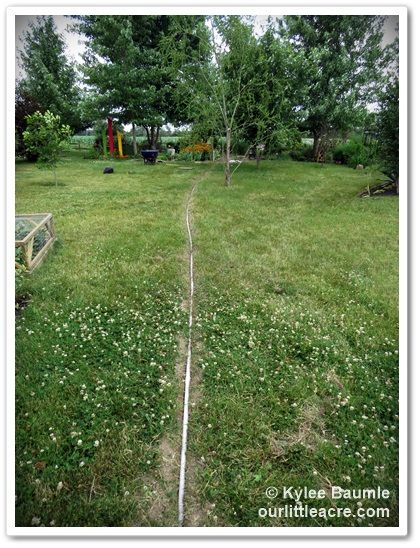
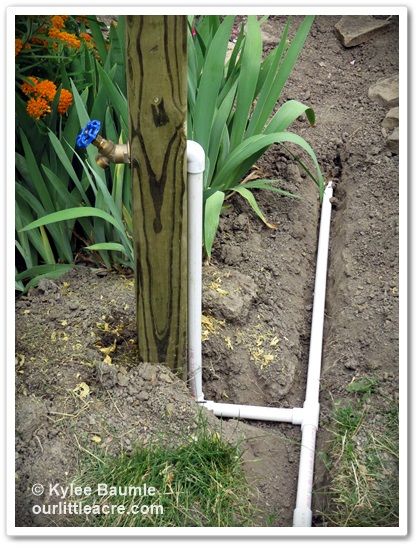
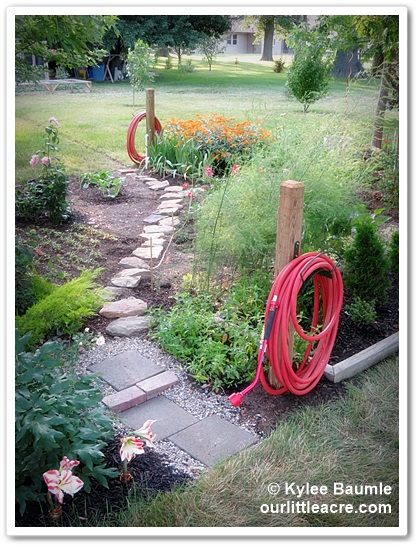
Without getting into sophisticated irrigation systems, which would be complicated in the case of our crazily-configured gardens, our solution was to run PVC pipe from the spigot on the pool house to newly-installed spigots at the chicken coop and all the way out to the garden at the back, where there would be two more spigots - one on the west side and one on the east side.  That way we didn't have to drag a hose across the garden itself.


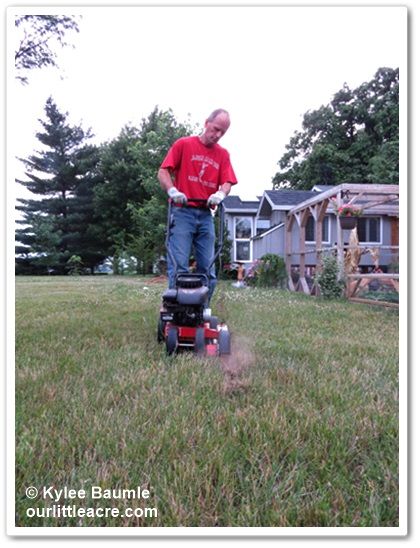
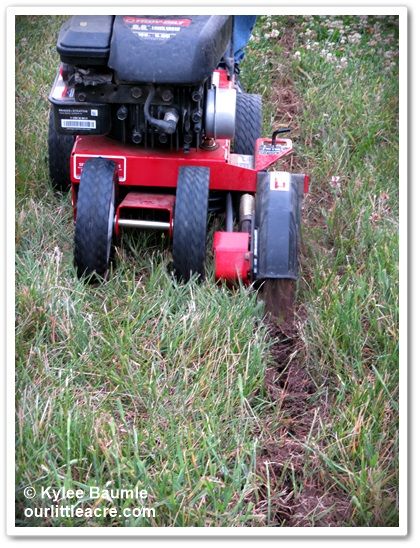
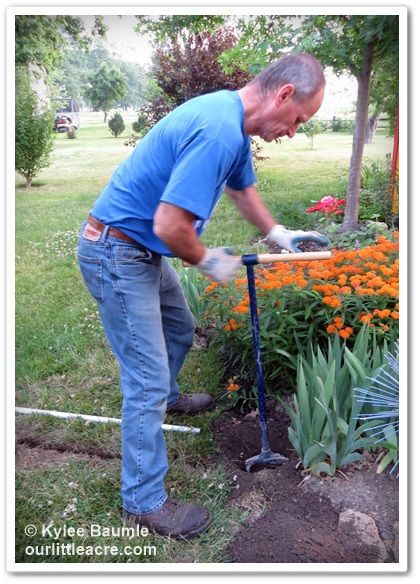
Romie used our Troy-Bilt edger to cut a shallow trench for the PVC pipe and I followed and deepened it with the Cobrahead tool, which shows yet another great use for it besides weeding.


Since we have to blow out the water lines for the pool every fall in preparation for winter, that's what we'll have to do with these too, so they don't freeze and crack.  They're about 4-5 inches deep - not the 30-36" depth needed to be below the frost line.


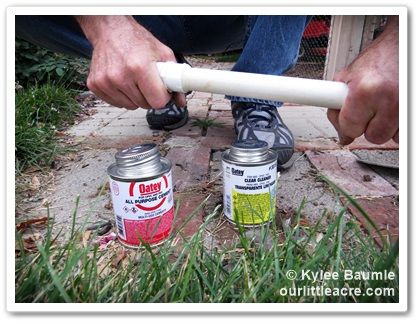
With an assortment of Ts and elbows and straight  ¾-inch PVC pipe, Romie ran it where he needed it, using cleaner and adhesive to connect them all together.


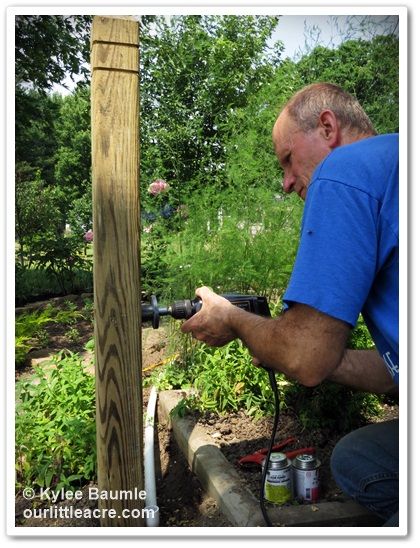
e used treated 4x4 posts for mounting the spigots, and drilled holes through the posts for the pipe so it didn't stick out from the posts so much.  That also stabilized the spigots.


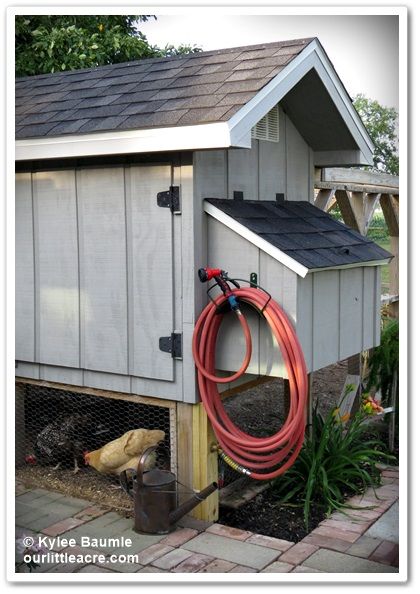
We attached heavy duty hose holders to store our Dramm hoses at the spigots.  The project was easily completed over two-and-a-half days and probably could have been done in even less time, but with temperatures in the mid-90s and high humidity, we had to take a lot of breaks.

I started watering with our new system immediately and all went well, with no leaks!  I'm so glad to not have to drag the hoses all the way back there to water the gardens and it's nice to have a spigot right there at the back of the greenhouse by the chicken coop, too.


Check out other Lowe's Creative Ideas for your home and garden here.  And for more blogger's projects and ideas, visit the Lowe's Creative Ideas Blogger Network page.


______________________
As a Lowe's Creative Ideas team member, I am provided with Lowe's gift cards to cover the cost of myprojects.  The Troy-Bilt edger was provided to me last year free of charge as part of my participation as a Saturday 6 team member.  Dramm provided the hoses and watering nozzles and wands.


Tuesday, January 29, 2013

Staghorn Fern String Planter - DIY


String gardens are popping up all over Pinterest these days. The concept is pretty simple, really.  It's a hanging container with plants in it!  But what sets a string garden apart is that the container used for planting isn't an ordinary container and they're usually hung in groups.

Most of the string gardens I've seen are made with Kokedama (moss balls) or grapevine spheres. All sorts of plants are planted in them, even small trees. Trees look especially stunning because they're usually hung low and appear to be suspended in mid-air if the "string" used is nylon fishing line. They can be a bit tricky though, because they're top-heavy, so proper balance and support is important.

I've wanted to make a string planter of my own, and I had a number of grapevine spheres that I've used as decorator items in my home for years. So I took one of those and in less than 30 minutes, I planted it up and hung it.  Though mine isn't made using kokedama, the effect is pretty much the same and it really couldn't be easier.


DIY String Planter


Materials:

  • hollow grapevine sphere
  • sheet moss
  • potting soil
  • scissors
  • 25-lb. strength nylon fishing line
  • plant of your choice


First, cut an opening in the grapevine sphere, large enough that you can fit the root ball of the plant inside it.


Next, line the inside with sheet moss, keeping the greener side facing the outside of the sphere, because it will show through a little bit when you're finished.


Put a small amount of potting soil inside the sphere unless your root ball takes up the entire volume of the sphere.  You should have some space to be filled around the root ball to allow for a bit of growth.

I used a clump of staghorn ferns (Platycerium sp.) that needed to be repotted because they were outgrowing their plastic nursery pot and they fit nicely inside the grapevine sphere.  Once I had the plant potted up, I took lengths of the nylon fishing line and tied them around the top edge of the sphere, making sure they were secure enough to hold the weight of it when suspended.

After soaking the ball and letting it drain, I gathered the "strings" of fishing line at the top and tied a knot at the length I preferred for the sphere to hang from the ceiling - about 30 inches.


After hanging the sphere, I tucked in some sheet moss around the top edges to give it a more finished look.


This staghorn fern has been living in our bathroom for the last three months and it loves the more humid environment there.  I put it in the shower periodically and wet it down, and I'll still be able to do the same thing with this container. I'll have to monitor it more closely since it will dry out more quickly in the grapevine sphere than it did in the plastic pot.


blogger templates | Make Money Online