


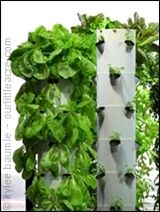


Using gutters for gardening isn't new and I've often thought about doing one here. I didn't know exactly where I'd put one, nor how I would construct it, but as we all do, I stored ideas away in the back of my mind and finally, it all came together.
The theme for this month's Lowe's Creative Ideas project was vertical gardening and here's my take on it - using gutters!
Vertical Trough Garden
Materials
- 1 10-foot section of vinyl rain gutter
- 6 4½-inch vinyl gutter end caps
- 2 10-foot ¾-inch PVC pipes
- 7 ¾-inch PVC couplings
- 1 ¾-inch PVC tee
- 1 12-oz. can Rust-oleum Universal Hammered Spray Paint (I used Brown)
- A couple of deck screws (we had these on hand)
- Potting soil
- Plants
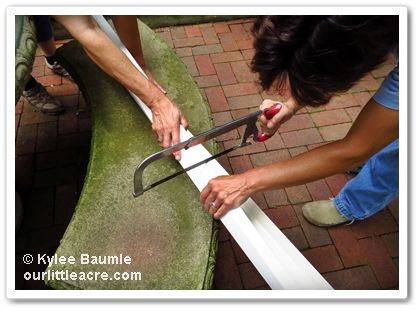
The first thing we did was to have the pipes and the gutter cut in half while we were still at Lowe's, and special thanks to Chris, the plumbing department manager at the Findlay Lowe's store, for so cheerfully doing this! That made it easier for us to get things home in our vehicle.
Construction
Figuring out the logistics of this was a little difficult, because I had a vision in my head, and knew what needed to happen to get things to come out the way I was seeing it, but executing it was another matter. Friend Julie Kroske spent the day with us and provided valuable input on the project, as well as being a calming influence when frustrations ran high. And three heads are better than two!
Existing plantings and a window determined the length of the trough garden. The longest piece of gutter was cut to a length of 42" and this was the bottom one of the three pieces. The next higher gutter piece measured 36" long and the third and topmost piece was 24" long. After cutting these to the proper length, we put the end caps on.
We cut the PVC pipes into lengths of 56", 49" and 15". A PVC cutter makes short work of that task and luckily Romie had purchased one a few years ago when he had to do some plumbing. Two ¾-inch holes were then drilled into the bottom of the bottom gutter piece, four inches from each end, for the PVC pipe "legs."

The tricky part came in when it was time to drill the holes in the top two gutters. These are angled and we wanted the angle to be the same degree off parallel on both of them, so I cut a template out of cardboard that matched the angle of the middle gutter.
 |
| I'm sure there's an easier way to do this part, but this worked for me. |
I then placed the bottom straight edge of the template an equal distance from the top edge of the bottom gutter and matched up the angle for placement of the top gutter. This then dictated where the holes would be drilled for the top and middle gutters. It worked out to be 7" from each end of the middle piece, and the top gutter had holes drilled at 7½" from the left end and 6" from the right end.
 |
| Smaller holes were then drilled in the bottom for drainage. |
Now it was time to put it all together. To keep the gutters from sliding up and down on the PVC pipe and securely where they needed to be, we cut the seven ¾-inch couplings in two across the middle so that we ended up with 14 of equal size. These were then placed on the PVC pipe above and below where they went through the gutters.

These were not made to slide all the way down a pipe - only on the end - so they were super tight. This was a good thing when it came to anchoring the gutters for this project, but it made it difficult to get them to the spot on the pipe where we needed them to be. So Romie used an adjustable wrench, holding tightly onto the coupling and he hammered the wrench until the coupling was in the proper place. Julie and I secured the pipe so that it stayed in place while he hammered.
I forgot to take a photo of the placement of the "T". This was used at the bottom of the short piece of pipe, inside the bottom gutter. It was orientated so that the bottom of the T was perpendicular to the sides of the gutter. Romie then secured it in two places with deck screws that we already had here from another project. This helped minimize torquing of the gutters.
Now it was time to paint!
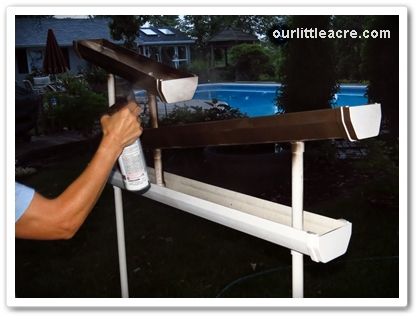 |
| Photo by Julie Kroske |
I used Rust-oleum Universal spray paint in Hammered Brown. This can be used on plastic and it gives whatever you paint the appearance of being made of metal (if you don't inspect it too closely). I'd wanted to make this project out of metal to begin with, but we couldn't find appropriate metal pipe or gutters at Lowe's for the three planter parts. The vinyl worked well though.
Once the paint was dry, I used our post hole digger to dig holes for the legs, which ended up being in the ground about 15 inches, give or take. We used some scrap steel rods from Romie's work and drove those into the ground first, then slipped the legs of the planter over them. You wouldn't need to do that - you could just put the pipe directly into the ground - but I like the idea of being able to lift the planter off and storing it inside for winter.
 |
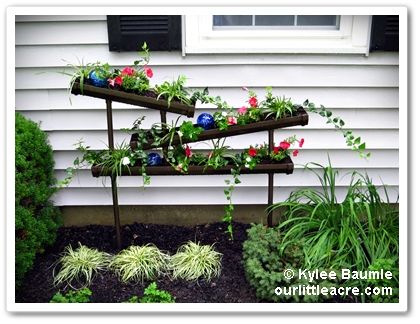
| In the ground, ready to plant! |
Time for planting! I used some plants grown by the Berry Family of Nurseries - Variegated Lilyturf (Liriope muscari 'Variegata') and English Ivy (Hedera helix 'Natasha') - as well as Proven Winners Supertunia® Red petunias. I also used some white vinca (Catharanthus roseus). Then, since it's July and we just celebrated our nation's birthday, I added some blue glass balls that are supposed to be watering aids, but I use them as accents in the garden and in containers.
Voila!

For more Lowe's Creative Ideas for your home and garden, visit their website. And here's the bloggers' page, where you can see what other Lowe's Creative Ideas team members are up to:
The Lowe’s Creative Ideas Creator and Influencers Blogger Network
Very happy to see my May project, "Dress Up a Dry Bed," as one of the current featured projects!

___________________________
Lowe's Home Improvement provided me with gift cards for the purpose of purchasing the materials needed to complete this project.The total cost, including plants, was approximately $85.00.


 "Bejeweled"


4 comments:
Kylee, I love it! Such a super cute project, and I love the end result. You are too creative! (I also loved all of the garden art we saw in San Francisco, but wow--definitely out of my price range, too!) Thanks for sharing!
Hi, Kylee. Your Vertical Trough Garden looks so cool!
Great for ornamentals...but you should never plant edibles in that thing.
Interesting project. Creating vertical container gardening may not be as complicated as it looks. Thanks for posting.
Post a Comment