
Tuesday, May 30, 2017

Have You Ever? (The Garden Version)


There's a game that most of us have played at some point or another in our lives, most probably our younger lives. It's called, "Have You Ever?" and it's a way to find out things about your friends that you might not have known before. If they tell the truth, that is.

For example, you might ask something like, "Have you ever smoked a cigarette in your high school during school hours?" or "Have you ever eaten a booger?" You know, stuff like that.

That could be a fun game to play in the garden, too. For your entertainment pleasure, file these questions away for your next get-together with your garden buddies.

Have You Ever...

  • ...nurtured a weed, thinking it was a flower?
  • ...grown a plant on the Invasive Species List?
  • ...planted a fragrant plant in your garden for the sole purpose of rubbing your hands on it and smelling them once in a while?
Helichrysum italicum is commonly known as curry plant, although it's
not edible. It just smells like curry powder. I plant this one just to rub its leaves.

  • ...used your bypass pruners to dig a hole?
  • ...planted a full sun plant where it got shade for most of the day, thinking a couple of hours of direct sun would be enough, only to find out it wasn't?
  • ...planted a tree too close to your house?
  • ...killed a plant that everyone else you know can grow without even trying? Multiple times?

Johnny jump-ups hate me.

  • ...moved the same plant more than twice?
  • ...temporarily hidden plant purchases behind or under shrubs so your significant other wouldn't notice that you'd bought more plants?
  • ...bought way more seeds than you could ever plant in a lifetime?
  • ...helped yourself to seed pods from the hotel's landscaping while on vacation?
  • ...felt guilty for thinning seedlings and sorry for the ones you pulled out?

You get the idea. We all break the rules now and then, because gardening rules beg to be broken, even if we don't break them on purpose.

By the way, yes, "I have ever" done ALL of the above. I'll bet you could add a few questions of your own for this game. C'mon... fess up in the comments! 🙃


Sunday, May 28, 2017

WEEKEND WISDOM: A "Tendon"cy for Uniqueness


A few years ago, I decided to do a fun bloggy thing in that I would share quirky and interesting information I came across while looking for other things. It may or may not have anything to do with gardening. I called this feature "Weekend Wisdom." I got distracted (a normal occurrence in my life) and I didn't do this on a very regular basis. Now it's the weekend and I just found something I want to tell you about.

Photo credit: Unknown
The human body is an amazing thing and I'm always thrilled to learn new and wonderful things about it that I didn't know before. The untapped potential alone for new and wonderful things is enough to make my mind explode. Here's the latest...

It seems that there is yet another thing that some of us have and some of us don't. There are supertasters - those people who have taste receptors that other people are missing. There are supersniffers too. (Lucky me, I'm both.) And now, it seems that some of us are missing some other body parts.

In your forearm, there is (or isn't) a particular muscle/tendon - the Palmarus longus. You can see if you have it or don't have it by touching you thumb to your pinky finger and then flexing your wrist. If you see a cord of tissue sticking up, that's your Palmarus longus. If the inside of your forearm remains pretty smooth and flat, you're in the approximately 15% of the population that doesn't have it.

I've got it...


My husband does not.

I wonder if either of our two girls are missing theirs. It can be missing on one arm and present on the other, and its general shape can vary as well.

The cool thing about this muscle, which is largely considered to be vestigial, is that it can be used to replace tendons in other parts of the body.


My husband now thinks he's more highly evolved than I am.


Monday, January 30, 2017

Grow Your Own Avocados


Wow, was this ever a throwback to my college days. Back in the days of macrame, yogurt makers, and prayer plants - otherwise known as The Seventies - homes, apartments, and dorm rooms everywhere could be seen with this sitting on their window sills:


It was ever so cool to grow your own avocado plant from a pit found inside one you'd gotten at the grocery store. I did it, my friends did it, and I'm betting some of you did it too. I honestly don't remember if I was successful at actually getting that thing to germinate or not, but I tried.

With the trade situation with Mexico kind of up in the air right now, there's been a lot of talk about what things are likely to go up in price if things change. Avocados and limes are mentioned, as is Corona beer and tequila. I can live without all of them, but each one enjoys popularity here in the U.S.

So, about this growing your own avocado thing . . .  Even if I can manage to get this avocado pit to germinate, it's highly unlikely that I will be able to grow an avocado tree that produces any fruit.

First of all, I don't live where avocados would be happy. They're hardy in USDA Zones 8-11 and I'm in Zone 5b, though I do have a greenhouse and they also make excellent house plants. Secondly, even if I can keep it happy, it can take from 4-13 years for an avocado tree to bear fruit. Some trees never do yield anything.


When I cut open an avocado last week and saw that pit, it took me back (sing it with me now . . . "You fill up my senses, like a night in a forest,") and I kind of wanted to try it again. What did I have to lose?

If you want to try it too, it couldn't be easier. Just clean the avocado pit, let it dry, then poke toothpicks into it to suspend it over a jar of water, with the fat side down. Place it in a warm spot and keep the water level so that its bum is submerged. In about 2-6 weeks, you should see both a root and a stem sprouting. At that point, be sure it's in a well-lit location.

As it grows, once the stem reaches 6-8 inches, prune it in half to induce branching. Once it has started to branch, you can plant it in a container of well-draining potting soil. Be sure to leave the top part of the pit exposed, similar to how you plant an amaryllis bulb.

Don't overwater, but don't let it dry out completely. In the summer, you can put it outside, where it will likely grow faster, but make sure to bring it in once temperatures dip below 45°F.

Far out, man.


Friday, December 9, 2016

When It Snows, Make Snow Cream!


We got our first real snow of the season Sunday night. There was that day a couple of weeks ago where you could see some snowflakes if you looked real hard, but this was a snow that accumulated. We got not quite two inches before it tapered off.


I was sitting on the couch, working on reviewing some of the edits on my new book that will be out in April, THE MONARCH: Saving Our Most-Loved Butterfly, and I had a light bulb moment.

I CAN MAKE SNOW CREAM!

This is something that has taken me over 59 years to experience. That's just crazy. I hadn't even heard of it until a couple of years ago and I just kept forgetting about doing it until tonight. So I jumped up and quickly mixed up the first part, then went outside to gather up some fresh snow.

This was the perfect snow for making Snow Cream!


It couldn't have taken more than five minutes, start to finish. Now I'm not a vanilla ice cream lover, nor do I particularly like homemade ice cream, so this is isn't something I'd crave, but it was sure fun to do and we'll be doing it the next time we have the grandkids here and we've got fresh snow on the ground.

Here's what you do:


SNOW CREAM

1 cup milk
⅓ cup white granulated sugar
1 teaspoon vanilla extract
Pinch of salt

Mix up the ingredients in a mixing bowl using an electric hand mixer. Mix until well blended. Put the bowl with the mixture into the freezer while you go get the ice cream. Gather up about 8 cups of fresh snow.
From this point on, you have to work fast, because it will melt fairly quickly. Add the snow to the mixture in the bowl and whip it. It should be thick enough that you can use an ice cream scoop to form a ball.

Scoop into bowls and add sprinkles, chocolate syrup, or whatever your favorite topping is. Eat and enjoy!

My chocoholic husband added Hershey's Syrup on top.

~~~~~~~~~~~~~~~~~~~~~~~~~~~~~~~~~

*I would give credit to whomever came up with this recipe if I only knew. I looked up several recipes online and they were all the same, with no credit given, so this is undoubtedly older than I am and may be in the "public domain" by now.


Tuesday, December 29, 2015

Roasting, Planting, and Restoring the American Chestnut


I recently wrote about chestnuts for my weekly gardening column in our local newspaper, the Paulding Progress. Chestnuts are a timely topic, what with Christmas and the song, not to mention chestnut season is generally October through December.

The president of the New York chapter of the American Chestnut Foundation, Allen Nichols, somehow saw my column and contacted me, offering to send both American chestnuts for eating and some for planting in the spring. Yes, genuine American chestnuts, not the Chinese ones most people eat these days.

The natural range of the
American chestnut
The American Chestnut Foundation is dedicated to bringing back the American chestnut tree (Castanea dentata), all but wiped out by blight in the early part of the 20th century. A fungal disease was inadvertently introduced to the U.S. from Asia and it proved to be fatal to the American chestnut, which has no natural defense against it.

Efforts to bring back the American chestnut include the creation of a transgenic American chestnut tree at the State University of New York College of Environmental Science and Forestry (SUNY-ESF). By inserting a naturally-occurring gene from wheat (also found in strawberries, barley, oats and bananas), the chestnut tree is resistant to the fungus. (See video at the end of this blog post.) If researchers are successful in gaining permission, it could be the first transgenic tree to be released in the wild.


https://www.washingtonpost.com/lifestyle/food/unearthed-thanks-to-science-we-may-see-the-rebirth-of-the-american-chestnut/2014/11/19/91554356-6b83-11e4-a31c-77759fc1eacc_story.html


My eating chestnuts arrived just before Christmas and yesterday, I set about roasting them. I'd never even seen a chestnut in my life, let alone roasted any, so I consulted Google and found several good guides for the process. I melded several of the guides into one and here's how I did it:


1.  Since chestnuts contain a fair amount of moisture, you need to cut a slit in the outer covering to prevent them from exploding as you heat them up in the oven. Make sure your knife is very sharp, because they're very tough, and make a cut about ⅛-inch deep, through the outer layer, the thin papery layer and just nicking the meat a bit.


All you need to do is to provide a vent, but traditional cuts are in the shape of an X:


2.  After cutting, I soaked the chestnuts in warm water for about half an hour. This helps loosen the outer covering which will later be peeled away.


3.  After soaking, I placed them in baking pan in a 350°F oven for 30 minutes. (Some sources recommend 400°F for 15 minutes.)


4.  When they're ready to take out of the oven, the skins will have peeled back on their own and the meats will be a golden color, glistening slightly.


5.  When I took them out, I put the hot chestnuts in a piece of foil and closed it up. This allows them to steam a bit, which helps with removal of the skins. After a few minutes, they were cool enough to handle.


6.  While many comments were found complaining of the difficulty in shelling the roasted chestnuts, I didn't find it to be difficult at all. Several of them popped right out of the shells on their own. Others came out when I cracked the shells further. The thin papery layer stuck to the shells, so even those weren't a problem. Beginner's luck, maybe?


What did they taste like?

I'm a pretty picky eater. Certain textures, temperatures, and aftertastes have a way of making something unpalatable to me, in addition to the flavor itself. But I often discipline myself to try new things and to eat things that I know are good for me even if I don't particularly like them.

I didn't expect to like roasted chestnuts. The only nuts I really like are pecans and almonds, but I'm even selective about the kind of almonds I'll eat. I like peanut butter (creamy only) but don't like peanuts. Walnuts make my mouth hurt. Cashews are just nasty.

But these chestnuts... YUM! I'm not really sure how to describe the taste to someone who's never had them before, but my first reaction was that their flavor hinted of something I'd eaten before. It took me a bit to identify it, and don't laugh, but to me they tasted like chicken. Not exactly, of course, but that's the taste that came to mind and Romie concurred.

Others have said they remind them of sweet potatoes and I can see that, too. Whatever... they were good. Romie liked them as well, but he'll eat just about anything.


Planting chestnut trees in spring

Photo from United States
Forest Service
When grown from seed, American chestnut trees take about 7-8 years before they produce seed. So why would I want to plant chestnut trees, when I'm not even sure if we'll be living here in 2023?

As Allen Nichols told me, "We are encouraging people to plant pure wild type American chestnuts so they have a tree to cross with our blight resistant transgenic tree, when it is available, which we hope will be in just 3-5 years."

I will plant them because I like being a part of something that is for the greater good and because, like my beloved monarchs, they can use all the help we can give them.


Watch this video on YouTube


Wednesday, December 23, 2015

Life's Too Short Not to Chia


Ch-ch-ch-chia!

Sing it with me now! When you hear that song, which Chia Pet® pops into your head?  Though it seems as if these quirky items have been in existence forever, it's really only been since 1982 that they were widely marketed. That's an entire lifetime for my younger daughter, so I suppose to her, they HAVE been around forever.

Even so, it took me 33 years before I owned one. Yep, I succumbed to the holiday hype. You've got to admit the commercials are catchy. Tacky too, but that kind of part of their appeal...


Watch Chia Pet commercial on YouTube


The terracotta figures have run the gamut of incarnations:  Ram, Bull, Puppy, Kitten, Teddy Bear, Tree, Bunny, Turtle, Herb Garden, Pig, Frog, Hippo, Guy, Elephant, Kid, Professor, Clown, Cow, Lion Cub, Dinosaur, Elmer Fudd, Taz, Tweety, Mr. T, Shaggy, Scooby-Doo, Homer Simpson, Bart Simpson, Bugs Bunny, Daffy Duck, Shrek, Donkey, Garfield, Cat Grass, Sylvester, Marty, Po, Presidents Obama, Washington, and Lincoln, Sponge Bob, Liberty, Hello Kitty, Santa, Snowman, Romney, Gingrich, Paul, Gnome, Coco Crisp, Willie, Uncle Si, Teenage Mutant Ninja Turtle, Mickey Mouse, Flower Garden (Winnie-the-Pooh with paperwhites), Chef's Garden, Zombies and Minnie Mouse.

Whew.

So which one did I get? Hello Kitty, of course.

I have followed the instructions, first soaking the terracotta Hello Kitty planter for an hour. (I actually soaked it overnight.)


Then I soaked two teaspoons of the included chia seeds in ¼ cup of water - again overnight, though the directions say just an hour. This helps soften the seed coat, enabling germination.


The mixture became a gel-like paste, which made it easier to spread and adhere to the terracotta planter. The mucilaginous paste is inherent and is the seed's way of making sure that it will have enough moisture until it germinates. Once the seed germinates, it will need to get its moisture elsewhere - in this case, by watering daily.


There's a little hole at the top of the planter, which you need to pour water into each day, to make sure the terracotta stays hydrated. This is how the chia will get the moisture it needs for growth.


I put it in a location that gets bright light - in our house, a south window because it's winter and the quality of light here in the north isn't the best in other locations of our house.


In about five days, give or take, I'll see sprouts beginning, and in about two weeks, they should be grown enough that I can clip them and add them to my salads.


Now lest you think this is all nonsense, chia sprouts are GOOD FOR YOU. You can eat them. Chia (Salvia hispanica) is used as a nutritional supplement in its seed form, added to smoothies, either ground or whole. They're rich with omega-3 fatty acids and high in the B vitamins, niacin and thiamine. The sprouts make salads healthier and more interesting.

Don't you want to chia too? Of course you do. Because you're secure in your own gardening skin and you don't take yourself or life too seriously. You want to cross that Chia Pet® off your bucket list. So just do it.

Better hurry though, because Chia Pets are only available in stores during the holidays. If you're lucky, you might get a great deal on one right about now. And while you're at it, you should just pick up a few of them and gift them to the people high on your list. Or low on your list. You decide.

Ch-ch-ch-chia! Because life's too short not to chia.


Sunday, March 22, 2015

Weekend Wisdom: Spring Officially Started Three Weeks Ago


http://calendaronpics.info/tag/first-day-of-spring-2015-clip-art
You thought spring started on Friday, didn't you? Well, you would be right, IF you're talking about spring based on the tilt of the earth on its axis. Astronomically, spring began on Friday, March 20th this year, when the earth was halfway between its extremes of tilt towards and away from the sun.

This is what we've all been taught as soon as we were old enough to understand the seasons. Never mind that it doesn't always occur on the same calendar date; it's usually within a couple of days of each other no matter which year we're talking about.

Some years (most years, if we're honest), that date rolls around on the calendar and we're frustrated because even though it's technically spring, it many times doesn't feel much like it. There's often snow still on the ground and the temperatures are anything but springlike.


The red-winged blackbird is a true harbinger of spring
for us here in Ohio.
But then there are the years when we notice signs that spring just might come a little early. The crocuses emerge from ground that is seemingly frozen solid and birds that take a hike for points south during winter are once again munching at the feeders and advertising that they're on the market for a mate.

So what gives?

It's called meteorologic spring and it began on March 1st. It's not based on the earth's tilt and only a little bit on the calendar for convenience's sake, though it is three months long, just like astronomical spring. Average temperature is the biggest determining factor and it also makes it easier to compare seasonal forecasts and trends for people who depend on the weather for their business or pleasure, such as agriculture (that's us!), travel and tourism, etc.

Though it seems like spring didn't come a bit early this year, there were signs in nature that it was well on its way before it felt like it got here. And I like the idea of celebrating all the goodness that is spring as early as possible.


Wednesday, October 15, 2014

Wordless Wednesday: You Might Be a Gardener If ...


...this happens.


Friday, October 3, 2014

The Big Apple - In My Garden


When we moved to our present home in 1977, my parents bought us two apple trees. Both were 'Red Delicious', a popular cultivar at the time and especially in our area, because of its resistance to cedar-apple rust. We planted them at the back of our property and it wasn't long before both trees were giving us apples in the fall.

Several years ago, the smaller of the two trees began to rot at the base and one day, Romie simply gave it a shove and that was the end of that.


A few years later, it seemed that the remaining tree was going to go the way of the first one, and we planned for a spring removal by planting four new trees around it. (Two 'Honeycrisp', one 'Idared', and one 'Gala'.) There would be plenty of room for the other trees to grow after we removed the ailing one. It had lived a good life for an apple tree and we were ready to move on.

But spring came and the tree leafed out and bloomed profusely so we put off removing it, thinking it had one more good crop in it. That was in 2010 and the tree is still with us, still producing. Part of it did die and we cut that large branch off, leaving a large enough stub for me to use as a pedestal, with the intentions of putting a blooming planter there - something that spilled out over the pot with viney lushness.

Before that happened though, I was walking through Molbak's in Woodinville, Wash., earlier this year and spied these:


Wheels began to turn in my head when I saw that large red apple, but I didn't know if I wanted to spend what it would cost to buy the apple and have it shipped home. I'd have to think about it.

Spring came and I thought about that big red apple again and I wanted it. I called Molbak's and guess what? They were no longer available. In fact, the manufacturer wasn't making them anymore. You snooze, you lose. But of course, that just made me want the apple all the more. I had plans for that big ball of shiny scarlet goodness.

I put out a plea on my Facebook page and as nearly always happens, someone came to my rescue. To make a long story short, my friend Karen Chapman (of Fine Foliage fame) used her landscape designer skills to locate one and before long, a big red apple was residing in our orchard.


Thank you, Karen. That apple makes me smile every time I see it, not only because I like how it looks, but because of how you went above and beyond to make it happen.


Wednesday, May 21, 2014

Get "Happy" at Moss Mountain Farm


There will be more to come about what we did, but for now, let's get happy with the Garden2Blog bunch at P. Allen Smith's Moss Mountain Farm near Little Rock, Arkansas!


Yes, it was that much fun.

Want to win?

Want to win a prize package of gifts from some of the Garden2Blog sponsors?  Just go to Allen's Facebook page, "Like" it, and then leave a comment there saying, "Kylee and Marge sent me."  (Marge is Allen's cat that he rescued seven years ago.)  :-)  Do it by Friday, because that's the day they choose a winner! Good luck!


Garden2Blog Sponsors:


_____________________________________
My transportation, food, and hotel accommodations were provided by Hortus, Ltd. and P. Allen Smith.

Tuesday, March 11, 2014

Join the "Farewell to Winter" Party on Facebook!


We're supposed to get hit with yet another big snowstorm tomorrow here in Northwest Ohio.  They're saying we could get 6-8 inches of new snow, which is on top of the snow we're trying to get rid of.  We've got drifts all over the yard that will be here for a while, simply because they were so high and it's been so cold for so long.

Yep.  This is what my garden looks like right now.

Today, we were well into the 50s and yesterday was pretty nice too.  The maple sap was running well and there was some snow melt, but with another storm poised to smack us in the face, it can be discouraging. So I decided to "turn my frown upside down."  I believe in the power of positive thinking and have always been an optimist, for the most part.

I decided today that I was going to throw a "Farewell to Winter" party on Facebook on Wednesday, right in the middle of the snowstorm.  Why not celebrate what might be the last big snow of the season?  Why...we might not get another one like this for MONTHS!

If you can't beat 'em, join 'em.  Right?

175 people have already said they're going. So why don't YOU join us for the party? Though it officially doesn't begin until Wednesday (that's about half an hour from now, according to my clock), unofficially it began several hours ago.  We're already having fun showing off blooms and flip-flop feet and yummy desserts.

WHAT:  Farewell to Winter Party
WHEN:  Wednesday, March 12, 2014
WHERE:  Facebook
WHY:  To give Mr. Snow and Old Man Winter a send-off party.  Buh-bye!

There will be some giveaways throughout the day tomorrow - seeds, a garden book or two, a Starbucks gift card, and whatever else I can find around here to share.

http://www.cabintiger.com/


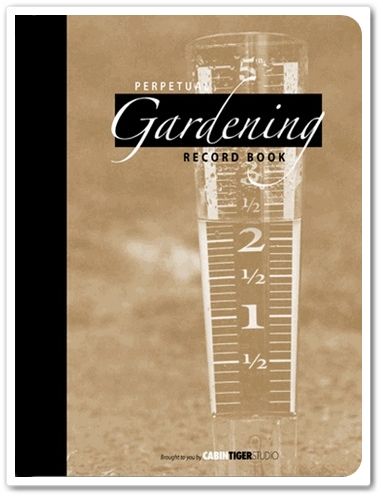
While we were getting warmed up tonight for tomorrow's party, I got a message from Lauren Graves at Cabin Tiger Studio, saying she'd like to give away one of her awesome Perpetual Gardening Record Books to one of tomorrow's party-goers!  Wasn't that nice of her?


And then Angela Treadwell-Palmer from Plants Nouveau offered to give away one of their Aloe x humilis Spineless Hedgehog™ plants! Who wouldn't love a gorgeous, easy plant like that?  Thank you, Angie!


Aloe x humilis Spineless Hedgehog™
http://www.amazon.com/gp/product/1604693320/ref=as_li_ss_tl?ie=UTF8&camp=1789&creative=390957&creativeASIN=1604693320&linkCode=as2&tag=theliteraryworld
Evelyn's new book!

And then...Evelyn Hadden (garden author, who just joined Garden Rant) messaged me and said she'd like to offer one of the party peeps a signed copy of their choice of one of her titles:


Such a nice thing for each of these people to do, without even being asked.

I hope you'll join in on the fun, and that's what it's meant to be - a place to rejoice that spring is almost here.  So no grumbling about the weather, no matter HOW much snow you get.

I, for one, intend to make a snowman tomorrow.  There will be pictures posted during the party.  And it doesn't matter if you live where it's warm either.  We still want you to come and spread some sunshine at the party, please.  We like to hear about what we've got to look forward to.

Let's party!  Bring a friend!

Soon, my garden will look like this.  :-)


Wednesday, October 9, 2013

Wordless Wednesday: Garden Play


This blog post contains a short video.  If you are a subscriber via email, the video may not appear in your message.  Click on the title of the blog post ("Wordless Wednesday: Garden Play") to view it at www.ourlittleacre.com.


 Garden Play

______________________________________
The Playmobil set was a free gift from Lechuza for visiting their booth at the IGC Show in Chicago.

Monday, July 29, 2013

Rooftop Gardens for the Everyday Gardener


No effort required.


Pluggers at GoComics.com.

Friday, May 17, 2013

One Flower's Point of View


In light of yesterday's post, this strip from The Other Coast by Adrian Raeside presents an interesting point of view...

(Click to enlarge)


Sunday, November 27, 2011

Grow Your Own Mushrooms!


Either you love mushrooms or you don't like them at all, it seems. I happen to love them, although I'm picky about the kind. I don't care for morels, which grow in the woods around here. I like the common white button ones, in both their raw form or fried. Yum!

Did you know?
The common white button mushroom is
an immature portobello mushroom.


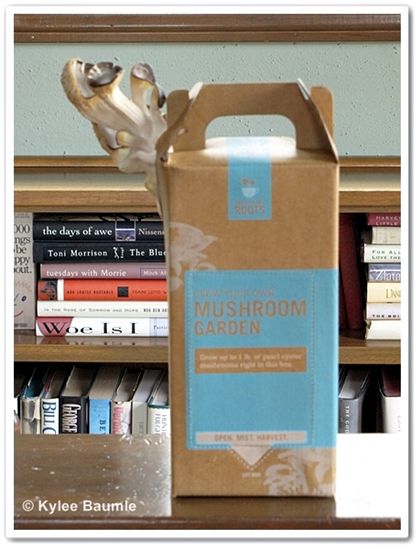
I was cruising the 'net one day last spring and came upon a website that offered a kit that lets you grow your own Pearl Oyster mushrooms. Put together by the folks at Back to the Roots, the kit consists of a block of recycled coffee grounds infused with mushroom spawn (seed). It's enclosed by plastic and housed by a cardboard box.

To start the growing process, you soak the block in water, then put it back into the cardboard box. Remove the perforated rectangular area on the side of the box, cut an X into the plastic, then mist it twice a day. Within 10 days, there be mushrooms!

I was skeptical. These things don't really work that easily, do they? Well, let me tell you what happened when I ordered one and tried it.

When the package arrived, I was getting ready to leave on a trip. I opened the shipping box and took out the mushroom kit. I set it aside in another room, to deal with when I returned home. A few weeks later, I brought the kit out. Imagine my surprise when I saw this:

Without me doing a thing, the mushrooms had already started growing
out the top of the unopened box!

Those were dried out, so I cut them off and proceeded to follow the instructions for growing. But not a single mushroom grew.  I contacted the company to see what I might have done wrong and they were wonderful. They offered to send a replacement kit to me at no charge because they wanted me to try again and experience growing my own mushrooms successfully. (They do have a 100% satisfaction guarantee.)

The second kit arrived and once again, I followed the instructions and I GOT 'SHROOMS! They grew very quickly, even though I actually missed a day or two misting them. I cut them off, coated them in flour and fried them in butter. Both Romie and I liked them.


A neat thing about this kit is that once you've grown them from one side of the block, you can turn it over, slit the other side and grow some more, which I did. The kit costs $19.95 (includes a small mister), which might seem expensive, but the experience of growing them was really fun and each block has the potential of growing 1½ pounds of fresh mushrooms. Replacement bags are just $9.99.

I think this would make a fun gift for the holidays, especially for kids, but I had a pretty good time with it myself. For more information and to order, visit Back to the Roots at http://www.backtotheroots.com. The kits are also available at Whole Foods Market.

~~~~~~~~~~~~~~~~~~~~~~~~~~~~~~
UPDATE: Back to the Roots contacted me after I posted this and
is offering a 10% discount to my readers.
Just use the code mushrooms4me10 when placing your order.
And as always, you'll receive free shipping on orders of two or more!
~~~~~~~~~~~~~~~~~~~~~~~~~~~~~~


*I have not been compensated in any way for this blog post. Back to the Roots was not aware that I was going to do a blog post about their product. I purchased the mushroom kit myself and the opinions expressed here are my own, based on my experience.


Wednesday, February 16, 2011

A Night in the Conservatory


I spent the night in the conservatory last night. Someone had asked me back when it was completed if I was going to sleep out there, so I said I would. For one night.


With snow still on the ground and night temperatures below freezing, I wasn't sure how well this was going to go. I hate to be cold. We keep the conservatory at 60°F and if it dips below that, the propane heater kicks on. That's a little chillier than we keep our bedroom, although my husband would love that temperature for sleeping.

I toyed with the idea of taking the little 7" TV out with me, but it was Tuesday night and there wasn't much besides NCIS that I cared to watch anyway. My plan was to work on some writing I needed to do, so I took my computer out with me, and did a little of that. I spent some time on Twitter and I finished reading Still Summer by Jacqueline Mitchard.

Refreshments accompanied me - Diet Mountain Dew and barbecue Lay's. I had to make sure I closed the Lay's bag up really tight when I was done with them, because the humidity out there would ruin them by morning if I didn't. I had my phone by me, in case the boogey man tried to break in.


Around 9:00 PM, the fluorescent lights turned off, as programmed by the timer. That left a very dim 60-watt bulb for light. Every now and then, I'd see something move out of the corner of my eye. In low light like that, everything looks a bit fuzzy and some things are not instantly recognizable. The moving somethings turned out to be a few fungus gnats. Ahhh...just like home.

I wish I could report that some sort of adventure happened, but the night was pretty uneventful. I'd let Lily in to sleep with me, so we snuggled all night on the lawn lounge. At one point, she noticed something outside and I thought maybe the deer were sneaking a snack in the garden, but when I looked, it was just a rabbit, heading into the neighbor's yard.

There was a slight breeze outside, so mostly the only sounds I heard during the night were the five-foot wind chimes, hung just outside the conservatory, in the gazebo. The heater came on periodically, but after awhile, I didn't notice it. The hum of the ceiling fan overhead provided a low-level white noise, perfect for sleeping.


When you're alone and it's quiet and dark, a lot of thinking goes on. Sure, it can be dark and quiet inside your home, but there's something about being in atypical surroundings that changes the subject of your thoughts. Writers know about this. It's why many choose a retreat specifically to write and why many become writers because of it.

Nothing outside of that thought itself was profound in the least. I worried that Lily would wake in the night and dig in the large brugmansia pot to do her business. (She didn't.) I was concerned that the propane heater was putting out carbon monoxide and I would be found in the morning with blue lips with my beloved Lily in my arms. (And then I remembered that the heater was made to be used in homes, too.)

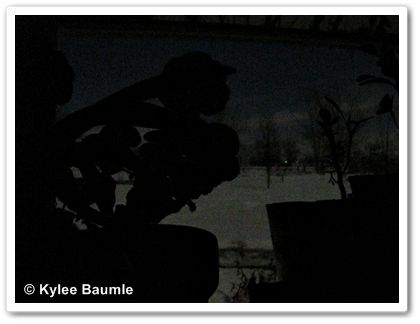
1:40 AM ... Max's Garden by moonlight

I thought about the wasp I'd seen buzzing in one of the windows last week and hoped it slept at night.  There were the spiders, of course, but I quickly put those out of my mind. I hoped to hear the Great Horned Owl, as we do on many nights. (And I did - both male and female, calling to one another!)

1:35 AM ... the moon through the skylight
I caught an earworm while waiting for sleep to come to me. The moon was my night light, three days from being full, and Cat Steven's Moonshadow was my lullaby until I finally fell asleep. Lily never left my lap all night, only changing position when I did.

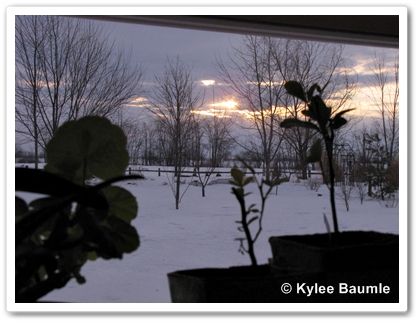
So you're probably wondering why I did this. I can't give you an answer other than to say, "Because I could." I awoke this morning, surrounded by beautiful plants and when the sun rose and shone through the east windows, it was good.

Sunrise


blogger templates | Make Money Online