Monday, April 2, 2018

Maple Syrup Season 2018 and a Taste Test


We didn't do maple syrup last year because Romie and I both went to Mexico to see the monarch butterflies as they overwintered there. That trip hit right smack in the middle of sap collecting, so we decided to just not do it. Oh, how we missed that wonderful homemade maple syrup!

I went to Mexico again this year, once again in the middle of sap collecting, but Romie was home, so he gathered it while I climbed a few mountains. I have to thank our daughter, Kara, for her help after I got home, because after one day to recover and repack, Romie and I both went to Florida for a week to visit my aunt and uncle. It truly takes a family to make this stuff.

This year, though we didn't keep track of how many gallons of sap we collected from our silver maple trees, we ended up with about three quarts of syrup. We would have had a little bit more (maybe a cup or so), had I not burned one small batch to a crisp. I blame Romie for this a teeny tiny bit, because we only had a small amount of sap, and he talked me into boiling it against my better judgement.

When you boil sap, it's always better to do a large batch at one time, because when it gets right down to the last few minutes of boiling, the sap can either turn to sugar or burn. Just. Like. That. With a larger batch, you have more play with it. I'm not sure why that is, but it just is. I didn't forget it, I just needed to check it in a few minutes rather than ten. Lesson learned!

This year, I used a hydrometer part of the time, for testing when the sap was of the right consistency for syrup. You pour the sap into a cylinder and then float the hydrometer in it. It's marked with red lines, and you want your sap to be thick enough for the surface of the sap to fall between the red lines. After a few seasons of doing this, I think it's just as easy to eyeball it.


Every year I make this, there are always a few who say to me, "Please keep some back for me." I cringe when I hear that, because there's no way we could do that for everyone who asks.  We can't even do it for a few, since it takes about 40 gallons of sap to make a gallon of syrup. With that ratio, you can see how much sap it takes to make a small amount and just how time consuming making syrup is. There's a reason it costs so much when you buy it in the store.

I'm kind of like fellow blogger Karen Bertelsen (The Art of Doing Stuff) when it comes to this. When someone asks her for some of her maple syrup when she's done making it, she answers, "Sure!" and then promptly forgets. She does put a couple of small bottles back just in case she needs to reward someone for doing her an extraordinary favor. And I'm not entirely selfish. A few of our bottles make their way to new homes, too.

This year I splurged and purchased special bottles for our maple syrup.
You can buy them here.

Back to this year's syrup making. The season always takes me by surprise. It starts just about the time I've had it with winter and am dreaming of crocus and daffodils and spring peepers. But I don't think I've ever gotten the spiles put into the maples early enough to get absolutely all the sap we could get.

When the maple buds look like this, maple syrup is drawing to a close.

The sap starts running towards the end of winter, when the temperatures are below freezing at night and above freezing during the day.  There are a lot of days like that between the end of January and when the maple trees start budding out. That's when the sap stops flowing, or at least stops being clear (instead of cloudy or dark). This year, we began collecting sap on February 9th and collected the last of it on March 21st.

A taste test

I haven't purchased real maple syrup since we started making our own, but this year, I heard about a brand that has gotten rave reviews and came to light as a result of being on Shark Tank. Parker's Maple Syrup didn't get the deal on the show, but it still helped the company just by being on the show. I bought some because I wanted to see how ours tasted in comparison.

The tin of Parker's arrived last week and when I tasted it, I sort of cringed. It wasn't cheap and I didn't like it. I bought the Grade A Robust, which is essentially the same grade as ours. But ours had a pure and strong maple syrup taste, without the smoky, somewhat burnt taste to it. Parker's had somewhat the same taste as Kirkland brand maple syrup I purchased from Costco a few years ago. I just don't like that scorched taste.

Our maple syrup is on the left.


I may have mentioned before that I'm a supertaster. This means, among other things, that I detect bitterness more than the average person. My tastebuds have receptors that many people's don't. My husband didn't think it tasted burnt at all. Okay, good, honey. You can have the Parker's then, and I'll just stick with ours, if you don't mind.

We also did a taste test with maple syrup made by the brother of our son-in-law. The semi-blind taste test involved five different syrups: Mrs. Butterworth's Syrup (not real maple syrup), ours, the brother's, a local commercial producer's,  and Parker's. Seven people tasted the five syrups and the results were incredibly varied. Three of the seven preferred our syrup over the others, and more than half rated Parker's the worst, even worse than Mrs. Butterworth's.

Do you have a favorite maple syrup brand? I've not found any that I like as much as ours. ❤


Wednesday, February 14, 2018

Niki Jabbour's VEGGIE GARDEN REMIX - Win One!


One of the best things about gardening is that there is an unlimited choice of things to grow. We tend to grow those things that we love, year after year, but it's always fun to try something new, too.

In 2008, I grew a lot of purple veggies. This
is Phaseolus vulgaris 'Purple Queen'.
One year, I decided to grow purple veggies. Researching what vegetables came in purple, I was surprised to find out how many there were. I already knew about eggplant and cabbage, of course, but there was also sweet corn, okra, potatoes, “green” beans, carrots, kohlrabi, lettuce, and several others.

Seeds were purchased and planted, and my purple vegetable garden was born.

When I would talk about my purple veggie garden, the number one question I got was, “Do the purple ones taste the same as the regular colored ones?” And the answer was yes. There was no discernible difference, other than slight variations you would expect from one cultivar to another, independent of color.

Besides being fun to do, I learned something along the way. Those purple beans magically turned green when they were cooked! We called them our magic beans.

For all of you adventurous gardeners, there's a new book that will have you salivating at all the wonderful and quirky choices available for growing. Niki Jabbour, star of growing year round, even though she lives in Nova Scotia, and author of bestselling The Year Round Vegetable Gardener, has written a fun new book – Niki Jabbour's Veggie Garden Remix.


http://amzn.to/2ClZ6Fh


This book is like looking at a catalog of 224 choices of a wide variety of edibles that you may not have thought about growing or may not have even known existed! But better than a plant catalog, Niki shares growing tips, plant origins, how and when to plant and harvest, different ways to use them, and a host of other information.

If your vegetable garden has become a little ho-hum, or you've lost a little enthusiasm for gardening in general, Niki's book can jump start it all again. How can you get bored growing things with names like 'Poona Kheera' (cucumber) and 'Orange Jelly' (turnip). I'm not a turnip fan, but ORANGE JELLY!

A carrot in parentheses!

I can think of no better way to begin this year's garden than flipping through this book and making a list of seeds that will elevate my veggie-growing space to stellar star status. It's like how I used to go through the Sears Christmas catalog the day it came and I made a list of all the toys I wanted. That was such fun, too.

We've been doing the Blue Apron thing for over a year now, and we've been introduced to some foods that we might otherwise not have known about. We found new foods to love, including some you'll find in Niki's book.


Win a copy of Veggie Garden Remix!

http://amzn.to/2CmqhQr

I was sent a complimentary copy of Niki's book and you could win a copy of your own! 

Just comment on this blog post by midnight, EST, on Sunday, February 25, 2018. One random commentor will get a copy of Niki Jabbour's Veggie Garden Remix sent to them from her publisher, Storey Books. Be sure to indicate how you'd like for me to contact you, in case you're the winner.


Good luck!

________________________________


Niki Jabbour is the award-winning author of Niki Jabbours Veggie Garden Remix, The Year-Round Vegetable Gardener, and Groundbreaking Food Gardens. Her work is found in Fine Gardening, Garden Making, Birds & Blooms, Horticulture, and other publications, and she speaks widely on food gardening at events and shows across North America. She is the host and creator of The Weekend Gardener radio show. She lives in Halifax, Nova Scotia, and is online at nikijabbour.com.


Monday, January 30, 2017

Grow Your Own Avocados


Wow, was this ever a throwback to my college days. Back in the days of macrame, yogurt makers, and prayer plants - otherwise known as The Seventies - homes, apartments, and dorm rooms everywhere could be seen with this sitting on their window sills:


It was ever so cool to grow your own avocado plant from a pit found inside one you'd gotten at the grocery store. I did it, my friends did it, and I'm betting some of you did it too. I honestly don't remember if I was successful at actually getting that thing to germinate or not, but I tried.

With the trade situation with Mexico kind of up in the air right now, there's been a lot of talk about what things are likely to go up in price if things change. Avocados and limes are mentioned, as is Corona beer and tequila. I can live without all of them, but each one enjoys popularity here in the U.S.

So, about this growing your own avocado thing . . .  Even if I can manage to get this avocado pit to germinate, it's highly unlikely that I will be able to grow an avocado tree that produces any fruit.

First of all, I don't live where avocados would be happy. They're hardy in USDA Zones 8-11 and I'm in Zone 5b, though I do have a greenhouse and they also make excellent house plants. Secondly, even if I can keep it happy, it can take from 4-13 years for an avocado tree to bear fruit. Some trees never do yield anything.


When I cut open an avocado last week and saw that pit, it took me back (sing it with me now . . . "You fill up my senses, like a night in a forest,") and I kind of wanted to try it again. What did I have to lose?

If you want to try it too, it couldn't be easier. Just clean the avocado pit, let it dry, then poke toothpicks into it to suspend it over a jar of water, with the fat side down. Place it in a warm spot and keep the water level so that its bum is submerged. In about 2-6 weeks, you should see both a root and a stem sprouting. At that point, be sure it's in a well-lit location.

As it grows, once the stem reaches 6-8 inches, prune it in half to induce branching. Once it has started to branch, you can plant it in a container of well-draining potting soil. Be sure to leave the top part of the pit exposed, similar to how you plant an amaryllis bulb.

Don't overwater, but don't let it dry out completely. In the summer, you can put it outside, where it will likely grow faster, but make sure to bring it in once temperatures dip below 45°F.

Far out, man.


Friday, December 9, 2016

When It Snows, Make Snow Cream!


We got our first real snow of the season Sunday night. There was that day a couple of weeks ago where you could see some snowflakes if you looked real hard, but this was a snow that accumulated. We got not quite two inches before it tapered off.


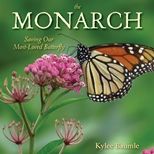
I was sitting on the couch, working on reviewing some of the edits on my new book that will be out in April, THE MONARCH: Saving Our Most-Loved Butterfly, and I had a light bulb moment.

I CAN MAKE SNOW CREAM!

This is something that has taken me over 59 years to experience. That's just crazy. I hadn't even heard of it until a couple of years ago and I just kept forgetting about doing it until tonight. So I jumped up and quickly mixed up the first part, then went outside to gather up some fresh snow.

This was the perfect snow for making Snow Cream!


It couldn't have taken more than five minutes, start to finish. Now I'm not a vanilla ice cream lover, nor do I particularly like homemade ice cream, so this is isn't something I'd crave, but it was sure fun to do and we'll be doing it the next time we have the grandkids here and we've got fresh snow on the ground.

Here's what you do:


SNOW CREAM

1 cup milk
⅓ cup white granulated sugar
1 teaspoon vanilla extract
Pinch of salt

Mix up the ingredients in a mixing bowl using an electric hand mixer. Mix until well blended. Put the bowl with the mixture into the freezer while you go get the ice cream. Gather up about 8 cups of fresh snow.
From this point on, you have to work fast, because it will melt fairly quickly. Add the snow to the mixture in the bowl and whip it. It should be thick enough that you can use an ice cream scoop to form a ball.

Scoop into bowls and add sprinkles, chocolate syrup, or whatever your favorite topping is. Eat and enjoy!

My chocoholic husband added Hershey's Syrup on top.

~~~~~~~~~~~~~~~~~~~~~~~~~~~~~~~~~

*I would give credit to whomever came up with this recipe if I only knew. I looked up several recipes online and they were all the same, with no credit given, so this is undoubtedly older than I am and may be in the "public domain" by now.


Friday, July 8, 2016

Tart Cherry Crumble Recipe - Yum!


This year, we had our first cherry harvest from the two 'Carmine Jewel' dwarf cherry shrubs we have. I'd gotten two seedlings from Gurney's at a regional GWA (Garden Writers Association) meeting in 2011, and after being gnawed to the ground one winter by rabbits, they came back like gangbusters.


I had my first experience at pitting cherries and I can tell you it was more fun than shelling peas. I don't enjoy shelling peas, which is why I no longer grow them, but pitting the cherries was another one of those tasks that you can do without thinking. Or you can think about the pie or cobbler or liqueur that those cherries will become.

There are several ways to pit cherries if you don't have a proper cherry pitter. I opted to use a straw - a stainless steel straw, which I knew would hold up well. I simply put the end of the straw at the stem end and pushed the pit out the other end. Don't wear a white shirt while doing this, although it doesn't seem to cause a permanent stain if you wash it right away.


The harvest yielded 207 cherries, which was about a pint of cherries, weighing ¾ of a pound after pitting. That wasn't quite as many as the recipe I used them in called for, but it was enough. And it was good.


I pretty much followed this recipe found on The Kitchn:


Tart Cherry Crumble


For the cherries:

1 pound tart cherries
2 tablespoons sugar
2 tablespoons flour
2 tablespoons finely chopped crystallized ginger, optional (I didn't use this)
1/4 teaspoon cinnamon
Pinch of salt

For the crumble:

6 tablespoons butter
1 cup flour
⅔ cup sugar
1 teaspoon baking powder
¼ teaspoon salt
1 large egg, beaten well

Position a rack in the center of the oven, and preheat the oven to 375°F.

Spread the cherries in an ungreased 9x9-inch baking dish, deep pie pan, or similar-sized dish. Toss the cherries with the sugar, flour, ginger, cinnamon, and salt. Cut the butter into several pieces and melt over low heat in a small saucepan. Raise the heat slightly after it has melted, and cook, swirling frequently, until the butter has turned nutty brown. Remove from the heat.

In a medium bowl, combine the flour, sugar, baking powder, and salt. Add the beaten egg and use your hands to combine the dry ingredients and egg. As you work the egg into the flour, it will form small moist crumbs. Sprinkle these over the cherries, then drizzle the browned butter over the topping.

Bake for 30 to 35 minutes, or until the top is browned and the cherries are bubbling. Cool for at least 30 minutes before serving. Serve warm or at room temperature with vanilla ice cream or unsweetened whipped cream.

I'd make it again.


Dwarf Sour Cherry 
(Prunus cerasus 'Carmine Jewel')

This is a dwarf shrub-type of tart or sour cherry. It is suitable for growing in Zones 3a to 8b, in sun to part-shade. It prefers neutral to alkaline soil, but is adaptable to most soil types, including heavy clay.

Developed at The University of Saskatchewan (Canada) and introduced in 1999, this black cherry is consistently highly productive, with a high fruit-to-pit ratio.

Field notes on 'Carmine Jewel'

________________________________
*I received these cherry plants as seedlings from Gurney's in 2011, free of charge. I have not received any other compensation for writing about them.


Tuesday, June 28, 2016

It Was an Actual Cherry HARVEST!


Back in 2011, while attending a regional GWA (Garden Writers Association) meeting in Chicago, I received a couple of small seedlings of a dwarf sour cherry shrub - 'Carmine Jewel'. Gurney's supplied them to us as part of the swag that we usually get when we attend such meetings.

I brought them home and planted them back near our apple trees. They didn't grow much the first couple of years and then those pesky wabbits chewed them off at the ground one winter. (Grrr... That's what I get for boasting about never having any rabbit issues.) I was certain they were both goners, but they came back from the roots - like gangbusters!


Last year, we had three blooms on one shrub and ended up with one cherry. I couldn't decide what to make with that cherry, so I simply ate it. 

Did I mention these were sour cherries?


This year, I was taken aback when I saw how profusely both shrubs were blooming and I made plans for pies, cobbler, jelly... Once the cherries started turning red, I netted them so the birds didn't get to them before I did.


In the end, there weren't as many as I'd hoped there would be, but...

CHERRIES, Y'ALL!


I haven't yet decided what I'm going to make (after I pit them...gah), but I think it might be this:


● Tart Cherry Crisp ●

(Recipe from Taste of Home)

________________________________

The 'Carmine Jewel' Dwarf Cherry was bred at the University of Saskatchewan and was introduced to the public in 1999. It is a shrub-type cherry that reaches a maximum height of about 6½ feet and a spread of about 5 feet, making it ideal for limited space gardens. 

Self-pollinating, it is one of the first cherries to ripen in early summer, with stunningly heavy yields in its fifth year, with 20-30 pounds of cherries per shrub not uncommon.

'Carmine Jewel' is is rated for zones 2b-7, making it very hardy. It is a firm cherry with small pits, making it excellent for drying. It has few disease and pest problems, making it a good choice for organic production.


It seems that it's a common error among backyard gardeners to pick these cherries before they're completely ripe. They're nearly black when at their peak and will be quite a bit sweeter if you can be patient. I noticed a few cherries falling off the trees, so I started harvesting them - in error. They will still be fine to eat in recipes, but next year, I'll know to wait a little longer.

___________________________

A tardy thanks to Gurney's for providing these shrubs free of charge at our GWA meeting.
___________________________


Thursday, June 23, 2016

Celebrating National Pollinator Week: Food For Thought


It's no secret the pollinators are in trouble. Oh sure, you see plenty of butterflies, bees, flies, and other insects out there and even bats (yes, they're pollinators), so really, what's the big deal, right?


Consider this:

One out of every three bites of food we eat relies on pollinators.


Still not convinced?

To carry that point further, some plants require specific pollinators in order to get good production of their fruit. (And I use "fruit" in the general definition of whatever edible the plant produces.) Bees are the most well-known of the pollinators, but other insects and birds are more efficient at pollinating certain plants.

Zucchini, anyone?


If you're one of the people who has asked me, "Does it really matter if the monarchs disappear?" I can wholeheartedly answer, "YES."

My philosophy in general is this:  I believe that every living thing on the earth is here because it has a purpose.

In regard to the monarchs, perhaps we can live without them, but it's more complicated than that. The monarchs are in decline because of several factors, not the least of which is that their habitat is disappearing due to urbanization, and to a greater extent, due to the agricultural use of pesticides* that kill milkweed, the only food their babies eat.


If you think that monarchs are the only pollinator that is being affected by the pesticides, think again. They're just more visible and recognizable than most. They're the poster child for the greater problem we humans are causing in the environment.

It's a complicated issue, for sure, but if nothing else, during this, National Pollinator Week, please give these things some consideration. Think before you use pesticides yourself. You may not only be saving the pollinator's meal, you could be helping to save your own.


_________________________________________
* Pesticide is the general term used by the FAO (Food and Agriculture Organization), the USDA and the EPA, which includes, but is not limited to herbicides, fungicides, and insecticides. Read more here.


Sunday, May 8, 2016

2016 - The Year of the Cherry


Several years ago, I received a couple of cherry trees at a garden writer's event. I can't remember the event, and I don't know which kind of cherry trees they are. I planted them and hoped that one day I would have enough cherries to make a pie, even though I don't do pies. If I got cherries, I'd make a pie for my husband, because he loves pies.

Oh, who am I kidding? We've had apple trees for nearly 40 years and he's the one who makes the apple pies. If we get cherries, he'll be the one to make the cherry pie.

The cherry trees didn't get a very good start. One winter a few years ago, we forgot to cage the small trees and the rabbits chewed them right down to the ground. I really thought they'd chewed up our cherry pie dreams. But the trees recovered quite quickly and nicely, even though they're now more cherry shrubs than trees. It was amazing, really.

Last year, we got a cherry. Three blossoms - woo hoo! - but just one cherry. I netted that thing because there was no way the birds were going to get our very first cherry. But in my anxiousness to taste it, I might have picked it too soon. Too soon for a sweet cherry, maybe not too soon for a sour one. So I still don't know if we have sweet or sour cherry trees.

A couple of weeks ago, I walked to the back of the property and was taken aback by those little cherry shrubs.


Hundreds of blossoms! Cherry pies! PIES! More than one. Maybe two pies!


I was an amazing thing. I just stood there and stared at them. And then I ran to the house and got the camera. So. Many. Blossoms.


It can take up to eight years for a cherry tree to produce a fruit crop of any size. It depends on the variety and the climate and growing conditions. In general, cherry trees that are slower to produce fruit will produce for a longer period of time and live longer.

Time will tell as to how many cherries we'll get. You can be sure the entire trees will be netted. And I'll be more patient in picking them this year. But I wish I knew which kind of cherries they were. If any of my garden writer friends remember getting these and can tell me which kind they are, I'd be happy to know. (Thanks to Linda Nitchman, they are identified as 'Carmine Jewel' bush cherries.)

I'm so excited about the prospect of so many cherries, I think I will make the first pie with them. Unless Romie really wants to. I wouldn't want to deny him that privilege, you know.


Wednesday, February 10, 2016

February Lilies, Wine & Chocolate


I just wrote about how much I enjoyed that big bunch of tulips back in January, and then along came FedEx two Saturdays ago with another familiar brown box from Stargazer Barn! I could hardly wait to get this one open to see what was inside.

Lilies this time, and though they were still in bud, I had grown this particular lily in my own garden once upon a time and knew how beautiful they would be. I remember when I bought my bulbs in 2005, 'Starfighter' was advertised to be an improved version of the famous 'Stargazer', undoubtedly the most beloved of all Oriental lilies.

The Carolina sphinx moths (Manduca sexta - the ones whose larvae are hell-
bent on destroying your prize tomatoes) loved my 'Starfighter' lilies as much
as I did. They visited the lilies at dusk when they were in bloom. (2006)


One of the improvements of 'Starfighter' over 'Stargazer' was said to be extended vase life. Now that it's been nearly two weeks since the lilies arrived from Stargazer Barn, I can tell you that the vase life is pretty astounding for a cut flower, especially for one that traveled some 2,500 miles or so to get to my house.

Stargazer Barn ships overnight so your flowers arrive as fresh as possible.


The original 'Stargazer' lily was bred back in 1974 on the very ground where Stargazer Barn is now located. That was a pretty memorable year for me too, as I was 16 for most of it and graduated from high school that spring. (Yep, that's me, grinning and clutching my diploma as we left the gymnasium on graduation day.)

I cut about an inch off the end of the stems of the 'Starfighter' lilies and put them in water in the provided galvanized French-style vase, along with the flower food powder that came with it.

There was also some Bear grass included, if I wanted to jazz up the bouquet a little bit. An informational card showed a couple different ways to use it and I chose to loop mine all fancy-like.

The lilies came wrapped in floral paper and were tied with this red
burlap "ribbon." I know it was included because it matched the lilies, but
it was also pretty much perfect for my kitchen color scheme too. Bonus!

As I said, the flowers were in bud when they arrived, but it didn't take them long before they began to open. As each opened, their intoxicating fragrance got more intense and it reminded me of how wonderful it always is to be walking through the garden in summer and catch a whiff of my own lilies.

Photo from Dick Taylor
These 'Starfighter' lilies are part of the Stargazer White Collection, which includes not only a dozen stems of the lilies, but a bar of that yummy Dick Taylor craft chocolate. This time it was Madagascar, which was dark chocolate with a hint of molasses, orange and raisin. (How do they do that?) This particular variety has won several awards, including being a  2015 International Chocolate World Final Bronze winner.

But that wasn't all! Also included was a bottle of Stargazer Barn's own 2014 Chardonnay. It's also won its own awards, including most recently, a Silver Medal in the 2016 San Francisco Chronicle Wine Competition.

I admit to not knowing a whole lot about wine, other than I know what I like and what I don't. I don't like a dry wine at all. I prefer white and those that are on the fruity, sweet side, but not too sweet. This one was good, and I say "was," because it didn't take too many evenings before it was gone.


This was really a special gift package and with Valentine's Day right around the corner, if you act quickly, you could send this anywhere in the lower 48 in time for it to arrive on Saturday. They don't charge extra for Saturday delivery and like I said, standard delivery is overnight. (No Sunday or Monday deliveries.)

 
Here's a code for Free Delivery: yummy. I'm not sure when that code expires, but I know it's good for this Saturday's delivery if you get your order in quickly. Not only that, the Stargazer White Collection is on sale right now for $79.99.

I counted the number of flower buds in this bouquet and there are 30 all together. They have continually opened up over the course of the last 12 days and only just today, I snipped off two of the earliest to open. There are still a few that are just now opening, which makes for an amazingly long-lasting fresh cut bouquet of American Grown flowers.

The entire first floor of our house smells like summer and the huge blooms are just so gorgeous that I stop to look at them every time I walk by. Thank you, Stargazer Barn, for this beautiful gift.


_________________________
I received the Stargazer White Collection from Stargazer Barn free of charge. No other compensation was given and I'm happy to share these beautiful flowers with you. Perhaps they will be something you might want to send to someone else or enjoy in your own home.

Thursday, October 1, 2015

Have You Seen What Ball® Has in Store This Year? (+ a giveaway)


Gardeners have been busy canning and preserving for the last few months and it's not over yet. Just this week, I pulled my beets for pickling, as I do each summer. It's one of our very favorite goodies from the garden. I've also got some Mexican gherkin cucumbers (they look like miniature watermelons!) that I'll be pickling for the first time this year.

http://www.freshpreserving.com/community/events/can-it-forward
Since 2010, Ball® has been celebrating the bounty of the garden with their annual Can-It-Forward day. Held in August, its intent is to help people with making the most of their garden produce. The Can-It-Forward pages have all kinds of wonderful tips and activities, including downloadable and printable labels for your jars.

Though we've never preserved the majority of what we grow (we eat it and share it with neighbors and family), when we do, Ball jars are what we do it in. We also use Ball® jars for our maple syrup we make in late winter.

http://www.freshpreservingstore.com/ball-heritage-collection-pint-jars-set-of-6/shop/632810/
This year, Ball® sent me some of their products to use and I was of course delighted to get the latest and final edition of the American Heritage Collection Series of jars, commemorating their 100th anniversary.  1913 saw the launch of the first true “Perfect Mason” jar followed in 1914 by the “PERFECTION,” then finally by “IMPROVED” in 1915. This year's jars are purple and follow the previous years' green and blue.

http://www.freshpreservingstore.com/ball-heritage-collection-pint-jars-set-of-6/shop/632810/


Photo by Jenna DeCraene
Also new this year are the Sip & Straw lids, which are pure genius. How many of us have used Ball® jars as drinking glasses? The Sip & Straw lids take it to another level and are just plain fun, for both kids and adults.

You just use regular rings (not included) and screw them over the lids, which do include sturdy reusable straws. They come in blue, red, or purple. You can use them on your regular Ball® jars or you can get jars with handles too.

Photo by Jenna DeCraene

http://www.freshpreservingstore.com/blue-book-guide-to-preserving/shop/633468/

I also received a copy of Ball's handy dandy Blue Book Guide to Preserving. It not only tells you how to do it, it also has over 500 recipes. This 37th edition, which is new this year, includes 75 new recipes.


Want some pretty purple jars of your very own?

If you've never used Ball® jars and for those of you who already do, here's a chance to win a set of six of this year's purple American Heritage Collection jars:

Just leave a comment on this blog post, telling me how you'll use the jars if you win (What will you can? Or will you use them for crafts?), as well as filling out the Rafflecopter form. You'll see bonus entry opportunities when you fill out the form, with a possible total of eight entries:

a Rafflecopter giveaway

The giveaway entry period will run through midnight EDT, Sunday, October 4, 2015. A winner will be randomly chosen by Rafflecopter and notified via email. Good luck!


If you've never checked out all the valuable information on their website, you're in for a treat. Ball® knows canning!

UPDATE: Congratulations to Julie Thompson Adolph! Rafflecopter chose you as the winner! Thank you to all who entered, and happy canning!


___________________________
I received products from Ball®/Jarden Brands for the purpose of review. No other compensation has been given to me and all opinions expressed here are my own. I am an Amazon Affiliate and this blog post may contain affiliate links to Amazon.com.

blogger templates | Make Money Online