Saturday, November 22, 2014

Updated Lowe's Creative Ideas Project: Swing Shelf Planter


Swing Shelf Planter in March 2013
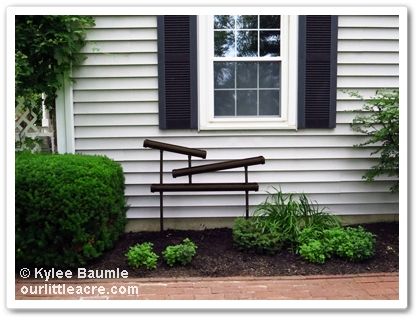
About a year and a half ago, I did a project as a member of Lowe's Creative Ideas Garden Team in which I potted up a trio of herbs in a shelf planter that hung in a window. I designed it and making it and putting it together was a joint effort with my husband. My herbs grew well for several months in that south window, but the day came when I wanted something different.

In the summer, that window can really generate some heat, and I had a few cacti that I thought would work out better. The herbs were constantly thirsty, so I transplanted the herbs to the garden and the cacti to my red pots. They've been living happily there for a little over a year now.


Last month, I spoke at the Ohio Master Gardeners State Meeting at Ohio Wesleyan University in Delaware. My husband and I arrived early with enough time to look through the vendor's area.

'Frizzle Sizzle' at OFA 2013
I'm always attracted to unusual plants - most gardeners are - and though I vowed not to buy any plants while I was there, Groovy Plants Ranch had a couple that I simply couldn't resist. The price was good, too, at just six dollars each.

I'd first seen Albuca spiralis 'Frizzle Sizzle' at OFA in Columbus the summer of 2013. James Greenhouses had several specimens of this curly cutie on display and they were causing a lot of buzz.

This distant cousin of the hyacinth (you'd never know it though) is a bulb that must be grown in well-draining potting soil and allowed to dry out between waterings or the bulb is in danger of rotting. If you live in Zones 8 or warmer, you can grow it outside year round, but for me it has to be grown as a houseplant.

It likes full sun, and though it will grow in part shade, the more sun it gets, the curlier the foliage will be. Around late winter it will shoot up flower stalks that will bloom with yellowish-green flowers that are unremarkable but are said to have a slight vanilla fragrance to them. That's if it's grown outdoors, where it will go dormant in summer.

I wonder what it will do in summer here. I haven't been able to find any information online that tells whether it will lose its foliage in summer when grown as a houseplant. Maybe one of my readers can enlighten me?

Albuca spiralis 'Frizzle Sizzle'

I started to walked away from the vendor area with my plant as I began to prepare myself mentally for my presentation. And then this caught my eye:

 Opuntia cochenillifera f. variegata

It was a variegated prickly pear cactus - without the pricklies. Sometimes called Warm Hand Cactus or Velvet Cactus, it wasn't the lack of spines that fascinated me. It was the fact that it was variegated, because variegated plants in general are one of my weaknesses. If it hadn't been variegated, I'm pretty sure I wouldn't have noticed the plant at all. Ho hum.

Opuntia cochenillifera f. variegata is hardy to Zone 9 and needs the same care as many succulents - minimal water with good drainage and full sun/part shade. It can grow up to 3-4 feet tall, but I'm pretty sure it won't do that for me. If it does, I'll have to find another spot for it other than the swing shelf. ;-)

Four cacti and a 'Frizzle Sizzle'

In case you were wondering, that hairy cactus in the middle is an Old Man's Cactus (Cephalocereus senilis). I've had it for several years now and it's about twice as tall as when I bought it. I learned early on that I had to keep it out of the reach of Simon, one of our inside cats, because he loved to lick it and chew on it. But mostly lick it. I guess he thought it was in need of grooming.

My Old Man's Cactus is sporting a cowlick.


Friday, July 4, 2014

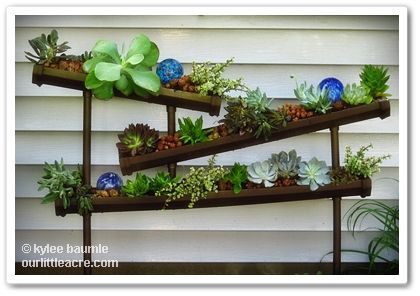
The Gutter Planter Redux - Succulent Style!


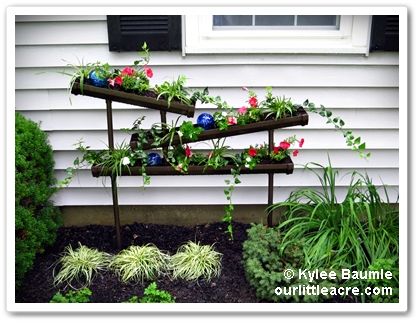
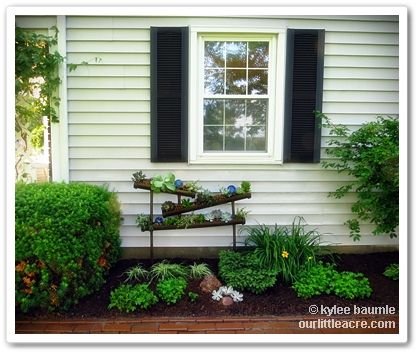
Last year, I enlisted the help of my husband and friend Julie to create a gutter planter for my monthly project as a Lowe's Creative Ideas Garden Team member.  Once it was constructed, I planted it up with an assortment of annuals and perennials and just for fun, threw in a few glass watering balls that had gotten their bottoms broken off.

Angled gutter planter - Summer 2013


As the summer wore on, the planter, which was located on the hot south side of our house, demanded that I pay pretty close attention to keeping it watered.  Because there's not a whole lot of room for potting soil, there isn't a lot of leeway or forgiveness on the watering issue.

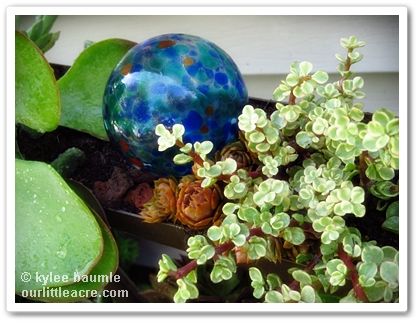
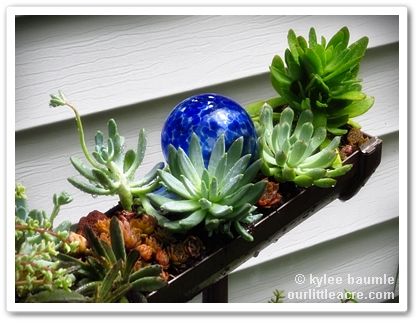
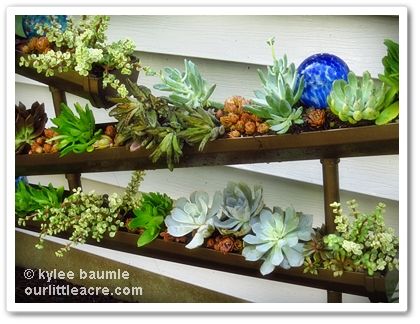
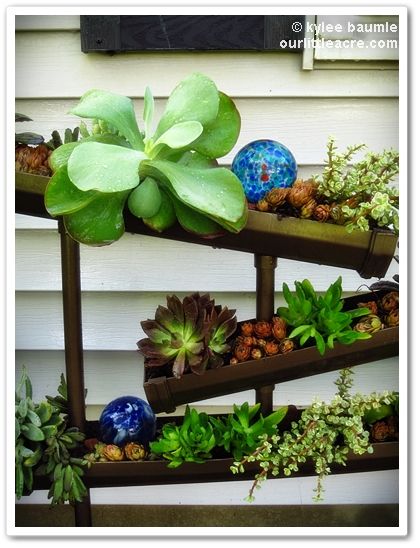
So this year, I decided to try something else. What kind of plants do well in hot, sunny locations that take a laissez-faire attitude when it comes to watering? SUCCULENTS!  So, with the help of Costa Farms, North America's largest houseplant grower and wholesaler, who sent an assortment to me, I planted that baby up with a bunch of cool succulents.


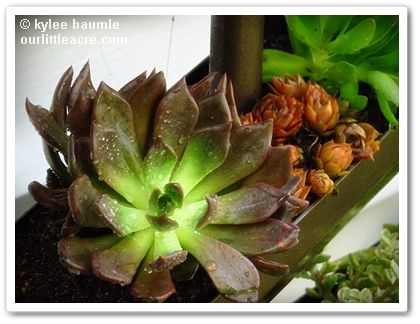
I added in some hens and chicks (Sempervivum spp.) that I already had in my garden, that I'd received from Forever and Ever Plants two years ago. One is 'Red Heart' (seen on the lower right in the photo above) and I've lost the tag for the orangey one.


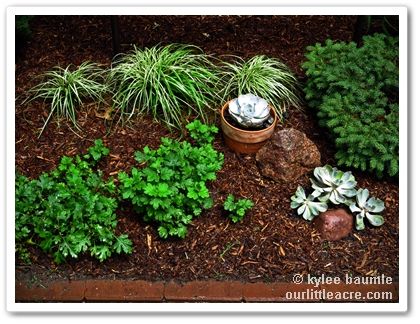
I also used some of the succulents from Costa Farms in the ground, below the planter, as a tie-in.  Since there are some hardy mums growing here too, I've made sure that the soil drains well, because mums won't survive our cold, wet winters here if I don't amend the native clay soil.  Succulents should do just fine.


It's been a couple of weeks now and we've had a few heavy rains, but the drainage holes in the bottom of the planters allow for excess water to drain away and everything looks just as good or better than it did the day I planted it.  I think this planter will be filled with succulents every year now.  When the danger of frost arrives later this year, I'll pot up the tender succulents and put them in the greenhouse for the winter.

 I just love how this looks!


You can find out how we constructed the planter in my original post, "A Different Angle on Vertical Gardening."

_________________________________
Thank you to Garden Media Group for arranging to have the succulents sent from Costa Farms.  Thank you, Costa Farms, for your generosity and help with this project!

Monday, July 8, 2013

A Different Angle on Vertical Gardening


On my recent trip to San Francisco for the Garden Bloggers Fling, I saw a piece of vertical gardening artwork for sale in the Ruth Bancroft Garden.  It was a whole lot out of my price range at $4000, but it gave me an idea for something I could do in my own garden at a fraction of the cost.

Using gutters for gardening isn't new and I've often thought about doing one here.  I didn't know exactly where I'd put one, nor how I would construct it, but as we all do, I stored ideas away in the back of my mind and finally, it all came together.

The theme for this month's Lowe's Creative Ideas project was vertical gardening and here's my take on it - using gutters!


Vertical Trough Garden

Materials


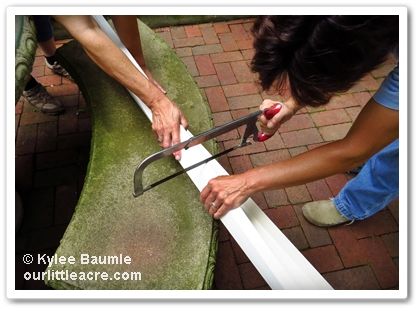
The first thing we did was to have the pipes and the gutter cut in half while we were still at Lowe's, and special thanks to Chris, the plumbing department manager at the Findlay Lowe's store, for so cheerfully doing this!  That made it easier for us to get things home in our vehicle.

Construction

Figuring out the logistics of this was a little difficult, because I had a vision in my head, and knew what needed to happen to get things to come out the way I was seeing it, but executing it was another matter.  Friend Julie Kroske spent the day with us and provided valuable input on the project, as well as being a calming influence when frustrations ran high. And three heads are better than two!

Existing plantings and a window determined the length of the trough garden.  The longest piece of gutter was cut to a length of 42" and this was the bottom one of the three pieces.  The next higher gutter piece measured  36" long and the third and topmost piece was 24" long. After cutting these to the proper length, we put the end caps on.


We cut the PVC pipes into lengths of  56", 49" and 15".  A PVC cutter makes short work of that task and luckily Romie had purchased one a few years ago when he had to do some plumbing. Two ¾-inch holes were then drilled into the bottom of the bottom gutter piece, four inches from each end, for the PVC pipe "legs." 


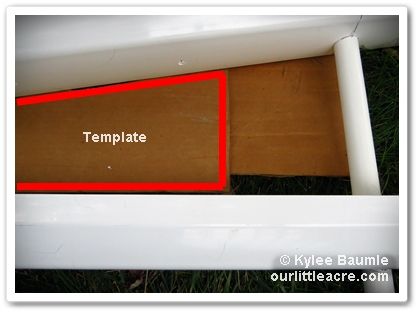
The tricky part came in when it was time to drill the holes in the top two gutters.  These are angled and we wanted the angle to be the same degree off parallel on both of them, so I cut a template out of cardboard that matched the angle of the middle gutter.

I'm sure there's an easier way to do this part, but this worked for me.

I then placed the bottom straight edge of the template an equal distance from the top edge of the bottom gutter and matched up the angle for placement of the top gutter.  This then dictated where the holes would be drilled for the top and middle gutters.  It worked out to be 7" from each end of the middle piece, and the top gutter had holes drilled at 7½" from the left end and 6" from the right end.

Smaller holes were then drilled in the bottom for drainage.


Now it was time to put it all together.  To keep the gutters from sliding up and down on the PVC pipe and securely where they needed to be, we cut the seven ¾-inch couplings in two across the middle so that we ended up with 14 of equal size. These were then placed on the PVC pipe above and below where they went through the gutters.


These were not made to slide all the way down a pipe - only on the end - so they were super tight.  This was a good thing when it came to anchoring the gutters for this project, but it made it difficult to get them to the spot on the pipe where we needed them to be.  So Romie used an adjustable wrench, holding tightly onto the coupling and he hammered the wrench until the coupling was in the proper place.  Julie and I secured the pipe so that it stayed in place while he hammered.

I forgot to take a photo of the placement of the "T".  This was used at the bottom of the short piece of pipe, inside the bottom gutter.  It was orientated so that the bottom of the T was perpendicular to the sides of the gutter.  Romie then secured it in two places with deck screws that we already had here from another project.  This helped minimize torquing of the gutters.

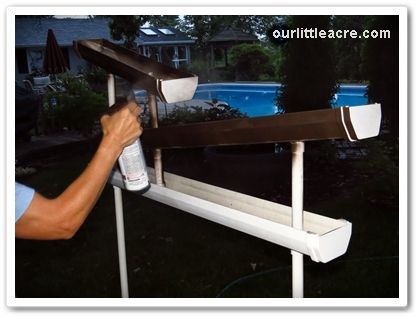
Now it was time to paint!

Photo by Julie Kroske

I used Rust-oleum Universal spray paint in Hammered Brown.  This can be used on plastic and it gives whatever you paint the appearance of being made of metal (if you don't inspect it too closely).  I'd wanted to make this project out of metal to begin with, but we couldn't find appropriate metal pipe or gutters at Lowe's for the three planter parts. The vinyl worked well though.


Once the paint was dry, I used our post hole digger to dig holes for the legs, which ended up being in the ground about 15 inches, give or take.  We used some scrap steel rods from Romie's work and drove those into the ground first, then slipped the legs of the planter over them.  You wouldn't need to do that - you could just put the pipe directly into the ground - but I like the idea of being able to lift the planter off and storing it inside for winter.

In the ground, ready to plant!

Time for planting!  I used some plants grown by the Berry Family of Nurseries - Variegated Lilyturf (Liriope muscari 'Variegata') and English Ivy (Hedera helix 'Natasha') - as well as Proven Winners Supertunia® Red petunias.  I also used some white vinca (Catharanthus roseus).  Then, since it's July and we just celebrated our nation's birthday, I added some blue glass balls that are supposed to be watering aids, but I use them as accents in the garden and in containers.

Voila!


For more Lowe's Creative Ideas for your home and garden, visit their website.  And here's the bloggers' page, where you can see what other Lowe's Creative Ideas team members are up to:

The Lowe’s Creative Ideas Creator and Influencers Blogger Network

Very happy to see my May project, "Dress Up a Dry Bed," as one of the current featured projects!


___________________________
Lowe's Home Improvement provided me with gift cards for the purpose of purchasing the materials needed to complete this project.The total cost, including plants, was approximately $85.00.


Friday, June 28, 2013

Lowe's Creative Ideas: Making Watering Easier


Our Little Acre is...well...an acre, but the configuration of that acre is such that our property is somewhat narrow and deep.  The lion's share of our gardens are located at the back of the yard and the spigots for hoses are at the house and at the pool house.  That means we have to drag hoses to and from the back gardens and that is, plain and simple, a pain in the behind.

The theme for this month's Lowe's Creative Ideas project is irrigation, so we took this opportunity to remedy our watering issues.  After the last three summers of being hot and dry, we took on this project with great enthusiasm.  Last summer's drought just about did us (and the gardens) in.

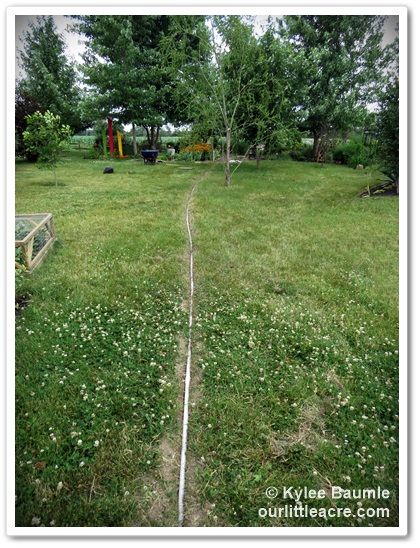
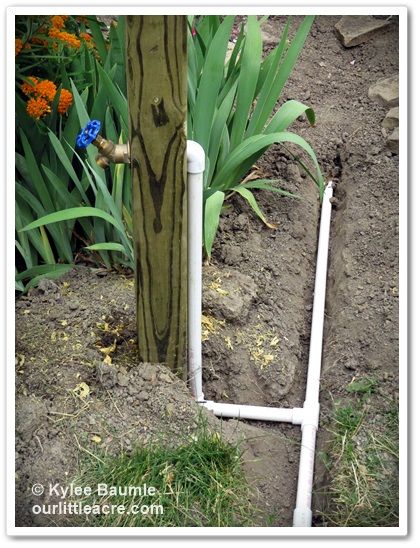
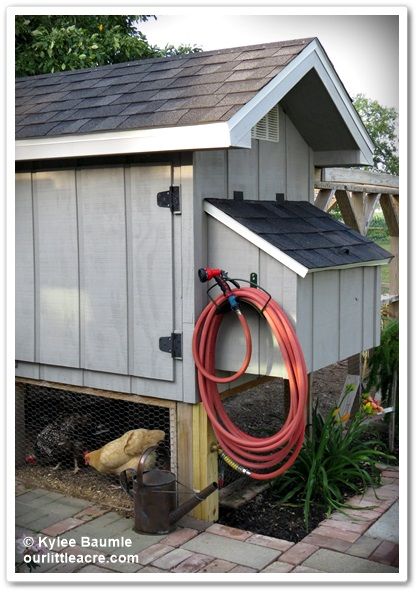
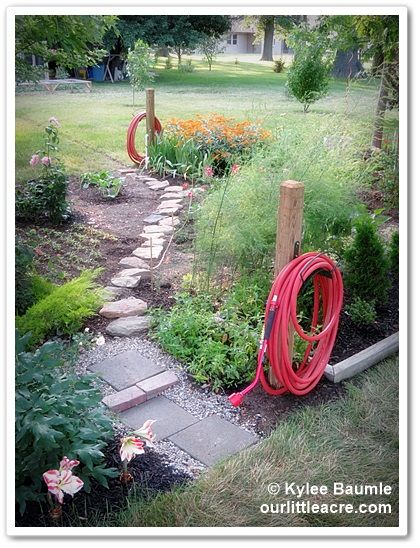
Without getting into sophisticated irrigation systems, which would be complicated in the case of our crazily-configured gardens, our solution was to run PVC pipe from the spigot on the pool house to newly-installed spigots at the chicken coop and all the way out to the garden at the back, where there would be two more spigots - one on the west side and one on the east side.  That way we didn't have to drag a hose across the garden itself.


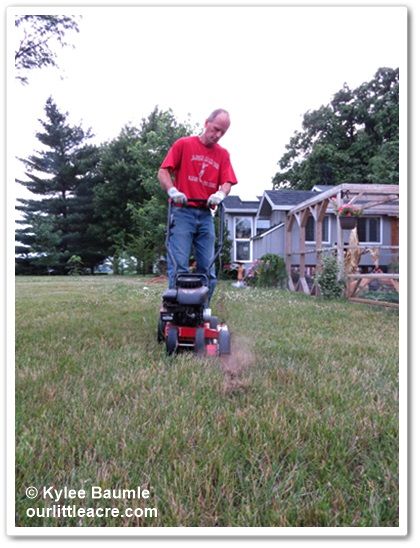
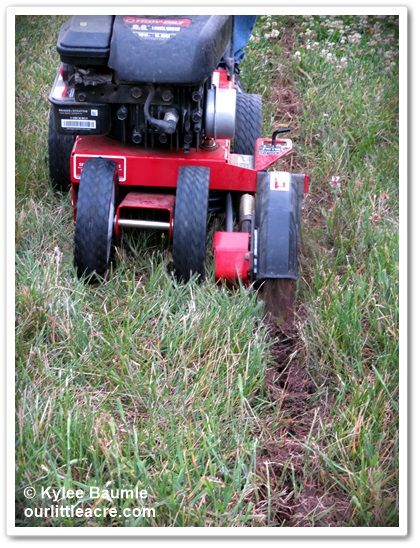
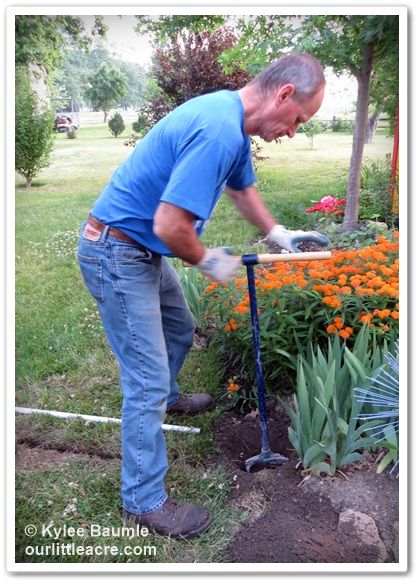
Romie used our Troy-Bilt edger to cut a shallow trench for the PVC pipe and I followed and deepened it with the Cobrahead tool, which shows yet another great use for it besides weeding.


Since we have to blow out the water lines for the pool every fall in preparation for winter, that's what we'll have to do with these too, so they don't freeze and crack.  They're about 4-5 inches deep - not the 30-36" depth needed to be below the frost line.


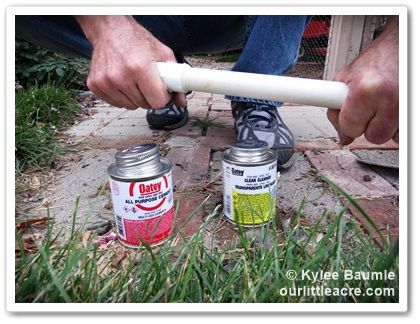
With an assortment of Ts and elbows and straight  ¾-inch PVC pipe, Romie ran it where he needed it, using cleaner and adhesive to connect them all together.


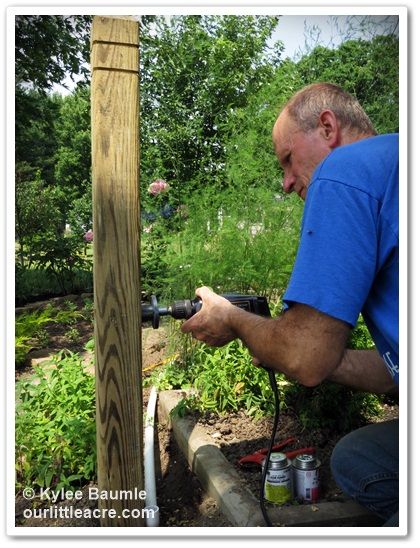
e used treated 4x4 posts for mounting the spigots, and drilled holes through the posts for the pipe so it didn't stick out from the posts so much.  That also stabilized the spigots.


We attached heavy duty hose holders to store our Dramm hoses at the spigots.  The project was easily completed over two-and-a-half days and probably could have been done in even less time, but with temperatures in the mid-90s and high humidity, we had to take a lot of breaks.

I started watering with our new system immediately and all went well, with no leaks!  I'm so glad to not have to drag the hoses all the way back there to water the gardens and it's nice to have a spigot right there at the back of the greenhouse by the chicken coop, too.


Check out other Lowe's Creative Ideas for your home and garden here.  And for more blogger's projects and ideas, visit the Lowe's Creative Ideas Blogger Network page.


______________________
As a Lowe's Creative Ideas team member, I am provided with Lowe's gift cards to cover the cost of myprojects.  The Troy-Bilt edger was provided to me last year free of charge as part of my participation as a Saturday 6 team member.  Dramm provided the hoses and watering nozzles and wands.


Sunday, June 2, 2013

Lowe's Creative Ideas: Summer Bulbs Dress Up a Dry Bed


We have a section of our largest garden that has never made me happy as long as the garden has been in existence.  It's a bit of a difficult area, design-wise and being a design-challenged gardener, I just never really knew what to do there.

Then I got an idea.  Let me set the stage for you.

This area of the garden is a mixed bag.  Due to the trees getting larger, we have more shade than we used to.  Any sun that does hit part of the area is morning sun, which is actually easier to work with than if it were afternoon sun.  It's also a fairly wet area, in comparison to the rest of the garden. And it's smack dab in the middle, with no easy way to get to it to care for plants there.

So here was the plan:  Make a dry bed.  A dry bed is a little waterway, like a teeny creek, if you will, except that it's got no water.  No water until you get a major rain, that is. And then that's okay, because by virtue of its design, it can handle quite a heavy rain before flooding. All that water has a place to go!

Here's what the area looked like before I got started:


Yes, that's bare ground you see, because I just didn't know what to do with it.  It's pretty dry in this photo and you know what happens when a typically wet area with native clay soil and no vegetation gets baked by the sun - it becomes hard and cracks develop.  We have amended it with compost somewhat, but since there was no plan for planting, it got neglected.

Not only that, because nothing was planted there, we used it for walking around to get to the areas of the garden adjacent to it.  So soil compaction made things even worse.  I let the Sedum acre do its thing because well, I didn't know what I wanted to do there anyway.

So...one dry bed coming right up!

First things first - I started digging the bed, making it deeper in the middle and sloping the sides. That's to help excess water drain into this area.


Then I put a very lightweight landscape fabric down - the kind that is made of a sort of paper and very permeable, but will suppress weeds.


We live out in farm country, and the fields around us are peppered with rocks.  Every now and then, we'll take a walk out into the field with buckets and gather them up.  The farmer benefits, because those rocks wreak havoc on their equipment, and we benefit because we use those rocks in our gardens.


After a couple of trips through the corn field behind us, we had enough rocks to line the dry bed. Smaller gravel was added to fill in the spaces between the rocks.


Then, the planting.  Paying attention to what was full shade, part sun, and full sun, most of the new plantings involved bulbs.  Some Asiatic lilies were already in place, but Caladium bulbs were added across the way.  Caladiums do bloom, but their best asset is their giant foliage that comes in assorted colors and white.  I chose the white ones here for the shadier part of this garden.


I also planted Tropicanna® cannas, which are a favorite of mine, also for their foliage, but they get bright tangerine blooms later in the season too.

Dahlia Dark Angels Star Wars
It's early, and the weather has been generally cool, so the dahlias aren't
in full bloom yet.

Finally, I planted some Caladium bulbs in the center of the giant terra cotta pot and dahlias on the outer edges.  Caladiums are generally a shade plant, but they will take a little morning sun, so they should be fine here.

Another benefit of having the dry bed is that we can walk on it if we need to!  While it's not a proper path through the garden, it can function that way when necessary.

I now love this part of the garden that I used to despise.


Materials:

Landscape fabric  ($9.97)
Dahlias (3 x $7.98)
Tropicanna cannas (2 x $16.98)
Caladiums (3 x $8.98)
River rock (3 x $2.47)

Some of the materials for this project we already had, but you can find everything you need to do it at Lowe's.  See more Lowe's Creative Ideas here! And other Lowe's Creative Ideas Bloggers here!


___________________________
Lowe's Home Improvement provided me with gift cards for the purpose of purchasing the materials needed to complete this project.

blogger templates | Make Money Online