


One of my projects from last year was my Lowe's Creative Ideas Pallet Project. I used a pallet to make a decorative tool storage design. It is by far the most viewed blog post I've ever done in the 6+ years I've been blogging (around 25,000 views) and it's still going over on Pinterest. Participating in this each month was a challenge for me, but pretty fun too, so when they asked if would continue with the team this year, I said yes.
I've actually had this idea for a little while, but had never really sat down and thought it out in detail until now. The concept is simple and putting it all together is pretty simple too.
Swing Shelf for Herbs
Materials list:
- 1" x 6" x 4' unfinished poplar board ($8.98)
- Olympic ONE Quart Interior Semi-Gloss True White Paint and Primer in One ($12.24)
- 3 4-inch terra cotta pots ($.97 each)
- Valspar 12 Oz. Outdoor Gloss Spray Paint in Red Queen ($4.98)
- LOCTITE Polyseamseal 6 oz White Latex Kitchen and Bathroom Caulk ($2.99)
- 12 feet 1/16" stainless steel cable wire ($3.24)
- 4 sets: 1/16" ferrule and stop ($2.48)
- 2 nickel-plated steel cup hooks ($1.96)
- 8 #6-32 Zinc-Plated Standard (SAE) Brad Hole T-Nuts ($4.60)
- 3 Bonnie Plants herbs ($10.44)
Since I wanted my terra cotta pots to be red, I started things off by spray painting them so they could be dry by the time I needed to plant them. It took two coats of the paint to get the look I wanted, since terra cotta is porous. You could leave them unpainted.

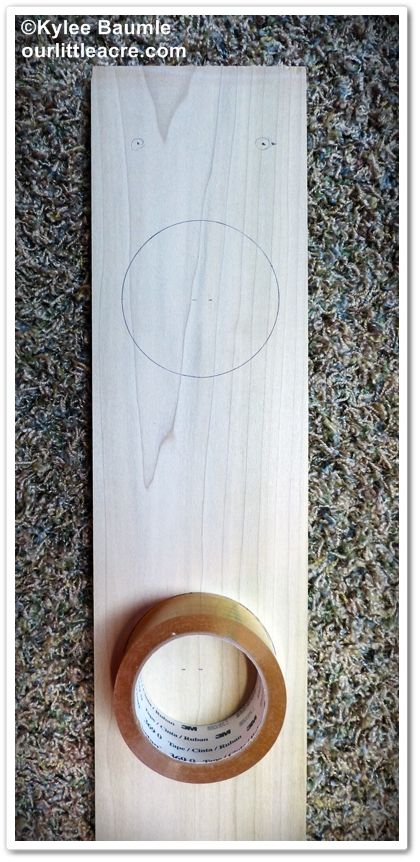 |
| It just so happened that this roll of packaging tape was the right diameter for the holes to be cut. |
While I was busy painting the pots, I enlisted the help of my husband in preparing the board. It isn't that I couldn't do this part, it's that I like him to feel needed. He's good with power tools so I let him play with them. I did the math - measured the inside width of the window where the shelf will hang, measured the circumference of the terra cotta pot just below the rim and used Π to figure out the diameter of the circular holes to be cut in the board. I did some more math to figure out where to place the three holes so they would be equidistant apart. Then I handed the board to Romie, with its markings for the jigsaw.
By the time I was done painting the pots the second time, the board was ready for painting. Two coats of paint were needed here too.

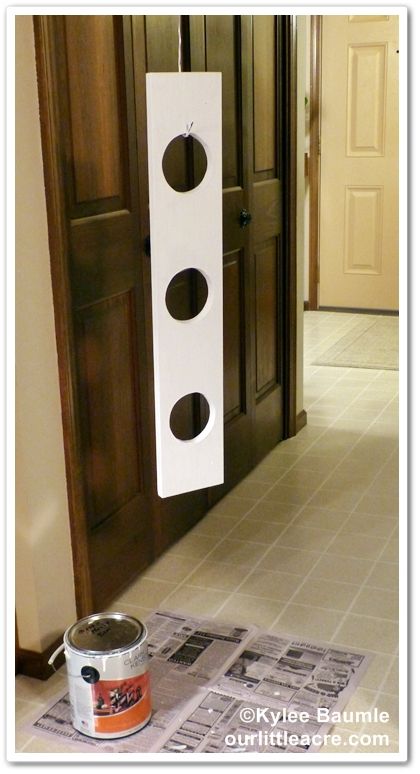 |
| We didn't have to purchase the white enamel paint because we had some left over from a previous project. |
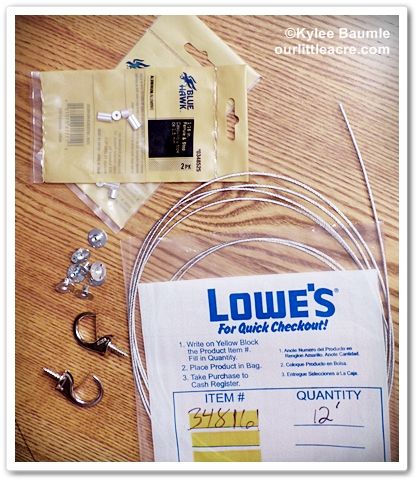 |
| Hardware needed for hanging the shelf. |
Once the paint dried on the board, Romie drilled two 1/16" holes in each end where the cable wire would be threaded through. These holes were two inches from the end of the board on each side.

Next came the trickiest part of the entire thing - threading the wire through the holes, making the loops for hanging, and making sure the wires are the same on both ends so that the shelf hangs level. You can cut the wires the same length, but you also need to make sure that your loops for hanging are the same.
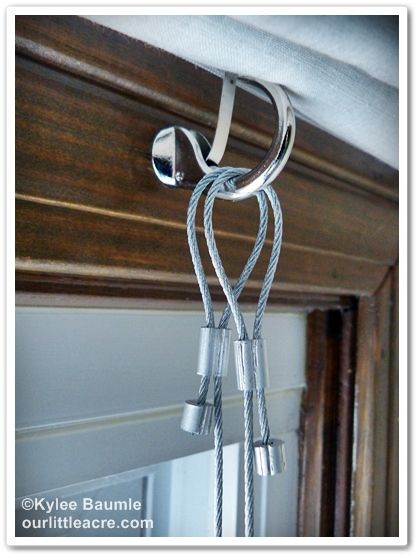 |
| Hanging loops with ferrules and stops, crimped in place with pliers. |
Before I made the wire hangers for this shelf, I had no idea what a ferrule was. It can come in many forms but here, it's the little piece of aluminum through which the cable wire is threaded to secure the loop for hanging. Once you have the wire threaded through, pliers can be used to crimp the ferrule so that the wire won't move. The stop is crimped on the end to cover the sharp cut wires and to prevent them from unraveling.
We screwed the hooks into the trim around the window at the top, under the existing window treatment and hung the shelf.

It's nice to have herbs close at hand when using them in cooking, and this shelf allows you to grow them in a sunny window; most herbs need full sun to do well. I chose Bonnie Plants flat Italian parsley, rosemary, and lemon thyme. I'll admit, I chose these because I like the look of their foliage and in the case of the rosemary and the lemon thyme, I love their fragrance.

This lack of a drainage hole can be dealt with then by planting the herbs in a plastic pot that does have drainage and using the terra cotta pots as cache pots.
If you don't want to seal up the hole, you can remove the pots and take them to the sink, water them, and allow them to drain before replacing them in the shelf.
This shelf hangs in our utility room, where I keep quite a few houseplants, and there wasn't room on the small table in the window for more. The window in this room has a southern exposure, which is just right for growing herbs.
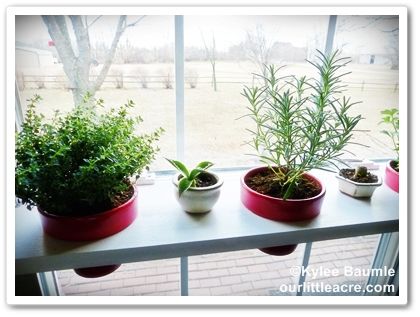 |
| There's enough room in between the red herb pots to sit small planters on the shelf if you want to. |


The total cost for the project was $56.58, including tax.
For more great project ideas, here are some helpful links:

_________________________
As part of the Lowe's Creative Ideas Team, I was provided with a Lowe's Gift Card to cover the cost of the project.


 "Bejeweled"


9 comments:
LOVE IT !!! And the RED is so YOU.
Wonderful - I love it! Am definitely going to pinch this idea Kylee - got to give Himself something to do when it's still too cold and snowy to be outside!!!
This sounds expensive, but everything is reusable. It looks great in the window--useful, decorative, and edible results. I love the calked bottle tops idea. I will definitely steal that one.
Stopping in from "A to Z Blog Hop." I love the ideas of the hanging herb holder. It looked so sassy and serves a pretty needed function (especially in my apartment). Well done.
Very cool idea and problem solved!
i love do it yourself stuff! my brother does a lot of "flipping" houses and so forth and he says lowes is much better than home depot! (for whatever this is worth)
Coming by from the A to Z bloghop seeing if you are still participating!
--
Tim Brannan
The Other Side and The Witch
Red Sonja: She-Devil with a Sword
The Freedom of Nonbelief
What a darling idea and it looks so nice. Will be a great project for cowboy!!
Great idea, Kylee! I have a couple of windows in our home that would work well for this. : )
Post a Comment