Sunday, July 7, 2013

How to Deadhead Daylilies


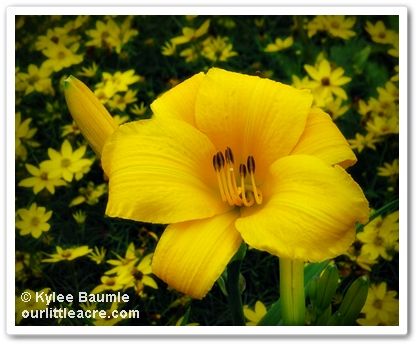
'Buttered Popcorn'
An All-American Daylily (2006)
Sometimes the simplest things can seem, well, not quite so simple when it comes to actually doing them.  I made a comment the other day about how I love to deadhead, and I especially love deadheading daylilies. My friend said, "How exactly do you do that?"


There are a few reasons why gardeners deadhead blooming plants:

  • to clean up the plant by removing the spent blooms
  • to stimulate the plant to bloom again
  • to prevent the plant from spending energy on making seeds

Daylilies are no different and these are all good reasons to do it.  But for me, I simply can't stand seeing dead blooms hanging like limp, dirty rags at the tips of the scapes, and I definitely want my daylilies to get larger by spending more of their energy on growing the plant itself, not making seeds.

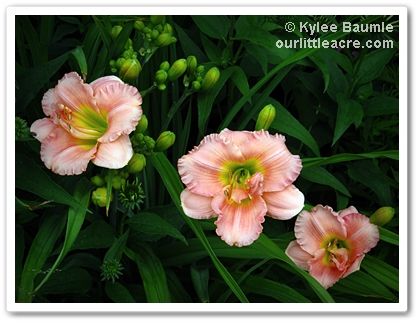
'Siloam Double Classic', which often doesn't bloom double

One of the things that I really enjoy about deadheading daylilies in particular is the snapping off part.  And when I say "snap," I mean SNAP!  It feels good when they snap off between my fingers and I love the crisp snappy sound it makes.  It's so onomatopoeia-ish.

What you do is to place your index finger under the junction of the bloom and the stem, then push down from the top with your thumb while pushing slightly upward with your index finger in one motion. (See video below.)


That snap is the sound of the developing seed head breaking away.  If the flower didn't get pollinated, it won't snap - the flower just either falls off in your hand or requires very little effort to remove it.

Sometimes the flower comes off easily, but the developing seed pod remains.  If that happens, go ahead and either pinch that off with your fingernail or repeat the snapping maneuver with it so that it doesn't stay on the stem.  When all the flower buds have bloomed on a scape, I cut the scape off at its base.
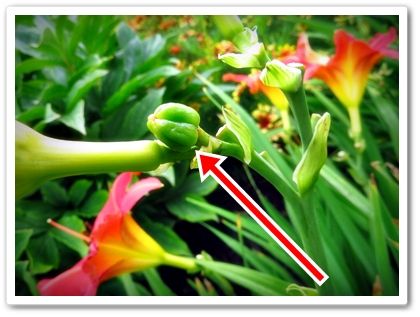
Daylily seed pod

You can always use pruners to cut things off, but what's the fun in that?  Snapping off daylily heads is akin to popping bubble wrap and we all know how much fun that is!

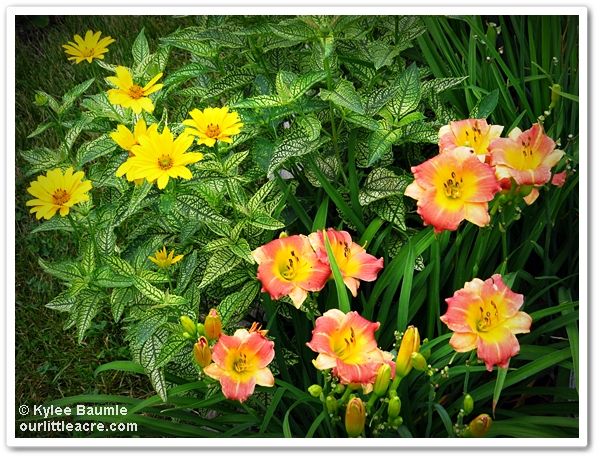
Hemerocallis 'Prairie Blossoms' with
Heliopsis helianthoides var. scabra
'Loraine Sunshine'

P.S.  I regularly remove any yellow foliage from my daylilies, too.  Some are worse about yellowing than others, but it's removed easily enough. The plants just look better when you do.


Friday, June 28, 2013

Lowe's Creative Ideas: Making Watering Easier


Our Little Acre is...well...an acre, but the configuration of that acre is such that our property is somewhat narrow and deep.  The lion's share of our gardens are located at the back of the yard and the spigots for hoses are at the house and at the pool house.  That means we have to drag hoses to and from the back gardens and that is, plain and simple, a pain in the behind.

The theme for this month's Lowe's Creative Ideas project is irrigation, so we took this opportunity to remedy our watering issues.  After the last three summers of being hot and dry, we took on this project with great enthusiasm.  Last summer's drought just about did us (and the gardens) in.

Without getting into sophisticated irrigation systems, which would be complicated in the case of our crazily-configured gardens, our solution was to run PVC pipe from the spigot on the pool house to newly-installed spigots at the chicken coop and all the way out to the garden at the back, where there would be two more spigots - one on the west side and one on the east side.  That way we didn't have to drag a hose across the garden itself.


Romie used our Troy-Bilt edger to cut a shallow trench for the PVC pipe and I followed and deepened it with the Cobrahead tool, which shows yet another great use for it besides weeding.


Since we have to blow out the water lines for the pool every fall in preparation for winter, that's what we'll have to do with these too, so they don't freeze and crack.  They're about 4-5 inches deep - not the 30-36" depth needed to be below the frost line.


With an assortment of Ts and elbows and straight  ¾-inch PVC pipe, Romie ran it where he needed it, using cleaner and adhesive to connect them all together.


e used treated 4x4 posts for mounting the spigots, and drilled holes through the posts for the pipe so it didn't stick out from the posts so much.  That also stabilized the spigots.


We attached heavy duty hose holders to store our Dramm hoses at the spigots.  The project was easily completed over two-and-a-half days and probably could have been done in even less time, but with temperatures in the mid-90s and high humidity, we had to take a lot of breaks.

I started watering with our new system immediately and all went well, with no leaks!  I'm so glad to not have to drag the hoses all the way back there to water the gardens and it's nice to have a spigot right there at the back of the greenhouse by the chicken coop, too.


Check out other Lowe's Creative Ideas for your home and garden here.  And for more blogger's projects and ideas, visit the Lowe's Creative Ideas Blogger Network page.


______________________
As a Lowe's Creative Ideas team member, I am provided with Lowe's gift cards to cover the cost of myprojects.  The Troy-Bilt edger was provided to me last year free of charge as part of my participation as a Saturday 6 team member.  Dramm provided the hoses and watering nozzles and wands.


Tuesday, June 25, 2013

Ahhh...Pots: A Review and Giveaway!


I love it when I'm made aware of cottage businesses and the products they make are both practical and attractive.  The Seed Keeper Company is one such company that I loved from the start and now I've found another one.

In nearby Tiffin, Ohio, René Clinger makes container pots - called Ahhh...Pots - in her home, from fabric.  An avid plumeria and tuberose grower, she came up with the pattern for the pots after a discussion with her fellow growers. The result was an assortment of pots made from UV resistant fabric that can be used either as cache pots or by planting directly in them.

René sent a few pots my way for me to try and that's what I'm doing now.  I'm using two of them as cache pots and the third one I've planted directly with Caladium bulbs.  Only recently have we had warm enough weather for the bulbs to even think about growing, so I'm waiting on those to make an appearance.


As cache pots, the ones I have are a little on the large side for what I put in them, but that was easy enough for me to remedy by putting air-filled packing pillows in between the plant pot and the Ahhh...Pot.  At the time that René sent the pots to me, I wasn't sure which of my plants I was going to put in them, so she sent the sizes we thought I could use.


Her pots come in a large assortment of sizes and she's always available to discuss which one would be suitable for your use. Pots are listed by capacity, in gallons, and it can be hard to figure out which size would be appropriate, especially if you're using them as cache pots.  Just contact René with the size of your pot in inches, and she'll tell you which size would work. 

The pot on the right is planted directly with Caladium bulbs that aren't up yet.

But the beauty of these pots is really that they can be planted directly.  They're made of landscape fabric, and as I said, UV resistant. They're also porous, so water can drain through. Seams are reinforced and they have handles for ease in moving them around. I think I'll try growing potatoes in the largest one next year!

There are 13 different designs, in both black and brown with contrasting trim, and the sizes range from one gallon through 65 gallons (now THAT'S a big pot!).  There's even a portable garden and flower pouches. The pots are easy to store over the winter by just hosing them off and folding them flat for storage.  I think you'll be pleased with the quality of  Ahhh...Pots and you'll get many years of use out of these.

You'll notice on her website that shipping is free for orders over $50 and wholesale pricing is available on request. If you don't see a size you like, René takes custom orders. AND first-time buyers get a free pot with their order!

Now for the giveaway!  René has generously offered to let me give away a 3-gallon Ahhh...Pot in a fabric design of the winner's choice.  All you need to do to enter is:

  • Leave a comment here, telling me which fabric you'd choose if you win.  (See the assortment of designs here.)

  • Fill out the Rafflecopter form (below), which will provide your contact information so I can let you know you're the winner!


a Rafflecopter giveaway
 
Entries will be accepted until midnight EDT on Wednesday, July 3, 2013.  Only residents from the lower 48 United States will be eligible to win.  Value of the prize is $12.95.

__________________________
I received Ahhh...Pots free of charge for the purpose of reviewing them for this blog. All opinions expressed here - as always - are my own.


blogger templates | Make Money Online