Friday, May 31, 2013

How to Plant Sedum Acre


I'll make this short and sweet.

A few years ago, my sister-in-law was walking through my garden and she saw a plant she really liked. I asked her how much she liked it.  A lot, she said.


I told her to grab a handful of it, take it home, throw it at the ground and give it a little water, if she was in the mood.

No digging? That's right. Just plop it where you want it and stand back. I promised her that in no time, she too could be sharing it with her friends and neighbors.  All of them.

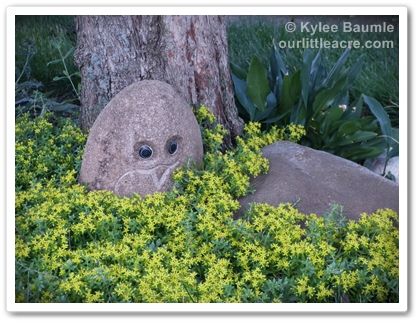
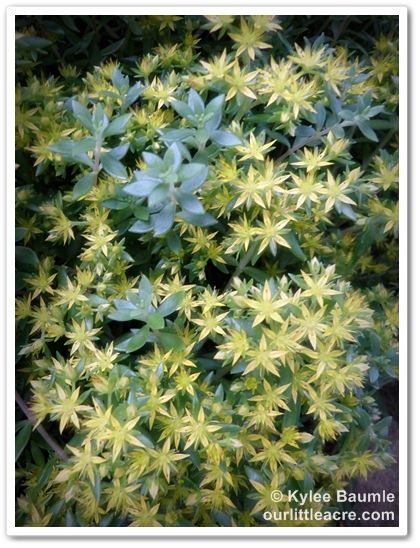
And yes, that's how you plant Sedum acre.

It's the plant that doesn't need you for anything.


Monday, May 27, 2013

The Accidental Bouquet


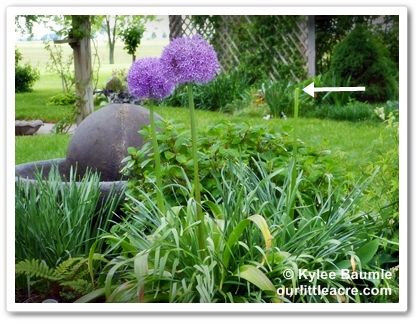
I suppose one flower can't a bouquet make, but when it comes to alliums, I think we're good with it.  The large headed alliums such as 'Globemaster' and 'Purple Sensation' are actually made up of hundreds of individual tiny flowers.

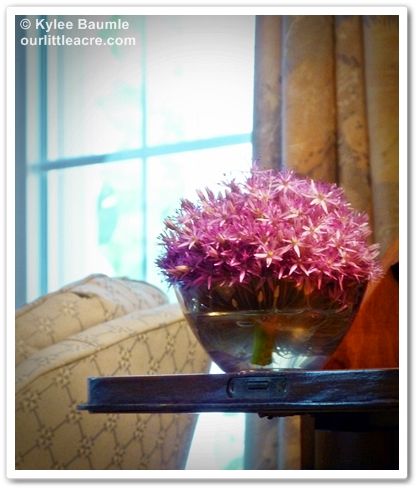
When Erin Schanen of The Impatient Gardener challenged us to cut flowers from our garden to enjoy inside, those of us who would rather enjoy them in their natural environment found it a little difficult to do. But sometimes accidents happen and all of a sudden, you have a bouquet whether you wanted one or not.


As I was walking through the garden a couple of days ago, I saw a tall green "spike" sticking up and at first couldn't figure out what it was.  Upon further inspection, I found that for whatever reason, one of the 'Globemaster' blooms had been severed from its stem and was laying at the base of the plant.

Instant bouquet, right?  Yep.  This counts.

After a day or so in water, the bloom color changed to a lavender pink!


Click on the graphic below to see more bouquets from The Garden Appreciation Society: Week 2.


Killdeer: Smart or Stupid?


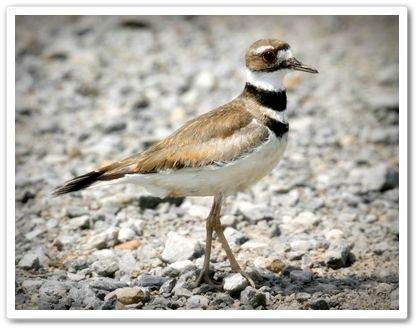
Killdeer   (Wikimedia Commons)
A sure sign of spring here in NW Ohio is the sound of the killdeer as we work outside in the garden.  They returned many weeks ago and while their song might be annoying to some, it's one I enjoy hearing.

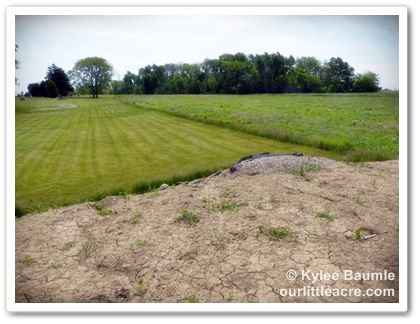
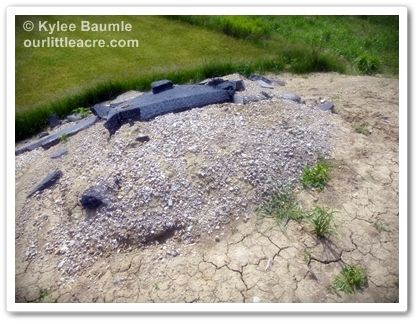
Yesterday, Romie and I took a walk down to Poohsticks Bridge on an absolutely perfect spring day. Just before we got to the bridge, we walked over to see what the county had dumped in their recent attempt to build up an area notorious for flooding. You never know what you'll see there; mostly it's fill dirt, but there are also bricks, intact pieces of drainage tile, and large rocks.


Yesterday we found something we've never seen before and certainly didn't expect to see.

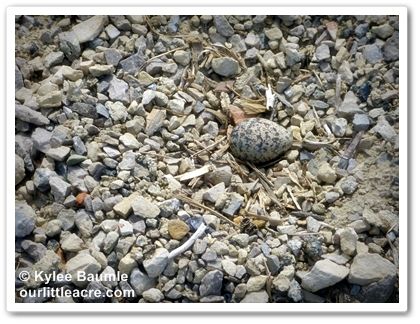
Do you see it?


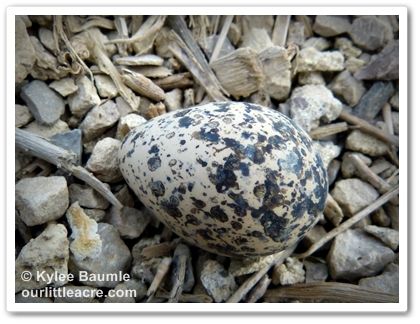
There, right out in the open, on the stones, was a single killdeer egg.  Though it's easily detected in the above photo, standing there looking at the stone pile, it was not.  It was pretty well camouflaged and I'm not sure why I noticed it.

Egg size is approximately 1.5 inches in length


Killdeer commonly lay their eggs in open nests such as this and when a predator comes near, they begin acting as though they're injured so as to be a distraction.


As we stood there, looking at the egg, mama wasn't around.  With there only being one egg instead of the usual four to six, we wondered if she hadn't abandoned it.  We'll keep checking it in the coming days to see.


Killdeer Facts(from Cornell University)

  • Latin name:  Charadrius vociferus
  • Size:  8-11 inches in length, similar to the American Robin
  • The killdeer is an excellent swimmer.
  • They scrape an area, lay their eggs, and then build the nest.
  • The oldest known killdeer was 10 years 11 months old.
  • Killdeer are ground foragers with a diet of insects.
  • Northern killdeer spend winters in Mexico, while southern killdeer are year-round residents.


Friday, May 17, 2013

One Flower's Point of View


In light of yesterday's post, this strip from The Other Coast by Adrian Raeside presents an interesting point of view...

(Click to enlarge)


Thursday, May 16, 2013

Forcing Myself to Enjoy the Flowers


You must think the title of this post is strange. I mean, what kind of gardener has to force herself to enjoy flowers? Well, it isn't that hard for me to enjoy them; in fact, I enjoy them a little too much - in my gardens.

I'm one of those people who has a hard time cutting flowers and bringing them inside. I've tried to figure out why this is so difficult for me to do and it's pretty simple, really. I enjoy seeing plants and flowers in their natural environment. Not that our flowers grow naturally in well-defined spaces that suit our tastes, but natural in the sense that the blooms are still attached to the plant that grew them.

Erin Schanen, of The Impatient Gardener, knows exactly what this is like, because she's "one of them" too.  Erin is trying to overcome this aversion to cutting flowers from our gardens by going public with a campaign she calls, "The Garden Appreciation Society."  She's challenging us to cut some flowers, make a bouquet, and post the photo of it online.


Okay, Erin.  I took the bait and rose to the occasion.  But it wasn't easy.  I told you I'd do it, but  in the back of my mind, I just wasn't sure I could.  Then this evening, as I was cutting off the spent tulip stems, I was inspired.  And it wasn't a flower that motivated me.

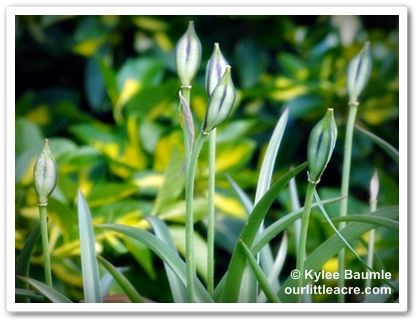
It was those tulips - the ones that looked great a couple of weeks ago.  The ones that dropped their petals just last weekend.  The ones that made these amazingly awesome seed pods.  Those.

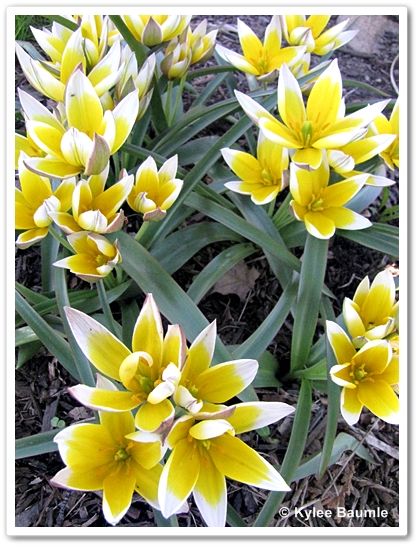
These are the seed pods of one of my species tulips- Tulipa tarda:


Before they do that, they look like this:


I love it when a plant doubles the fun like that.

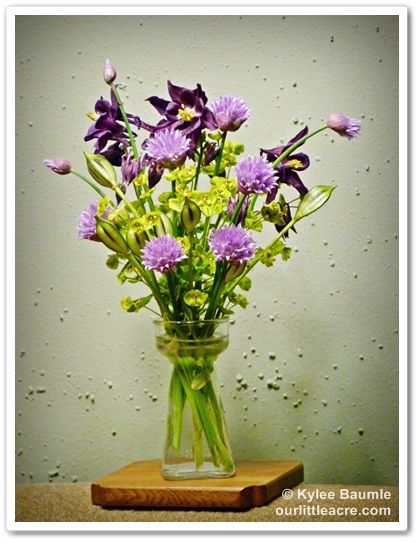
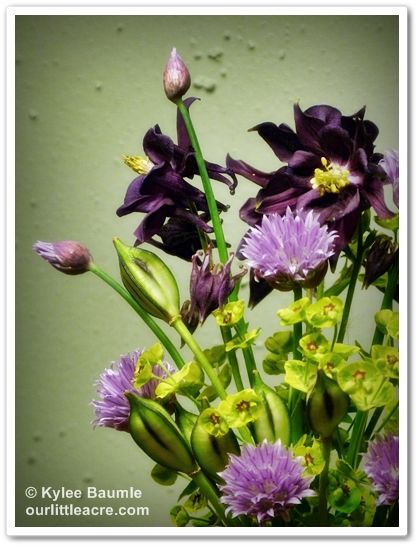
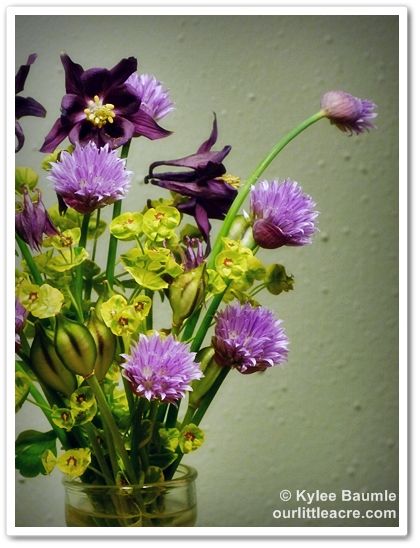
But anyway, I decided that I'd just use those seed pods and find some other things in the garden to go with them.  Since there's always an abundance of chives and columbine, it didn't pain me too much to cut those blooms.

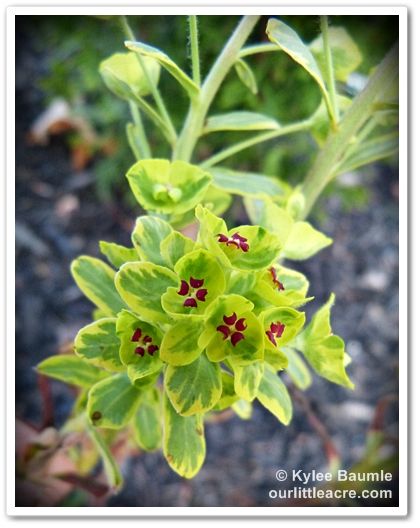
A little harder to cut were the Euphorbia 'Ascot Rainbow' blooms, but I've got plenty of those too, and I'll be cutting those soon anyway, so that the plant will bulk up and branch out. (Although this Euphorbia doesn't really require any pruning, if you don't want to.)

They've got The Most Awesome Blooms that most people will never notice because they won't get down close enough to see the beautiful detail. Just look at this!

Euphorbia x martinii 'Ascot Rainbow'

 So here's what I came up with for my bouquet:


It's small - just 10 inches at its tallest point.  Baby steps...

~~~~~~~~~~~~~~~~~~~~~

To see how others are enjoying flowers from their gardens, visit Erin's blog.


Wednesday, May 15, 2013

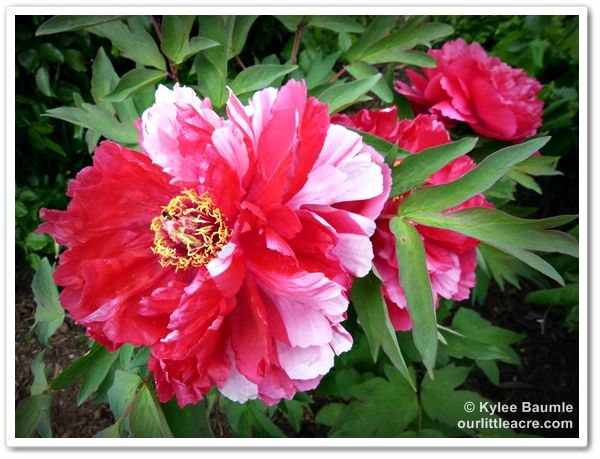
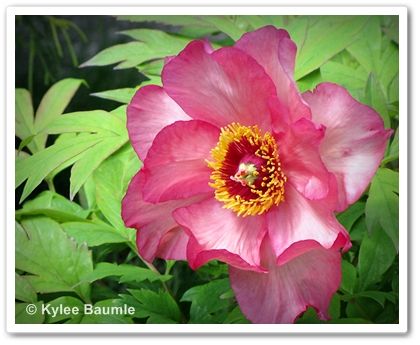
Wordless Wednesday: Tree Peony 'Shimanishiki'


Seen in the Smiley Park Children's Garden in Van Wert, OH...

Paeonia suffruticosa 'Shimanishiki'


Tuesday, May 14, 2013

Lowe's Creative Ideas: A Rainbow of Color For a Partly Shady Garden - and a Deck!


Our average last frost date here at Our Little Acre in northwest Ohio is May 15th, but it's been a long time since we've had a frost that late. This year, spring has taken its sweet time getting here, although we've had some nice weather here and there. Frost two nights in a row this week didn't make some things in the garden very happy - the gardener either.

My April Lowe's Creative Ideas project is just a bit late, due to the cold weather and a lot of rain.  It's hard to plant in mud. But finally, we got it completed! 

Sometimes I dream a little too big.  But I'm a possibility thinker and I could visualize this project.  In fact, part of it had lived in my head for a couple of years now.  A big tip of the hat to my ever-helpful husband, Romie.  Without him, most of it would not have been possible.

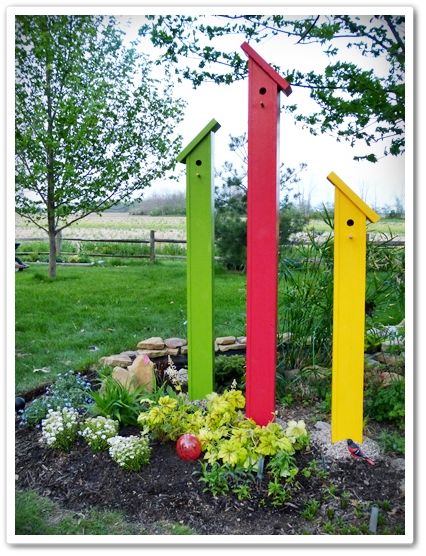
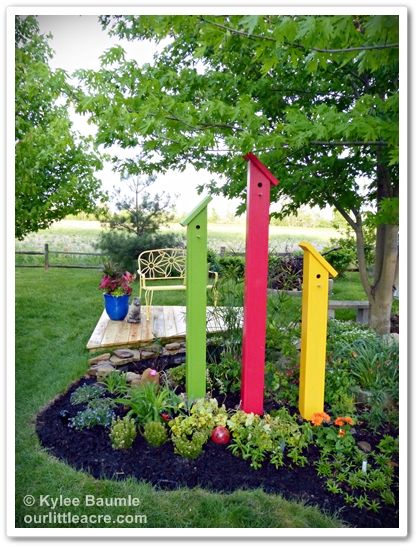
One of the Creative Ideas themes for April was to use colors of the rainbow.  I decided to incorporate these colors by using both flowers and hardscape.

A portion of our large garden at the back of the property has always been reserved for what I call "hot" flowers.  In the past, I'd grow colorful zinnias, cosmos, snapdragons, marigolds, and lilies.  Anything that would bring about a riot of color was fair game for that garden.  But in recent years, that has been a challenge, due to the maturing of several trees in that part of the yard and in the garden itself.  The kinds of flowers I'd always grown there needed a lot of sun to perform well.  That was Dilemma #1.

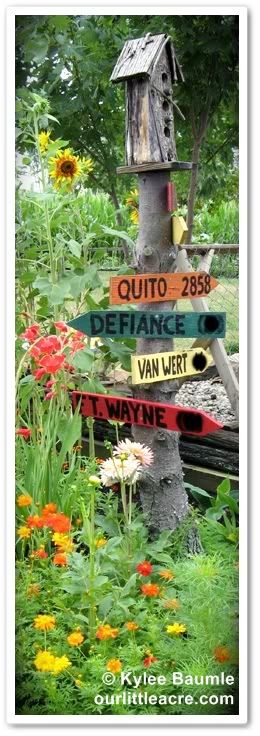
Secondly, we had made use of the trunk of a pine tree that had died, by converting it into a directional with colorful signs indicating the miles to the homes of family members.  We also put a decorative bird house on top, which the wrens always made use of.  This past year, the pine rotted to the point that it was only a matter of time before it fell over, so that was removed.  I had always loved this colorful addition to the "hot" garden, so this became Dilemma #2.

I put my thinking cap on.

I'd remembered seeing a cute set of birdhouses in my Lowe's Creative Ideas magazine awhile back, so I went to the website and found the plans.  I knew I was going to need some husband help for this, so I talked mine into making the birdhouses for me.  It didn't take him too long; I got them painted, and we put them up.


The birdhouses fit like a sleeve over 4x4s that are set into the ground.  The top of the 4x4 serves as the bottom of the nesting cavity of each birdhouse.  We made the holes 1¼-inch in diameter, so as to attract wrens and not sparrows.

This added a lot of color to the garden and I was pleased with how they looked as a replacement for the directional. 
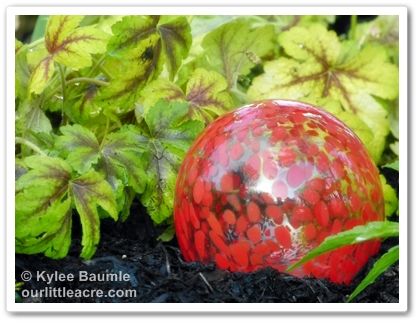
Heucherella 'Gold Zebra'
To add more color, I planted some perennials and annuals, some of which do okay in shade.  For example, Heucherella 'Gold Zebra' has bright yellow foliage with deep red veining, and the fountain grass Pennisetum setaceum 'Fireworks' has a burgundy tint to it (more so with direct sun).
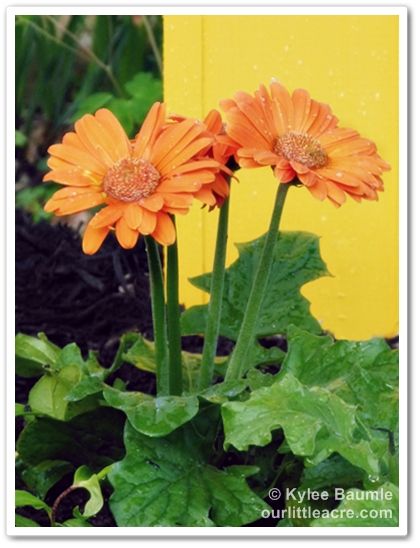
Gerbera jamesonii

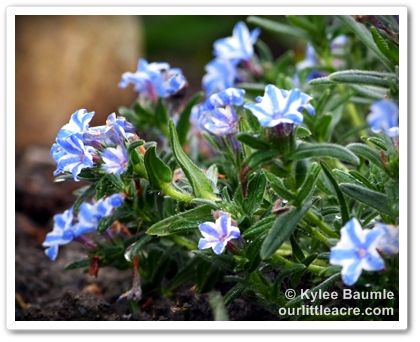
The "hot" garden still gets a fair amount of direct sun on its western and northern edges at various times of the day, so I planted perennials lithodora (Lithodora diffusa 'Blue Star') and candytuft (Iberis sempervirens 'Purity').

A couple of Gerbera daisies in orange brightened things up and existing Asiatic lilies 'Matrix' and some colorful daylilies will provide some vibrant red-orange and golden yellow color as the season progresses.
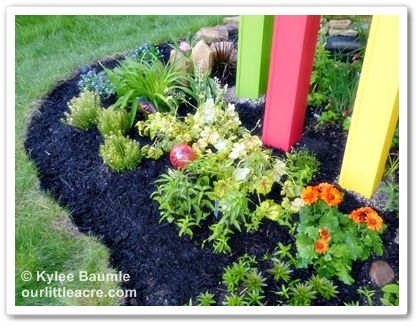
The candytuft (front left) was done blooming by the time I finished the
project, but it will provide pretty foliage and occasional rebloom.

Lithodora diffusa 'Blue Star'


The second part of my plan was the one that I'd first expressed a desire for two years ago.  There's a small pond that's part of this garden and I'd wanted a deck for a sitting area next to it.  This took some convincing on my part before Romie agreed to make it.

I'd envisioned a curvy-edged deck, but when it became clear that curves were going to be much harder to execute than a deck with straight edges, I conceded to going with the simpler design.  After a geometry discussion, we agreed on a trapezoid shape for the deck.
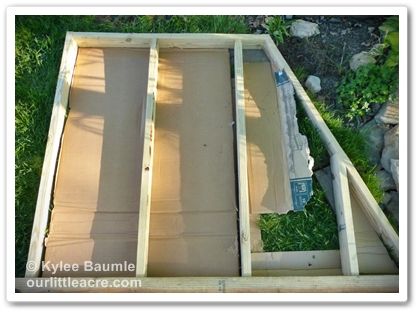
We placed cardboard under the deck, to kill the grass.

The deck proved easier to make than the birdhouses, and they weren't difficult, so in the end, the project was pretty easy.  It just took some time and some cooperation from the weather to get it all in place.

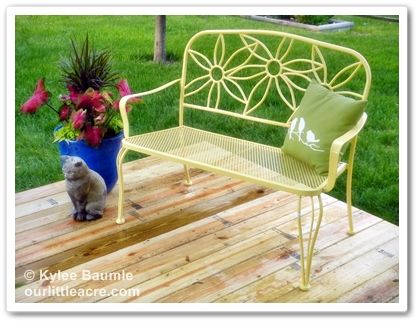
I'd fallen in love with a yellow daisy bench on a previous visit to Lowe's, so I picked one up on my trip there to get supplies for the rest of the project.  That, I put together all by myself.  I mean, it was only a few nuts and bolts and voila!


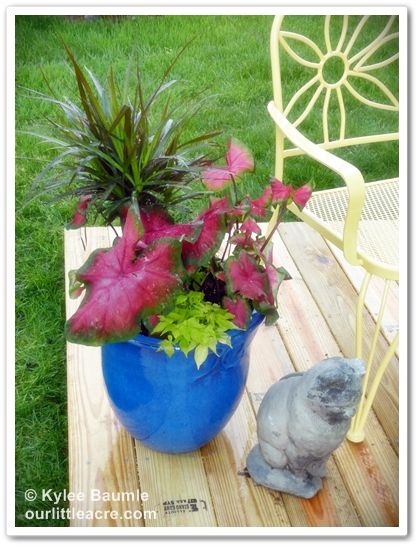
To add some more color, I planted up one of my larger pots - bright blue! - with a braided Dracaena that I found in the Lowe's houseplant section.  I added a couple of shade-loving caladiums for red color, and sweet potato vine in a bright chartreuse.  The sweet potato vine will eventually spill out over the edge of the pot and will do fine in shade, even though it prefers sun.


I get to have my "hot" garden, even though a good deal of it is now in shade.


Supplies

Tall Trio of Birdhouses:

  • 11 - 1"x6"x8' pine boards  ($5.96 x 11 = $65.56)
  • 1 - 2"x8"x8' pine board  ($6.47)
  • 3 - 4"x4"x8' treated pine posts  ($8.27 x 3 = $24.81)
  • 1 lb. box of 6d galvanized finishing nails ($3.92)
  • 3 - 1 qt. Valspar exterior semi-gloss paint + primer in Mountain Botanical, Classic Red, and Morning Sunrise ($12.33 x 3 = $36.99)

Total cost:  $137.75


Deck:

  • 6 - 2"x4"x8' treated pine  ($3.37 x 6 = 20.22)
  • 15 - 5/4" x6"x8' treated deck boards  ($3.97 x 15 = $59.55)
  • 1 - 5 lb. box of 2.5" deck screws (Used about half of box @ $22.47)

Total cost:  $ 91.00


Plants:

  • 3 - 1 gal. Heucherella 'Gold Zebra'  (3 x $10.98 = $32.94)
  • 3 - 2.5 qt. Lithodora 'Blue Star'  (3 x $7.98 = $23.94)
  • 1 - 2.5 qt. Pennisetum 'Fireworks'  ($5.98)
  • 3 - 2.5 qt. Iberis 'Purity'  (3 x $5.98 = $17.94)
  • 3 - 1.25 qt. Gerbera daisy  (3 x $4.98 = $14.94)
  • 3 - 1 pt. Ipomoea (3 x $2.98 = $8.94)
  • 2 - 1.25 qt. Caladium 'Freda Hemple'  (2 x $4.98 = $9.96)
  • 1 - 1.25 qt. Dracaena  ($10.98)

Total cost:   $125.62

Cost of daisy bench:  $98.00

For more DIY inspiration, visit Lowe's Creative Ideas and the Lowe's Creative Ideas Creator and Influencers Blogger Network.


___________________________
Lowe's Home Improvement provided me with gift cards for the purpose of purchasing the materials needed to complete this project.

Tuesday, May 7, 2013

Perky-Pet® Bird Feeder - NO SQUIRRELS!


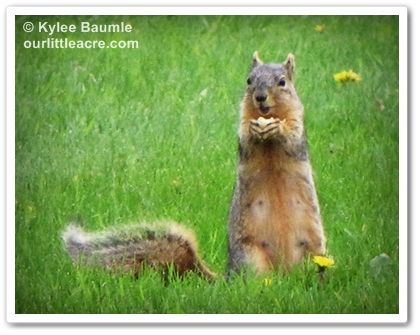
Thankfully, we aren't bothered by squirrels trying to eat at our bird feeders here at Our Little Acre.  It's not that we don't have squirrels, because we do.  We even had one in our house once.  (THAT was fun.)  But for some reason, they keep to the big oak tree in the front yard and the smaller nearby maple.

Mmmm!  Acorns!
We think it's probably the herd of cats we have that discourages them from coming closer to the house, although undoubtedly the squirrels would win if they were to stage an invasion of the turf that our cats consider to be theirs.  We also have more than our fair share of acorns from several large oaks, so  maybe they get enough to eat from those.

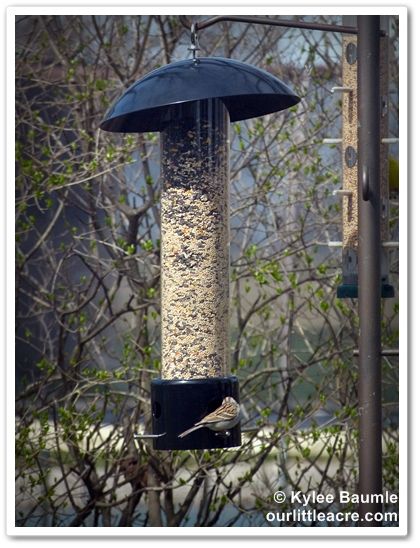
But I've seen numerous complaints by bird enthusiasts about squirrels wanting a piece of the pie that doesn't belong to them, so I know it can be a real problem for a lot of people.  This bird feeder from Perky-Pet®
is designed to discourage such behavior from the squirrels.  Here's how it works:


Perky-Pet® Squirrel-Be-Gone®
The Baffler

I like that this feeder is large enough to not need filling as often as smaller ones (it holds three pounds of feed). I especially like that it's so well-made, with its heavy-duty powder-coated finish.  Not only that, it's an attractive feeder, and if the squirrels ever do try to eat from the feeders, we're prepared. (Pre-emptive strike!)

The baffle at the top tilts to throw the squirrels off balance.


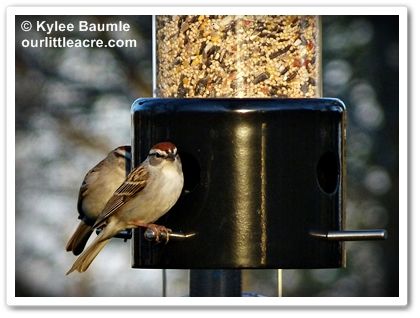
Since we've put up the feeder, I've seen cardinals, goldfinches, nuthatches, and numerous other birds feeding from it.

Sparrows need to eat, too!

For more information on this feeder and others, visit Perky-Pet®!  Right now, they have many of their feeders on sale, with free shipping on orders over $50.

_______________________________________
I was sent the Perky-Pet® Squirrel-Be-Gone® The Baffler bird feeder free of charge to trial here at Our Little Acre.  I was not required to write about the feeder, but I wanted to share it with my readers, in case they were interested in an item like this.  All opinions expressed here are my own.

Monday, May 6, 2013

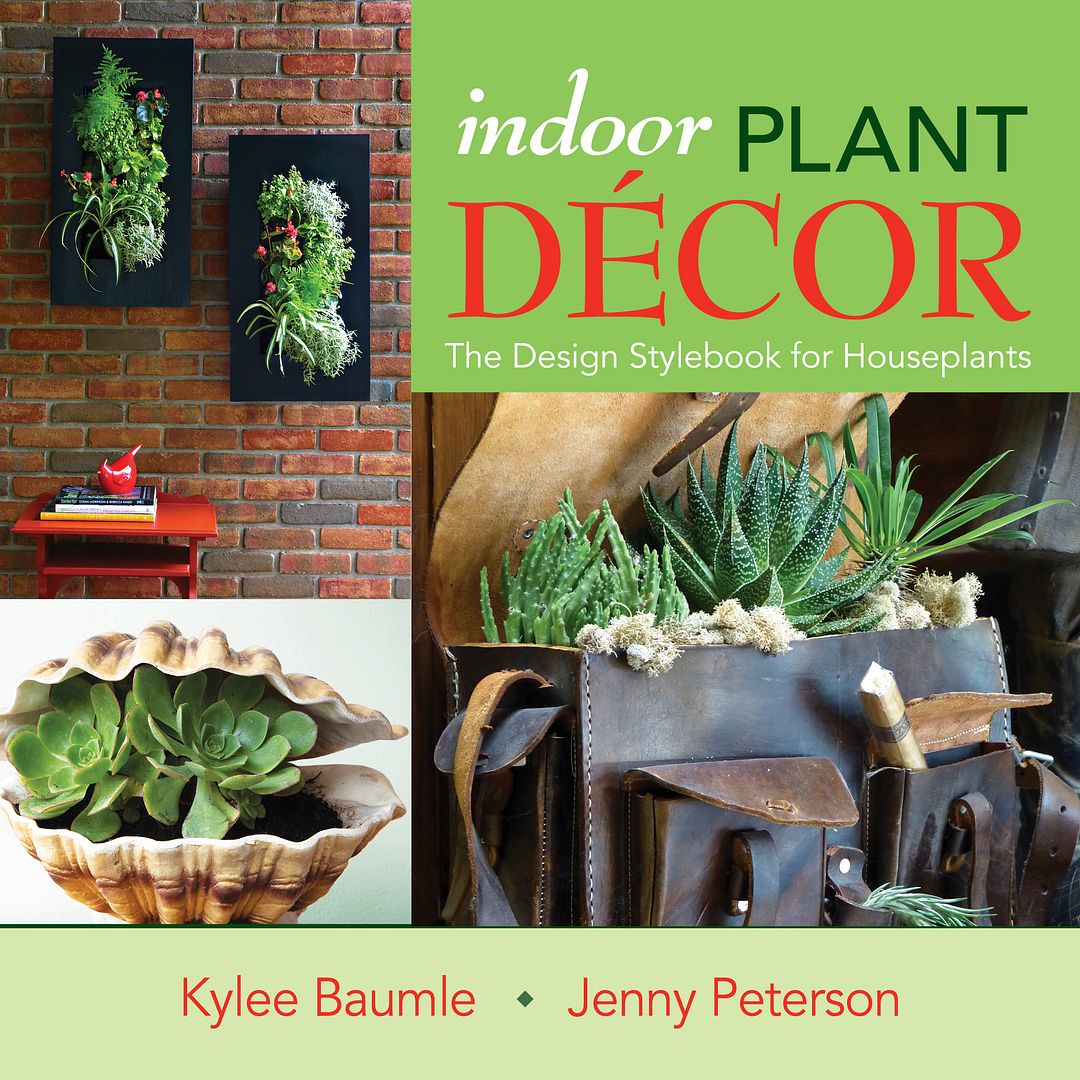
The "Indoor Plant Décor" Virtual Book Tour


This is a special week for co-writer Jenny Peterson and me.  Our new book - Indoor Plant Décor: The Design Stylebook for Houseplants - has been out and about for two weeks now and we've been busy with book signings and in Jenny's case, a TV appearance on Central Texas Gardener We had an interview this past week with The Saturday Evening Post and our book will be featured in their November/December issue!

Today, May 6th, is the beginning of our Virtual Book Tour. Eleven blogs will be featuring a review of Indoor Plant Décor and each one will be giving away a unique gardening item at the end of the tour on May 12th.

Following is a list of the participating blogs, with the item that they will be giving away:


Be sure to click the above links to see what they have to say about our book and grab a chance at winning a great gardening item!


Saturday, May 4, 2013

Tree Peony Suckers


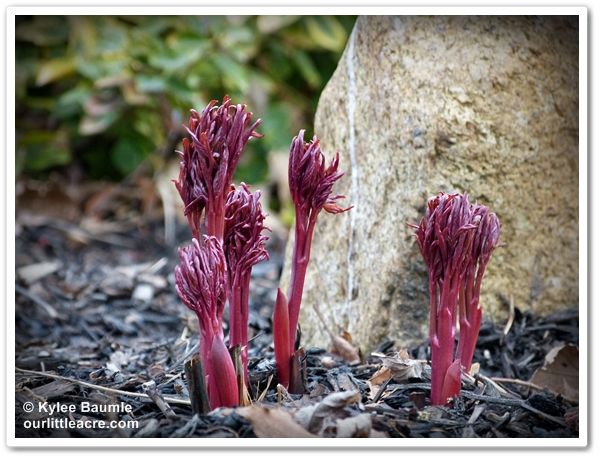
Just a few weeks ago, I was rejoicing that the herbaceous peonies (Paeonia lactiflora) were emerging and I remarked on Facebook that they resembled hands reaching to the sky.


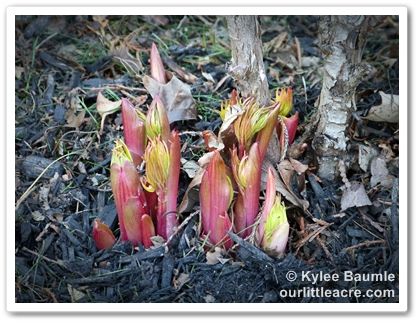
But when I saw this at the base of my tree peony, I wasn't happy at all:


Tree peonies (Paeonia suffruticosa) are generally grafted onto a P. lactiflora root and occasionally they'll try to grow from below the graft.  Since you probably paid good money for that tree peony, you don't want something sapping the strength from it and that's just what the herbaceous peony shoots will do.  Besides which, they'll bloom like an herbaceous peony, too.

So, what's a good peony mother to do?

Nip it.  Nip it in the bud.  Carefully cut the suckers off at the ground and keep them cut.  Later, in the fall, you can dig around the roots and see if the tree peony portion has formed its own roots.  If so, you can trim away the herbaceous roots to prevent suckering in the future. (Instructions for this can be found at peonies.org.)

I'm not sure that's entirely necessary though.  I feel more secure in just keeping the suckers trimmed away.  Can someone smarter than I am about these things comment here and let me know if this is an acceptable way of dealing with this issue, or whether I will eventually need to deal with the herbaceous roots in a more permanent fashion?

Tree peony (unknown cultivar)


Wednesday, May 1, 2013

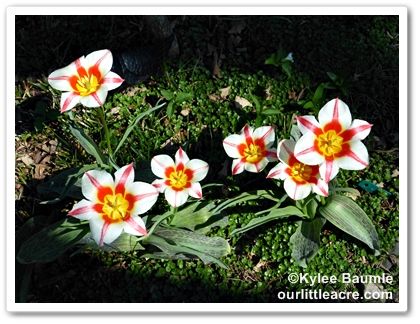
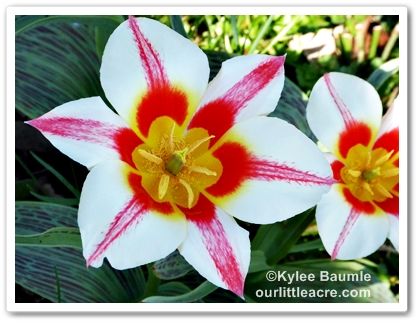
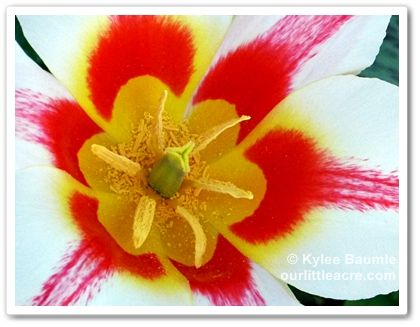
Wordless Wednesday: 'Coors'


Greigii tulip 'Coors'


blogger templates | Make Money Online