


Behind our honeysuckle trellis lies a narrow pathway between our property and our neighbors'. The pathway actually belongs to our neighbors, but it lies on our side of a row of tall shrubs and the former neighbors agreed to let us take care of this area, and the current ones agreed as well. It's where my native wildflowers grow in the spring and we use this area frequently when going from the front yard to the back.
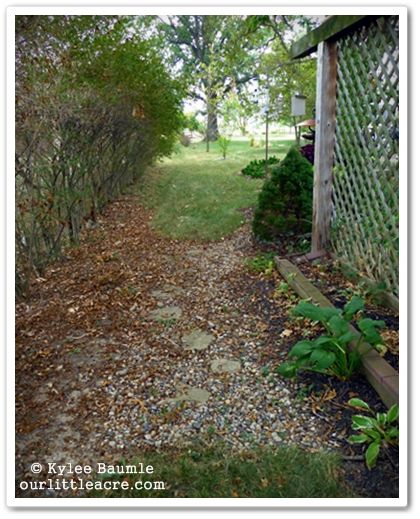
The problem here is one that we've had for some time, and I actually worked to fix it a few years ago, but the problem has returned, due to settling and compaction. What problem is that? Whenever we get a decent rain, water pools in this low area. Though this hasn't been much of a problem this summer because rain has been nearly non-existent, over the weekend we got over two inches - more than we'd gotten all summer prior to this. And I'm pretty hopeful that we'll get more rain someday.
I decided to modify my original fix of digging the path so that it was lowest in the middle, then filling it with stones and using flagstones to walk on. This time, I wanted to use a stepping stone that was more water permeable, allowing more space for water to have a place to go.
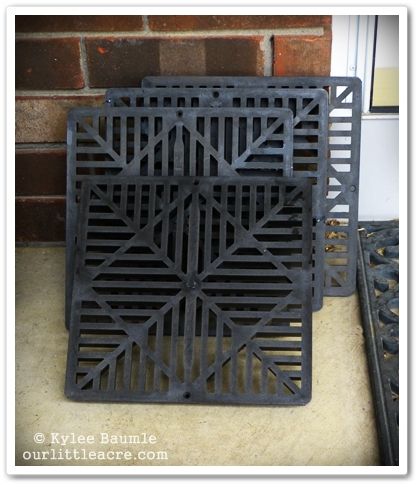
I asked my husband if he would help me out (and he usually does) by framing the grates with treated lumber. We had some decking we'd gotten at Lowe's that was left over from a previous project, so he cut those pieces to the proper size and made frames for the grates. A simple screw in each side of the completed frame then held the grate in place. I considered staining the wood, but decided to let nature give it some patina all its own over time.

I embedded the framed grates a little bit, leveled them, and straightened the stones around them. When I was buying materials for this project at Lowe's, I noticed they had hostas in quart-sized containers on sale for $1.99 each so I bought three of them and filled in the area you see to the left with 'Twilight'.
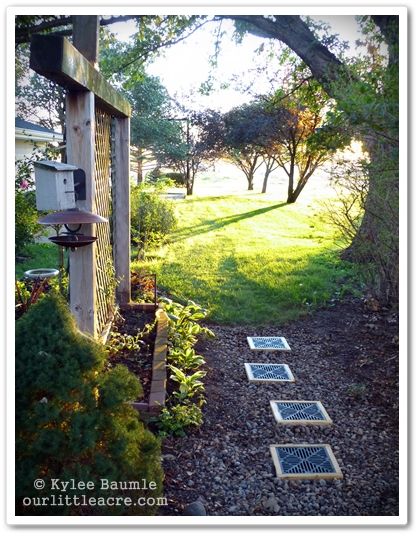
Once again, our standing water problem has been taken care of and I really like how the stepping stones look, as well as being functional.
For more problem solvers and DIY projects, check out the Lowe's Creative Ideas website!

As part of the Lowe's Creative Ideas Garden Club, I was provided with a Lowe's Gift Card to cover the cost of materials for my project.


 "Bejeweled"


4 comments:
It looks great! :-) We got a little of that rain too! We paid the price with a lot of tree damage to the area from the terrible storm that accompanied it, but we are so thankful for the rain!
What a neat idea. DIY drainage tiles. So creative!!
The stepping stones look fab - and even better that they're functional too! xx
Looks great Kylee! The drainage grates are a neat idea.
Post a Comment