Let's just get this out of the way right now: I am not a big fan of roses. But it hasn't always been that way. I've grown lots of them over the years and in the past, have staunchly defended them. I've grown hybrid teas, climbers, floribundas, miniatures, David Austins, Knock Outs®, and other types that I can't remember.
 |
| My pink mini. |
My first roses were miniatures. I'd won one at a dinner I attended and that little pink blooming machine performed beautifully for lots and lots of years. No disease, no real pests, just oodles of little pink blooms. It was my gateway drug to roses.
Then came hybrid teas and floribundas. 'Hot Cocoa' and 'Chihuly' were the rose stars of my garden. 'Disneyland' gave me gorgeous clusters of orangey-pink Kool-Aid® blooms. I reveled in the fragrance of my David Austin beauties. The uniqueness of a new Decorator Rose® wowed me.
I'd hear people wail about aphids and Japanese beetles. They'd curse black spot, powdery mildew, and fungus. They were losing roses to this or that. And while they were ranting away, I was wondering what was "wrong" with my roses, because I had none of these problems.
Until I did.
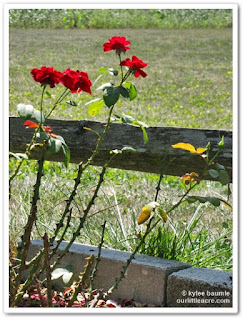 |
| Pitiful. |
It was like the universe was taunting me. I had bragged about the beauty and nobility of roses and poo-pooed the disrespect that roses are often the targets of. If I could grow disease-free and pest-free roses, anyone could, right? Ha.
I hung in there for a few years, taking advice from my rose-growing friends and seeking help by way of googling rose problems to death. One by one, my roses failed to live up to my expectations until one day last year, I'd had enough. One by one, I began taking them out. I couldn't stand to look at them anymore.
Now I didn't remove
all of them. And not all of them that I did remove ended up being destroyed. Those that still weren't affected by the aforementioned afflictions found new homes, or received a reprieve (for another year or two, anyway). But you'll only find a fraction of the number of roses that used to call Our Little Acre home.
Those that got to stay include 'Gourmet Popcorn' miniature rose, floribundas 'Ebb Tide', 'Hot Cocoa', 'Chihuly' and 'Disneyland', and 'Morning Magic' climber. But half of those will be disappearing by next year too. I may keep 'Morning Magic' just for its Japanese beetle attracting character. It's a master at it and I rarely see the beetles anywhere else.
Oh, I nearly forgot to mention my beloved wingthorn rose -
Rosa sericea var.
ptericantha - but that is in a class by itself. No pests, and it's been disease-free ever since I planted it in 2011. I hope it continues to behave, because I'd be
really sad to lose that one.
It's something special.
 |
| Aren't those thorns delicious? |
So there's my history of roses. When
Proven Winners® ColorChoice Flowering Shrubs told me they wanted to send me one of their new roses, I had to think twice about it. I read its description and decided to give it a shot. It was the color and the fragrance that were the tipping points. Fragrance! Imagine that! A rose that smelled like a rose...
I don't usually do a plant review until it's been in my garden for at least an entire season, meaning it's survived our often brutal winter. The plants usually arrive here in decent shape but there's often transplant shock and an adjustment period to our climate and soil to contend with. I'm not a gardening expert, I'm just an average backyard gardener, and sometimes my trial plants don't make it because of gardener error. Sometimes they thrive in spite of the gardener.
 |
| Rosa x At Last™ |
I received three
At Last™ roses at the end of June. They've been in the ground for just a month, but oh what a difficult month that has been. Very little rain and extremely hot temperatures have made it hard for even some of my well-established plants.
The roses arrived with one bloom and a few buds. The color - apricot - was just as lovely as the photos. They didn't pout at all once I had them in the ground and in fact, have been throwing out new buds and blooms ever since. And then there is that fragrance. They smell like...ROSES.
 |
| Rosa x At Last™ |
So far, the Japanese beetles have not found them. I don't have a huge beetle problem here, but they're around. It's too soon to say if they will be bothered by disease or other pests.
It's too soon to say much of anything about them. But for now, I'm loving these roses. I hope I can say the same thing next year and for many years after.
Read more about this new rose
here.
_________________
*I received these roses gratis from Proven Winners, with no request to say a single word about them. But I'm duly impressed (so far) and wanted to share my experience.


 "Bejeweled"


