
Monday, August 27, 2012

DIY: My Lowe's Creative Ideas Pallet Project


I can't believe it's been two weeks since my last blog post. I've been busy! I've been working my dental hygiene job, attended the Independent Garden Center Show in Chicago, and I finished another Lowe's Creative Ideas project! Let's talk about the latter.

This month's theme was "Address the Mess." Well, there's no shortage of messes around here. "A place for everything and everything in its place" is a nice thought, but I'm not sure I'll ever manage to do it. But Lowe's motivated me to organize at least one thing - some of my garden tools.

Our largest garden is on "the back 40" of Our Little Acre and there are times when I simply don't want to walk all the way up to the garage or even to the front of the storage building we have near the pool, to get the garden tool I need. Usually it's pruners, a trowel, or a pair of gloves. So here's my little solution to that problem.
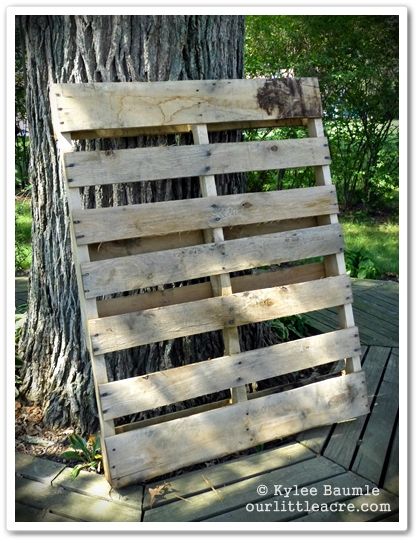

Pallets are hot. For years now, gardeners and other people have been making use of these free discards to create useful objects. Most gardeners plant them. I decided to use one to help me be more organized and keep certain gardening tools handy. I enlisted the help of my trusty assistant, Romie, because he's just so handy with power tools. Secretly, I think he likes playing with them, too. So I showed him what I wanted, and he obliged me.


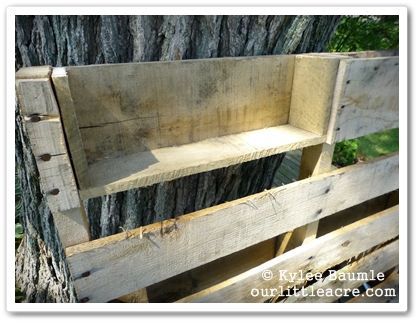
Step One was to make a little compartment at the top of the pallet. He cut the top front board on the pallet to make a door.
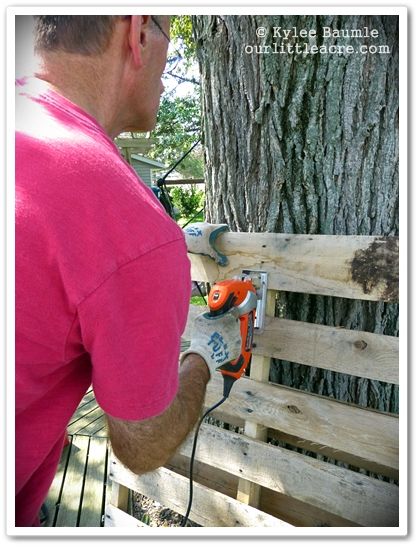


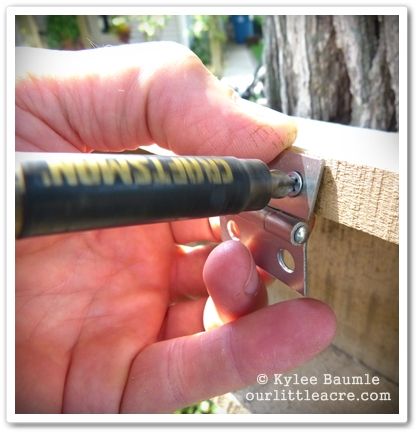
Then he cut pieces from another pallet to make a top and bottom for it. Hinges were attached, and I used magnetic closures to keep the door shut. A simple black knob on the door and that was complete. This was the hardest part of the entire project, but it wasn't really hard. Especially because Romie did it. 


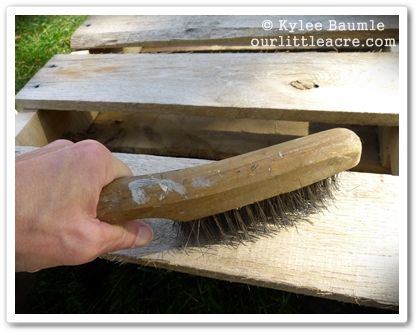
I brushed the entire pallet with a metal brush to remove dirt and loose splinters.

Next, I took white Kilz primer (we had some left over from a previous home project) and dry-brushed the pallet with it to give it a weathered whitewashed look. Once that was dry, we attached a plant pot strip that I bought several years ago, but hadn't used for awhile.


Then came the tool hangers that I chose from Lowe's large assortment.
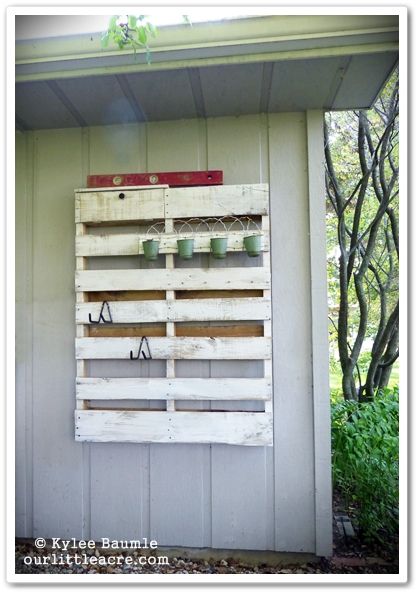


We hung it on the back of the building, on the east wall, using six wood screws. There's an eave that helps protect it from the rain, but there's also a large crab apple tree that will aid in keeping the rain from it, too. We rarely get a rain from the east anyway.

I planted the pots with petunias and begonias, and put my pruners and gloves in the compartment at the top. I think I'll stencil something on the blank space to the right of the compartment.
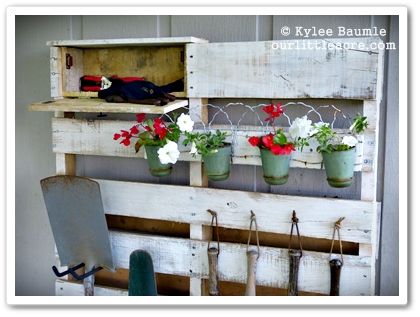


Voila!
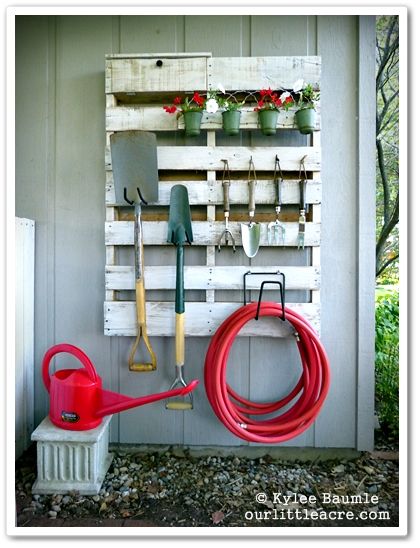


Visit Lowe's Creative Ideas for more garden inspiration and great DIY ideas!



_____________________
Thanks to Lowe's for providing the gift card for the materials I needed to complete this project. Also to Ethel Gloves, Corona Tools (pruners), Clarington Forge (spades), and Dramm (hose and watering can) for the other gardening products shown in this blog post.  Oh, and I must also thank Troy-Bilt for the pallet, upon which my tiller arrived. :-)

Monday, August 13, 2012

Let There Be Caterpillars


Just as I had been lamenting the lack of caterpillars in the garden - namely, the swallowtails and monarchs - my walk through the garden this morning showed me that they're there. I only found one of each, but I'm thankful for small favors.

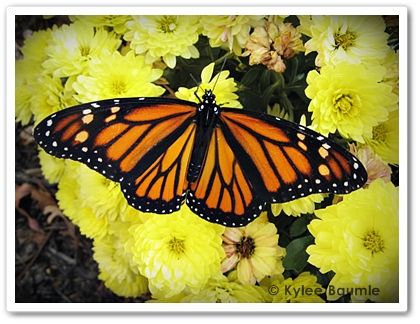
A female monarch butterfly on mums.
It's true though - there are far fewer monarchs than in years past and fewer swallowtails, too. Even though I grow just as many host plants for the caterpillars, they just aren't here. When you grow plants for a butterfly garden, many people think of brightly colored flowers of all types, because that's where you see the butterflies sipping nectar, right?

But if you truly want the butterflies coming and raising their young in your gardens, you need to grow the right kinds of plants for their babies. That can be very specific and in the case of the monarch, limited to just one genus.

The two caterpillars that I see in my gardens 98% of the time are those of the black swallowtail and the monarch, although I'm sure there are others that have managed to escape my detection. I get excited when I find them, because that tells me I'm doing something to help their populations increase by growing the right host plants.

So far, this is the only swallowtail caterpillar I've found in the garden.

The swallowtails love our dill, fennel and parsley. They seem to prefer the parsley as that's where I find more of them. Last summer, I had eleven at one time on a really small clump of parsley. This year, I've only found one so far.

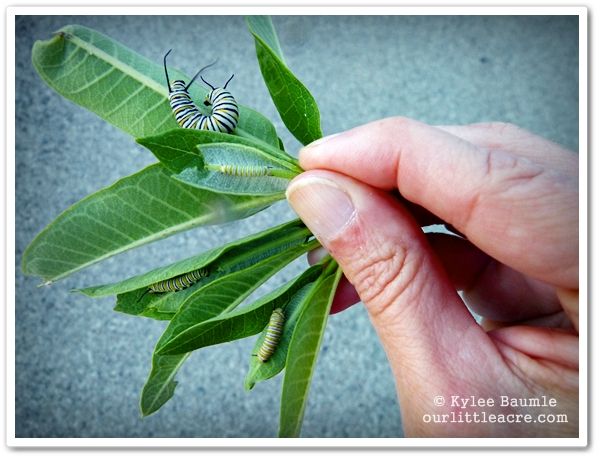
Saturday, Romie and I took a walk down our road and I felt compelled to check out the milkweed growing in the ditch. The first one I looked at had a teeny tiny monarch caterpillar. I plucked the leaf with it, so that I could relocate the caterpillar in my own garden. By the time we had reached the cemetery a quarter of a mile away, I'd collected six monarch caterpillars in various stages of development. They're now in my garden on the milkweed there.

Four of the six monarch caterpillars I found on milkweed in the ditch.

Monarch caterpillars eat ONLY plants in the Asclepias genus - in other words, milkweed. These are native to Ohio and there are several species here; swamp milkweed (A. incarnata), butterfly weed (A. tuberosa), and common milkweed (A. syriaca) are the ones most commonly found. I've got all of these growing in Max's Garden, as well as an annual type commonly known as tropical milkweed (Asclepias curassavica).

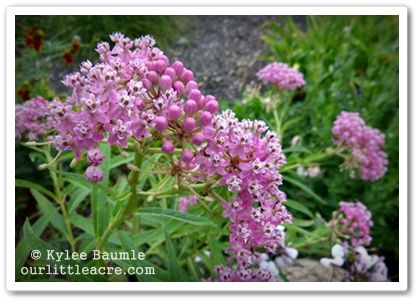
Swamp milkweed has beautiful rosy pink blooms and seem to be the milkweed
of choice for the monarchs in our garden.

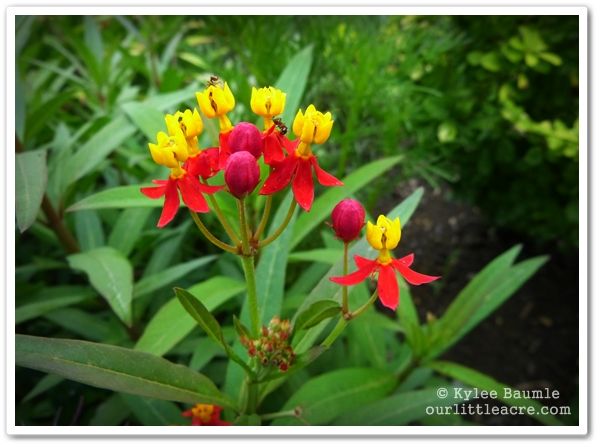
Tropical milkweed (an annual) has striking red and yellow blooms.

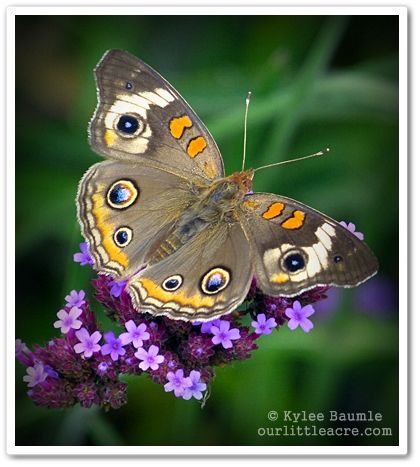
In August, the Buckeye butterfly (Junonia coenia) is present in great numbers and it's one of my favorite butterflies, due to its eye markings. Yesterday, they were just thick on the Verbena bonariensis. I counted 15 of them at one time!

The Buckeye butterflies love the Verbena bonariensis.

The Buckeye babies feed on plants in the snapdragon family (Antirrhinum), as well as toadflax (Linaria) and Gerardia, which are both native here.

For a list of butterflies and their caterpillar host plants, visit The Butterfly Site.

Monday, August 6, 2012

Pathway Becomes a Solution for Standing Water


As part of the Lowe's Creative Ideas Garden Club Team, our assignment last month was to solve a problem. I shared how we replaced a half-dead shrub with a very cool trellis design, but we had another problem area that needed to be taken care of.

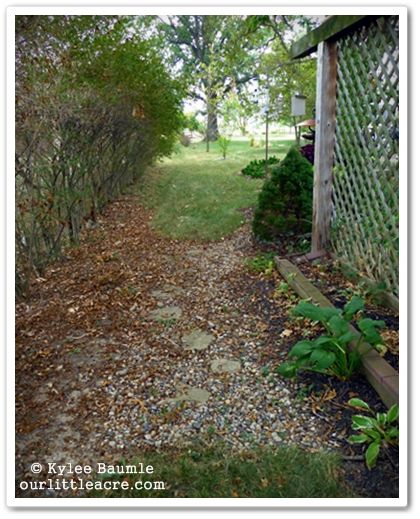
Behind our honeysuckle trellis lies a narrow pathway between our property and our neighbors'. The pathway actually belongs to our neighbors, but it lies on our side of a row of tall shrubs and the former neighbors agreed to let us take care of this area, and the current ones agreed as well. It's where my native wildflowers grow in the spring and we use this area frequently when going from the front yard to the back.


The problem here is one that we've had for some time, and I actually worked to fix it a few years ago, but the problem has returned, due to settling and compaction. What problem is that? Whenever we get a decent rain, water pools in this low area. Though this hasn't been much of a problem this summer because rain has been nearly non-existent, over the weekend we got over two inches - more than we'd gotten all summer prior to this. And I'm pretty hopeful that we'll get more rain someday.

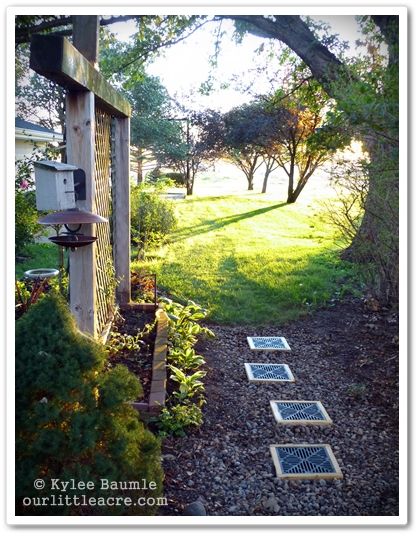
I decided to modify my original fix of digging the path so that it was lowest in the middle, then filling it with stones and using flagstones to walk on. This time, I wanted to use a stepping stone that was more water  permeable, allowing more space for water to have a place to go.

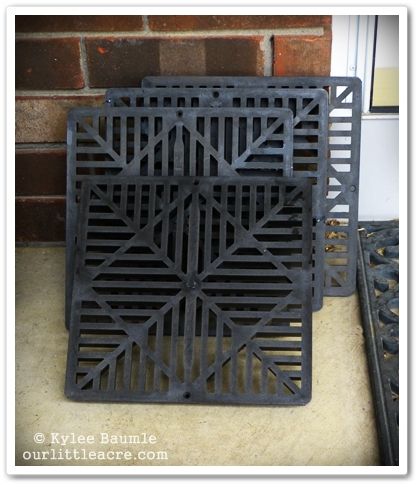
After removing the original flagstones, I regraded the existing stones in preparation for the new stepping stones. For these, I used 12" square grates that are made of polyolefin with UV inhibitors that help them to withstand the elements and are normally used as drainage grates in garage floors. They're heavy duty and can withstand foot traffic. They're also rather pricey at $21.37 each, but they'll likely last as long as I need them to.

I asked my husband if he would help me out (and he usually does) by framing the grates with treated lumber. We had some decking we'd gotten at Lowe's that was left over from a previous project, so he cut those pieces to the proper size and made frames for the grates. A simple screw in each side of the completed frame then held the grate in place. I considered staining the wood, but decided to let nature give it some patina all its own over time.


I embedded the framed grates a little bit, leveled them, and straightened the stones around them. When I was buying materials for this project at Lowe's, I noticed they had hostas in quart-sized containers on sale for $1.99 each so I bought three of them and filled in the area you see to the left with 'Twilight'.


Once again, our standing water problem has been taken care of and I really like how the stepping stones look, as well as being functional.

For more problem solvers and DIY projects, check out the Lowe's Creative Ideas website!


As part of the Lowe's Creative Ideas Garden Club, I was provided with a Lowe's Gift Card to cover the cost of materials for my project.


blogger templates | Make Money Online